Home >Software Tutorial >Office Software >Excel print area automatic adjustment setting method
Excel print area automatic adjustment setting method
- WBOYWBOYWBOYWBOYWBOYWBOYWBOYWBOYWBOYWBOYWBOYWBOYWBforward
- 2024-03-30 18:41:131090browse
php editor Zimo will introduce the automatic adjustment setting method of Excel printing area in this article. Adjusting the print area can ensure that printed documents are neater and more beautiful. This article will explain in detail how to automatically adjust the printing area in Excel through simple operations, allowing users to quickly complete printing preparations. Through the guidance of this article, users can easily master this technique, improve work efficiency, and reduce tedious steps.
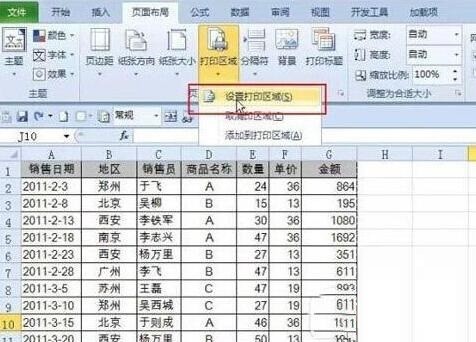
1. Select area - Page layout - Set printing area.

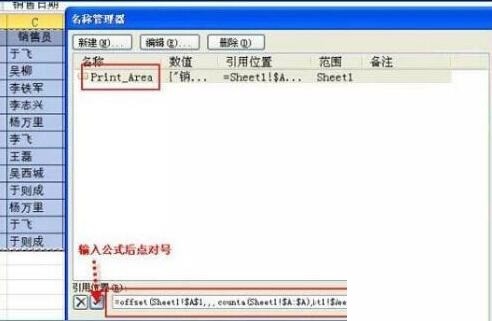
2. Formula - Name Manager, select print_area for printing, and enter the following formula in the text box below:
=OFFSET(Sheet1!$A$1,,, COUNTA(Sheet1!$A:$A),COUNTA(Sheet1!$1:$1))

Formula introduction:
COUNTA(Sheet1!$A:$A ): Count how many rows there are
COUNTA(Sheet1!$1:$1): Count how many columns there are
OFFSET(Sheet1!$A$1,,,number of rows,number of columns): Take A1 Generate a dynamic area for the vertices based on the number of rows and columns
After adding a new column or row, the printing area will also automatically resize (note the change of the dotted line)
The above is the detailed content of Excel print area automatic adjustment setting method. For more information, please follow other related articles on the PHP Chinese website!

