
Home >Software Tutorial >Office Software >How to 'limit the editing area' in an Excel table?
How to 'limit the editing area' in an Excel table?

- WBOYWBOYWBOYWBOYWBOYWBOYWBOYWBOYWBOYWBOYWBOYWBOYWBforward
- 2024-02-18 14:54:071437browse
php Xiaobian Xigua will introduce to you how to set the "restricted editing area" in the Excel table. By setting the worksheet protection function, you can selectively allow users to edit specific areas while limiting editing permissions in other areas. This can effectively protect the data integrity of the form and prevent misoperation. Next, we will explain in detail how to set it up so that you can better manage editing permissions in Excel tables.
Excel "Restrict Editing Area" has two setting methods according to different needs. Let's take a look at the specific operations below.
Setting method one:
If you want to restrict the non-editable area to a small amount, for example, only restrict the "Quantity" column in the chart from being editable, other areas can be edited, you can use this method.

Setup steps:
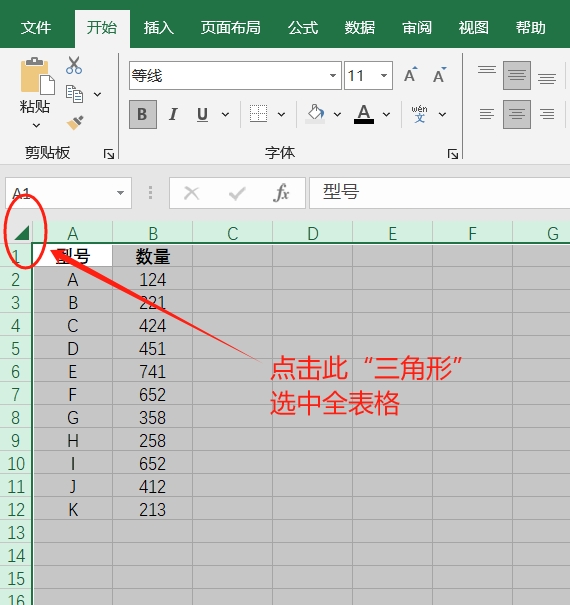
1. After opening Excel, click the "triangle" icon in the upper left corner of the table to select the entire table. You can also use the shortcut key "Ctrl A" to select it.
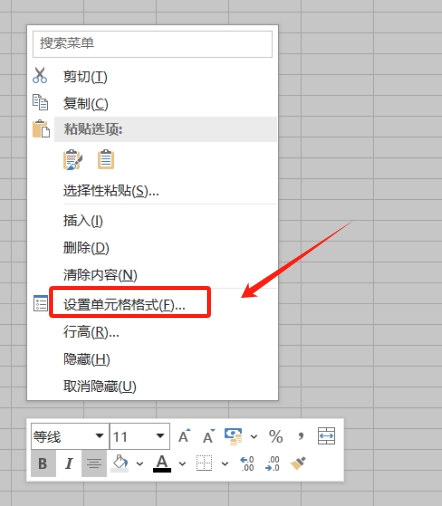
2. After selecting the entire table, right-click the mouse and select the [Format Cells] option.
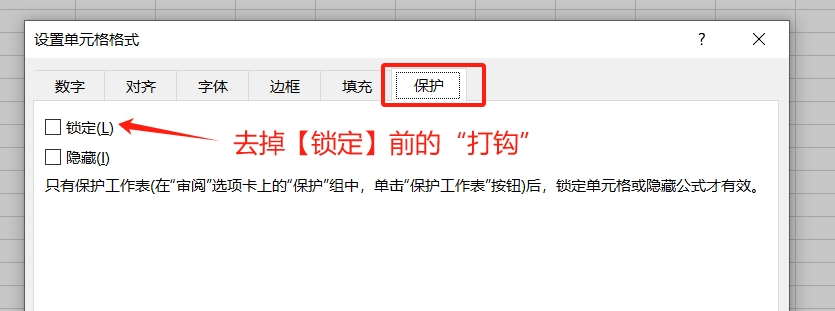
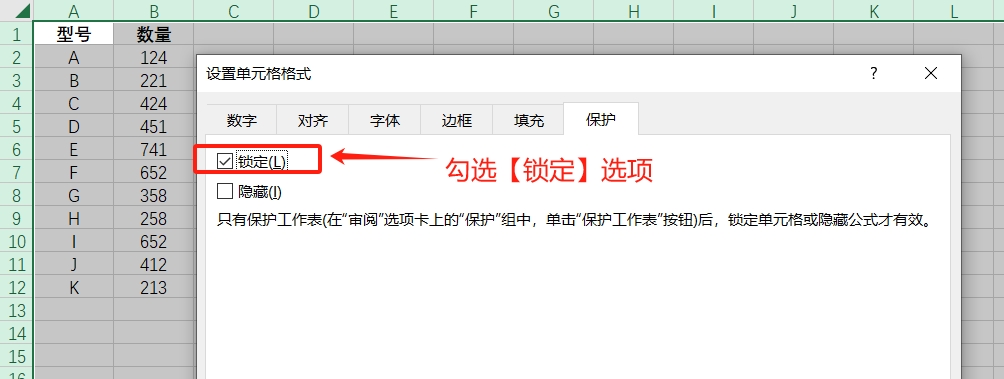
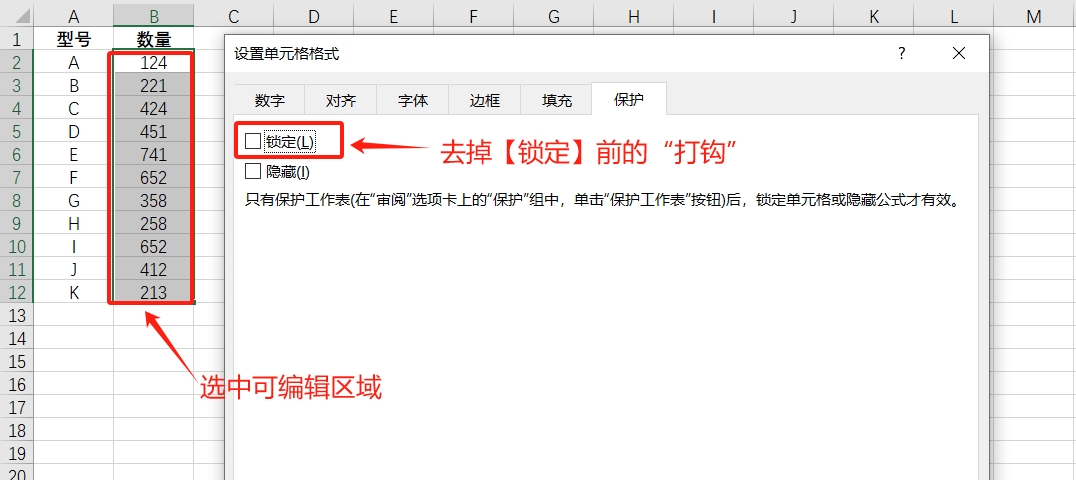
3. When the [Format Cells] dialog box pops up, select the [Protect] option, then remove the "√" in front of [Lock], and then click [OK].
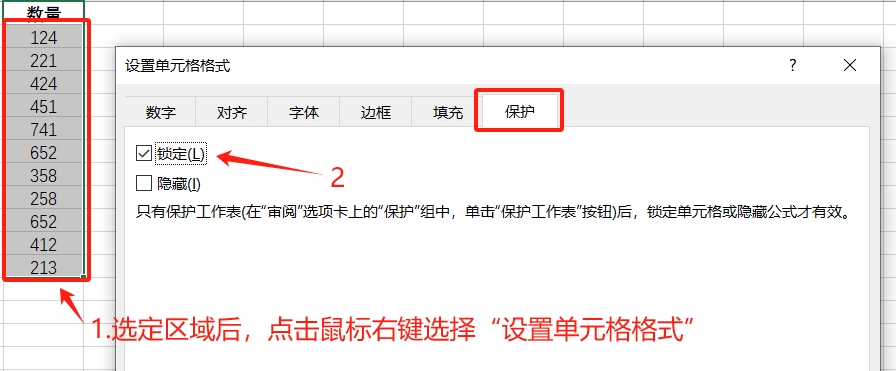
4. Return to the table, select the area that needs to be locked for editing, then right-click the mouse and select [Format Cells]. When the dialog box pops up, select the [Protect] option, check the [Lock] option, and then click 【Sure】.
5. Click [Protect Worksheet] in the [Review] list of the menu tab.
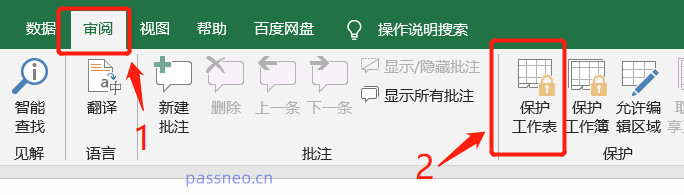
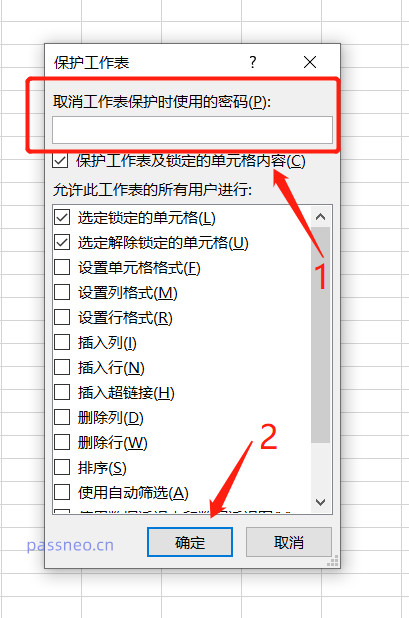
6. After the dialog box pops up, check [Protect worksheet and locked cell contents], then enter the password you want to set in the password field, click [OK] and enter it again, the "Restrict editing" of the Excel table Area" is set.
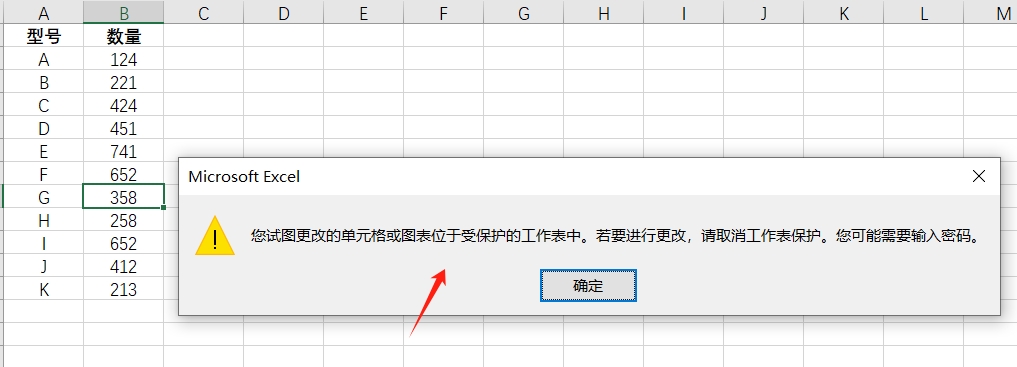
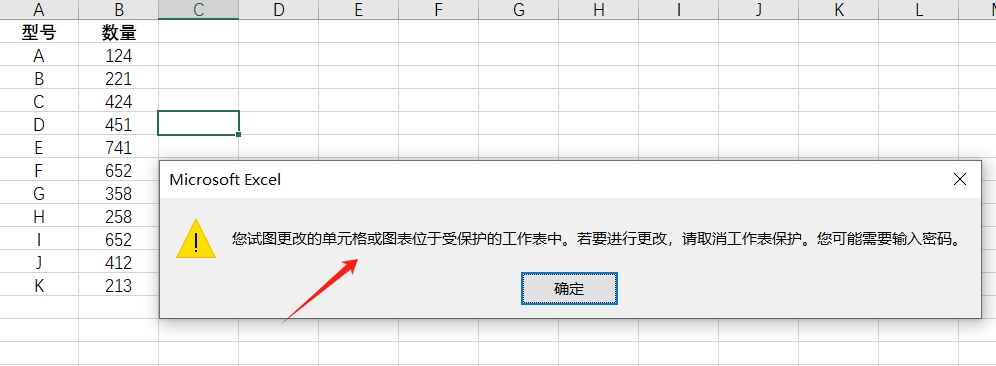
After setting it up, you can see that if you want to edit the "Quantity" column data, a prompt will pop up that the cell is protected and requires a password to change. Other areas can be edited freely.
Setting method two:
If you want to restrict more non-editable areas, take the following picture as an example. If you want the "Quantity" column to be editable, other areas cannot be edited, that is, the requirements for "Method 1" are the same. On the contrary, you can use "Method 2".
Setup steps:
1. The previous steps are the same. After selecting the entire table, click the right mouse button [Format Cells]. When the dialog box pops up, this time you need to check the [Lock] option, and then click [OK].
2. Return to the cell, select the area you want to edit with the mouse, then right-click the mouse and select [Format Cells]. After the dialog box pops up, this time remove the "tick" in front of [Lock], and then click 【Sure】.
3. The following steps are the same as "Method 1". Click [Protect Worksheet] in the [Review] list of the menu tab, then enter the password you want to set in the pop-up dialog box, and click [OK] Enter it again, and the "restricted editing area" of the Excel table will be set.
As you can see, except for the "Quantity" column of the selected area, which can be edited and changed, other areas cannot be changed and require a password.
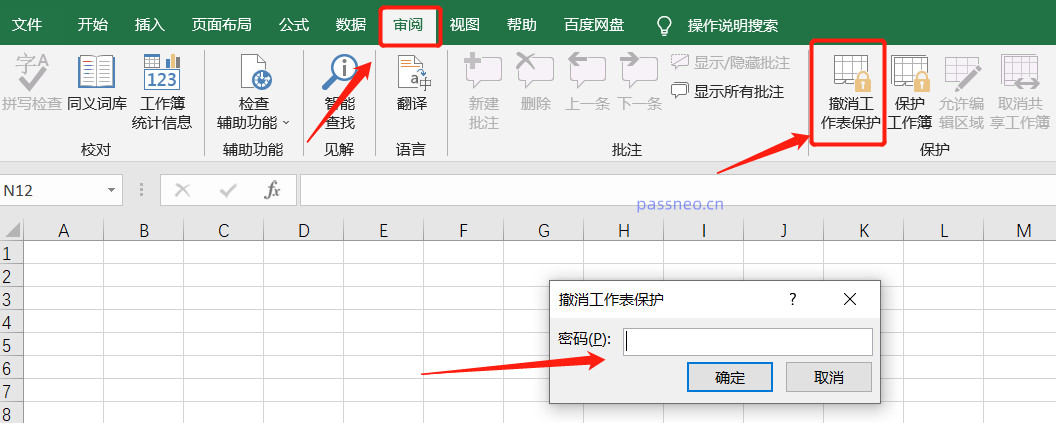
Оба вышеуказанных двух метода защиты можно отменить. Метод один и тот же. Вам нужно только нажать [Отменить защиту листа] в списке [Просмотр] вкладки меню, а затем в всплывающее диалоговое окно. После ввода первоначально установленного пароля и нажатия кнопки [ОК] «Ограниченная область редактирования» Excel будет отменена.
Как видно из приведенных выше операций, для отмены защиты Excel необходимо ввести изначально установленный пароль, поэтому обязательно запомните или сохраните пароль.
Если вы случайно забыли свой пароль, вам нужно использовать другие инструменты для решения проблемы.
The above is the detailed content of How to 'limit the editing area' in an Excel table?. For more information, please follow other related articles on the PHP Chinese website!