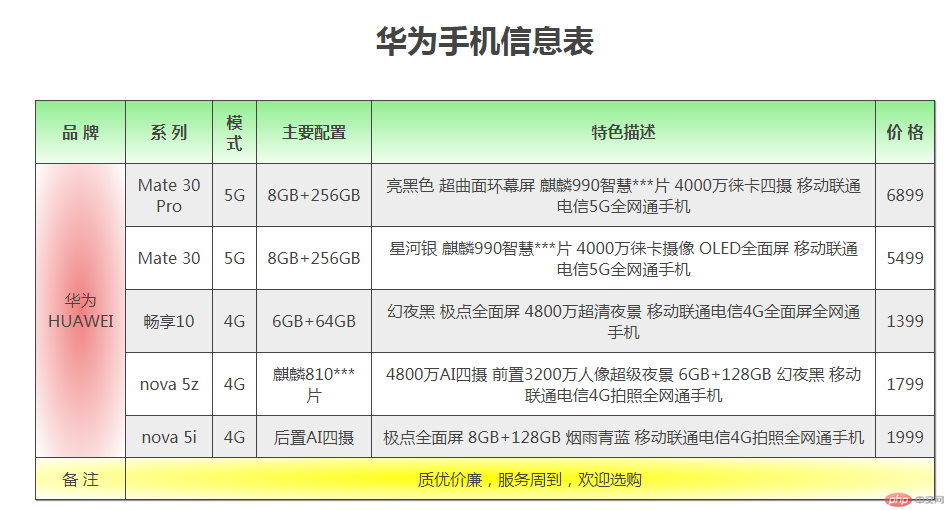
一、制作一个表格
要求:用到行与列的合并
HTML代码如下:
<!DOCTYPE html><html lang="en"><head><meta charset="UTF-8"><title>商品信息表</title><link rel="stylesheet" href="static/css/table.css"></head><body><div><table class="table"><!--表格标题--><caption><h2>华为手机信息表</h2></caption><!--表头--><thead><tr><th>品 牌</th><th>系 列</th><th>模 式</th><th>主要配置</th><th>特色描述</th><th>价 格</th></tr></thead><!--表格主体--><tbody><tr><td rowspan="5">华为HUAWEI</td><td>Mate 30 Pro</td><td>5G</td><td>8GB+256GB</td><td>亮黑色 超曲面环幕屏 麒麟990智慧***片 4000万徕卡四摄 移动联通电信5G全网通手机</td><td>6899</td></tr><tr><td>Mate 30</td><td>5G</td><td>8GB+256GB</td><td>星河银 麒麟990智慧***片 4000万徕卡摄像 OLED全面屏 移动联通电信5G全网通手机</td><td>5499</td></tr><tr><td>畅享10</td><td>4G</td><td>6GB+64GB</td><td>幻夜黑 极点全面屏 4800万超清夜景 移动联通电信4G全面屏全网通手机</td><td>1399</td></tr><tr><td>nova 5z</td><td>4G</td><td>麒麟810***片</td><td>4800万AI四摄 前置3200万人像超级夜景 6GB+128GB 幻夜黑 移动联通电信4G拍照全网通手机</td><td>1799</td></tr><tr><td>nova 5i</td><td>4G</td><td>后置AI四摄</td><td>极点全面屏 8GB+128GB 烟雨青蓝 移动联通电信4G拍照全网通手机</td><td>1999</td></tr></tbody><!--表格底部--><tfoot><tr><td>备 注</td><td colspan="5">质优价廉,服务周到,欢迎选购</td><!--<td></td><td></td><td></td>--></tr></tfoot></table></div></body></html>
CSS代码如下:
/*给表格添加上表格框*/table {/*因为单元格也要设置边框,并且会用到边框折叠,所以表格外框可选*/border: 1px solid #444444;color: #444;/*设置盒子大小不受影响*/box-sizing: border-box;/*设置边线阴影*//*阴影四个属性:1、水平方向 2、垂直方向 3、扩散大小 4、颜色*/box-shadow: 1px 1px 1px #999;/*将表格中所有的边框线进行折叠*/border-collapse: collapse;}/*给每一个单元格也加上边框, 单元格包括td,th*/th, td {border: 1px solid #444444;}/*设置表格的宽度与文字排版*/table {width: 900px;margin: 20px auto;}/*设置表格的标题*/table caption {font-size: 1.3rem;margin-bottom: 15px;}/*设置单元格的样式*/th, td {text-align: center;padding: 10px;}/*在奇数行上实现隔行变色效果*/tbody tr:nth-of-type(2n+1) {background-color: #ededed;}/*设置表头样式:背景色线性渐变*/table thead > tr:first-of-type {background: linear-gradient(lightgreen, honeydew);}/*设置底部样式:背景色径向渐变*/table tfoot > tr:last-of-type {background: radial-gradient(yellow, white);}/*给***单元素格添加小麦色背景*/table tbody > tr:first-of-type > td:first-of-type {background: radial-gradient(lightcoral, white);}
运行结果如下图:
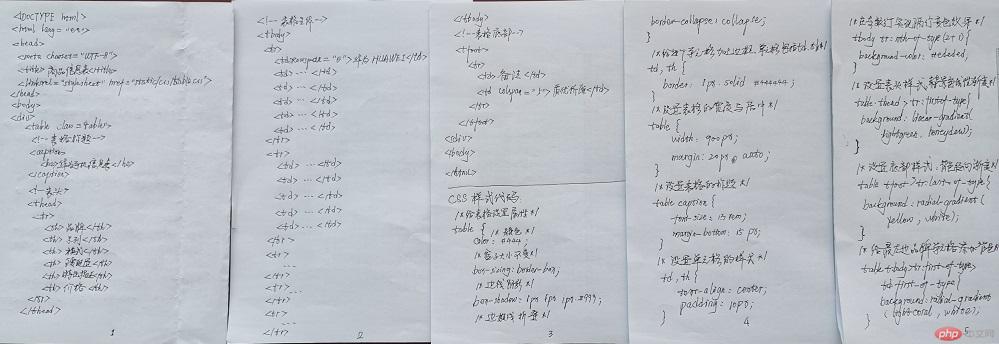
手抄代码如下:
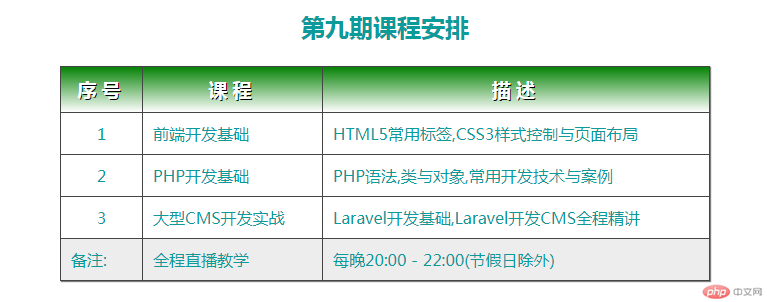
二、使用<div><span><p><ul>…等标签来制作一张课程表
HTML代码如下
<!DOCTYPE html><html lang="en"><head><meta charset="UTF-8"><title>用div等标签创建表格</title><link rel="stylesheet" href="static/css/table2.css"></head><body><div class="table"><p class="caption">第九期课程安排</p><div class="thead"><ul><li>序号</li><li>课程</li><li>描述</li></ul></div><div class="tbody"><ul><li>1</li><li>前端开发基础</li><li>HTML5常用标签,CSS3样式控制与页面布局</li></ul><ul><li>2</li><li>PHP开发基础</li><li>PHP语法,类与对象,常用开发技术与案例</li></ul><ul><li>3</li><li>大型CMS开发实战</li><li>Laravel开发基础,Laravel开发CMS全程精讲</li></ul></div><div class="tfoot"><ul><li>备注:</li><li>全程直播教学</li><li><span>每晚20:00 - 22:00(节假日除外)</span></li></ul></div></div></body></html>
CSS样式代码如下:
.table {display: table;box-sizing: border-box;border: 1px solid #444444;box-shadow: 1px 1px 1px grey;border-collapse: collapse;width: 650px;margin: 20px auto;color: #0C9A9A;}.caption {/*以caption样式标签显示*/display: table-caption;text-align: center;font-size: 1.5rem;font-weight: bold;}.thead {/*以thead样式显示*/display: table-header-group;text-align: center;font-size: 1.2rem;font-weight: bold;letter-spacing: 5px;color: white;text-shadow: 1px 1px 0 black;background: linear-gradient(green,white);}.tbody {display: table-row-group;}/*将第一列文本居中对齐显示*/.tbody >ul >li:first-of-type {text-align: center;}.tfoot {display: table-footer-group;background-color: #ededed;}/*将所有的<ul>转为<tr>标签样式*/div > ul {display: table-row;}/*将所有的<li>转为<td>标签样式*/div > ul > li {display: table-cell;border: 1px solid #444;padding: 10px;}
运行结果如下图:
手抄代码如下:

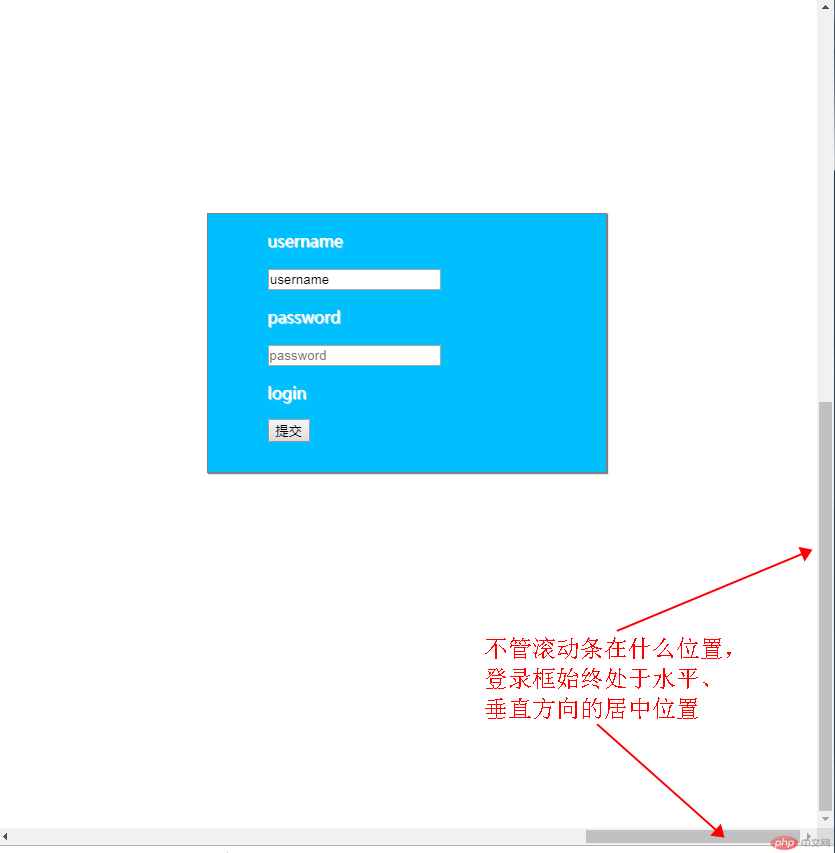
三、 使用绝对定位,实现用户登录框在页面中始终居中显示
HTML代码如下
<!DOCTYPE html><html lang="en"><head><meta charset="UTF-8"><title>centerlongin</title><link rel="stylesheet" href="static/css/centerlogin.css"></head><body><div><form action=""><span><p>username</p><input type="text" id="user" name="user" value="username"></span><span><p>password</p><input type="password" id="password" name="password" placeholder="password"></span><span><p>login</p><input type="submit" id="login" name="login"></span></form></div></body></html>
CSS代码如下:
body {height: 1600px;width: 3000px;}div {width: 400px;height: 260px;background-color: deepskyblue;border: 1px solid grey;color: white;text-shadow: 1px 1px 1px beige;box-shadow: 1px 1px 1px grey;box-sizing: border-box;padding-left: 60px;position: fixed;left: 50%;top: 50%;margin-top: -200px;margin-left: -200px;}
运行结果如下图:
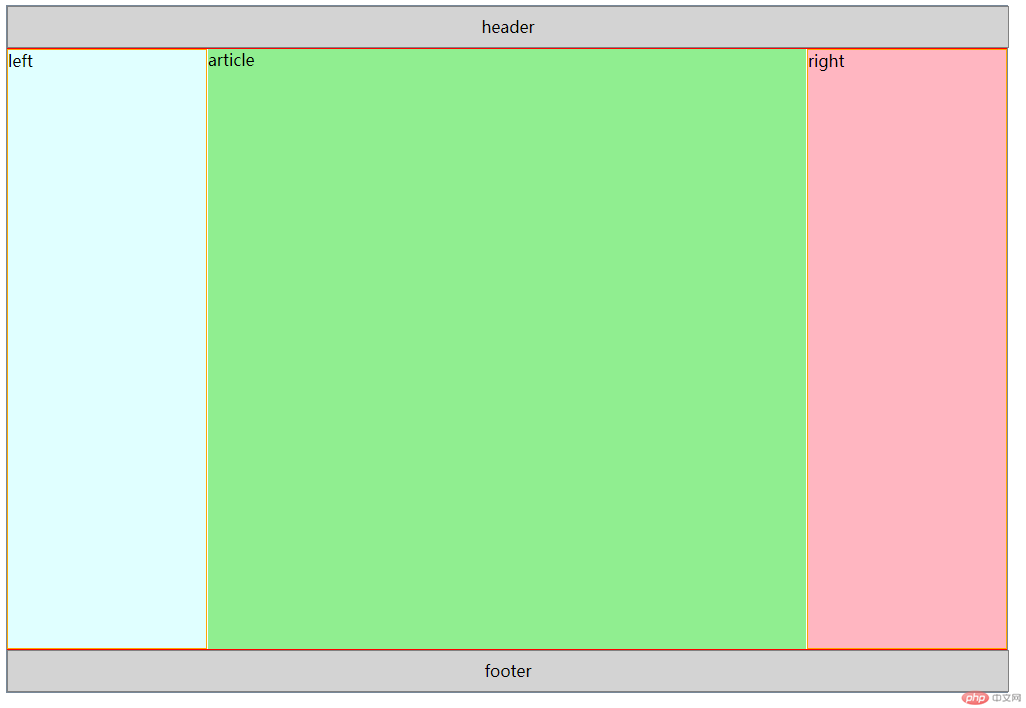
四、模仿课堂案例, 实现圣杯布局,并写出完整流程与布局思路
HTML代码如下:
<!DOCTYPE html><html lang="en"><head><meta charset="UTF-8"><title>saintcup</title><link rel="stylesheet" href="static/css/saintcup.css"></head><body><header>header</header><main><article>article</article><aside>left</aside><aside>right</aside></main><footer>footer</footer></body></html>
CSS代码如下:
body {width: 1000px;border: 1px solid lightslategrey;position: absolute;}header,footer {height: 40px;width: 100%;border: 1px solid grey;background-color: lightgray;text-align: center;line-height: 40px;}main {box-sizing: border-box;border: 1px solid red;padding-left: 200px;padding-right: 200px;}main > article {width: 100%;min-height: 600px;background-color: lightgreen;box-sizing: border-box;}main > aside {width: 200px;min-height: 600px;border: 1px solid orange;box-sizing: border-box;}main > aside:first-of-type {background-color: lightcyan;position: absolute;top: 43px;left: 0;}main > aside:last-of-type {background-color: lightpink;position: absolute;top: 43px;right: 0;}
运行结果如下图:
