属性、群组、兄弟、相邻、伪类选择器的使用规则及应用场景内边距(padding)、外边距(margin)的使用规则及场景
属性选择器
下面的例子为 id="bg-red" 的所有元素设置样式:
[id=bg-red]{
border:5px solid blue;
}
可以为拥有指定属性的 HTML 元素设置样式,而不***于 class 和 id 属性。
群组选择器
body, h2, p, table, th, td, pre, strong, em {color:gray;}
通过群组,创作者可以将某些类型的样式“压缩”在一起,这样就可以得到更简洁的样式表。
相邻、兄弟选择器
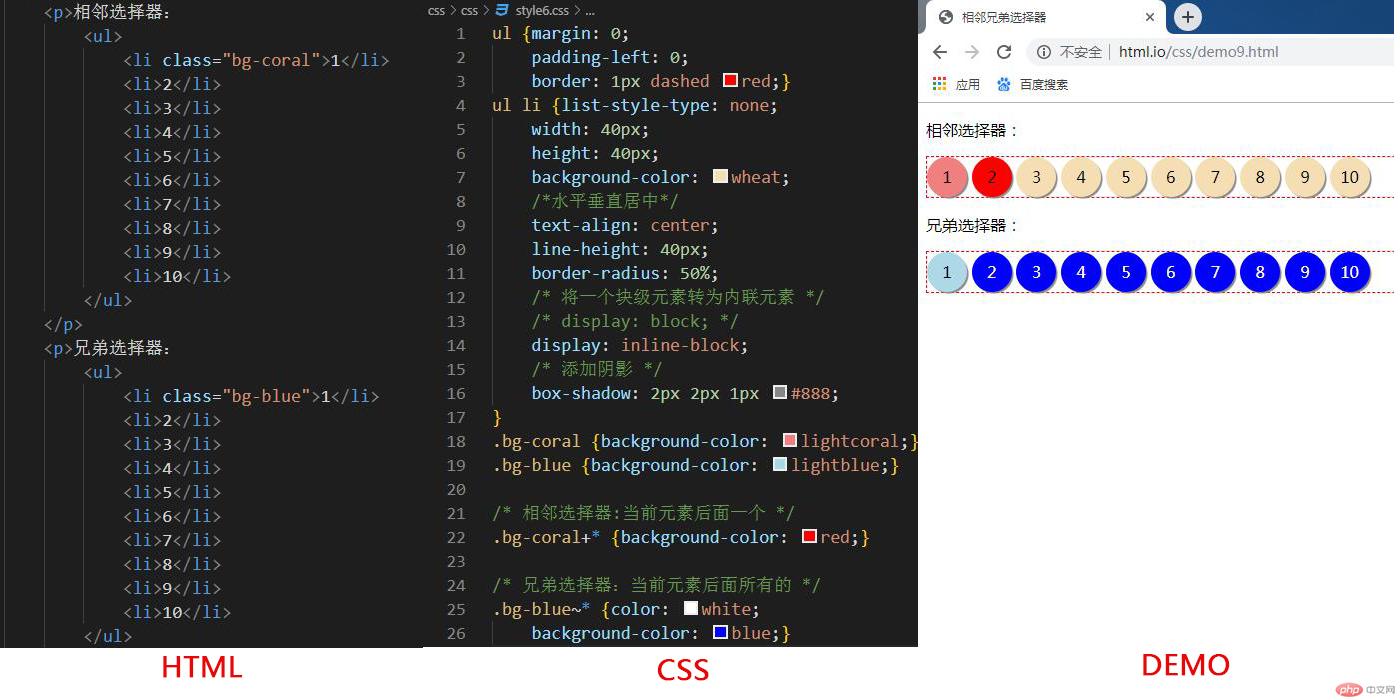
相邻选择器(当前元素后的一个元素)
#bg-blue+* { background-color: yellow;}
兄弟选择器(当前元素后的所有元素)
#bg-blue~* { background-color: yellow;}
伪类选择器
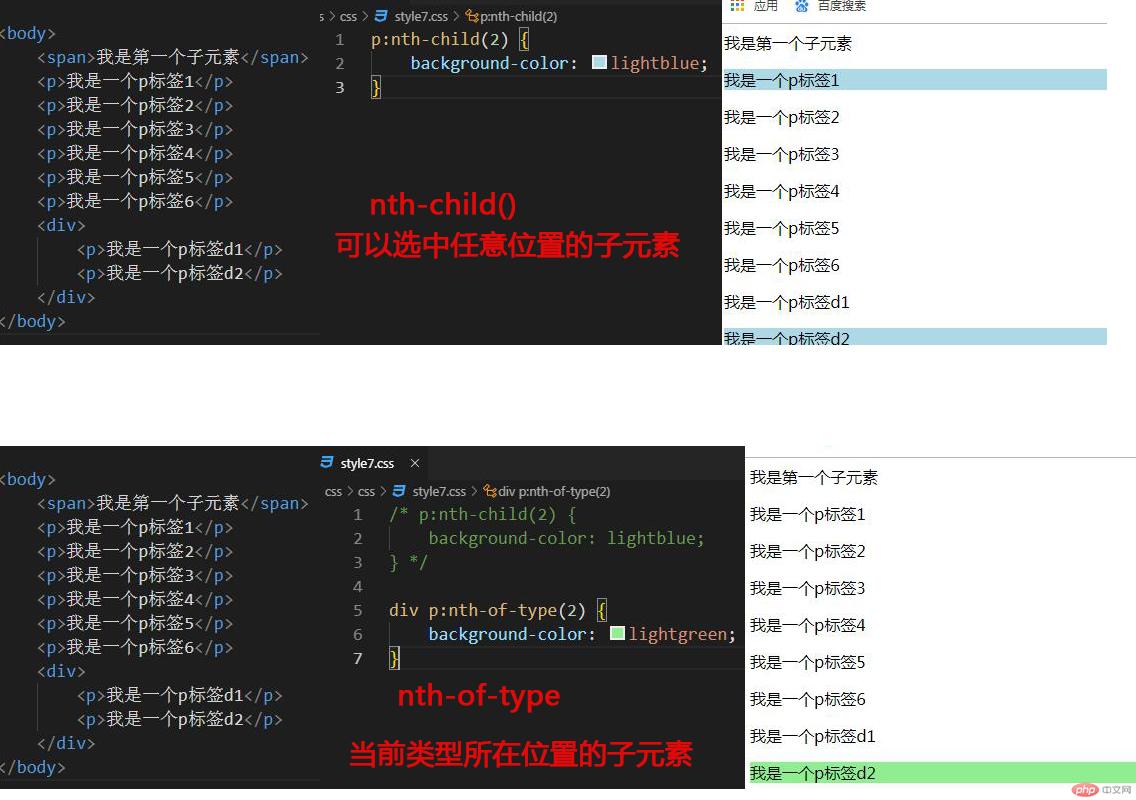
伪类-子元素选择器:
:first-child、:last-child、:nth-child()、:nth-last-child()
伪类-类型选择器
:first-of-type、:last-of-type、:nth-of-type()
伪类选择方法: 关注点不同,如果关注位置用 :nth-child(),即关注位置又关注类型用 :nth-of-type()
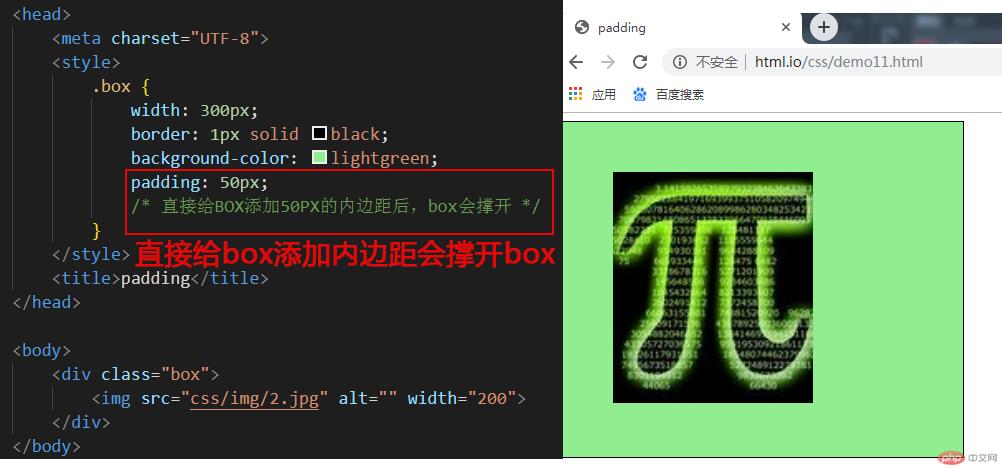
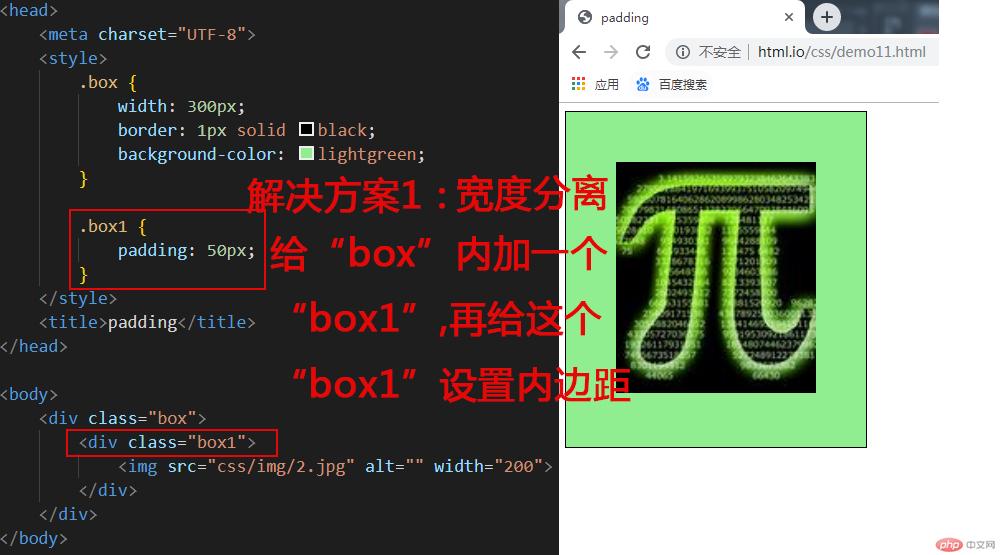
内边距 padding
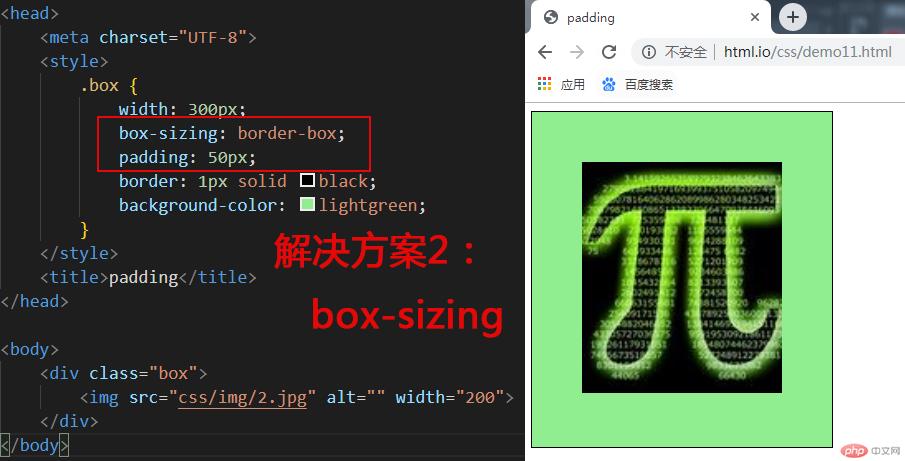
实例
<!DOCTYPE html>
<html lang="en">
<head>
    <meta charset="UTF-8">
    <!-- <link rel="stylesheet" href="css/style3.css"> -->
    <style>
        .box1 {
            width: 300px;
            border: 1px solid black;
            background-color: lightgreen;
        }
        .box1 {
            padding: 50px;
            /* width: 200px; */
        }
        /* 宽度分离 */
        .warp {
            width: 300px;
        }
        .box2 {
            padding: 50px;
            background-color: lightblue;
            border: 1px solid black;
        }
        /* box-sizing */
        .box3 {
            width: 300px;
            box-sizing: border-box;
            padding: 50px;
            background-color: pink;
            border: 1px solid black;
        }
    </style>
    <title>padding</title>
</head>

<body>
    <!-- 将图片显示在容器在中间 -->
    <div class="box1">
        <img src="https://img.php.cn/upload/avatar/000/301/984/5d67445d14d55129.jpg" alt="" width="200">
    </div>
    <!-- 宽度分离 -->
    <div class="warp">
        <div class="box2">
            <img src="https://img.php.cn/upload/avatar/000/301/984/5d67445d14d55129.jpg" alt="" width="200">
        </div>
    </div>
    <!-- box-sizing -->
    <div class="box3">
        <img src="https://img.php.cn/upload/avatar/000/301/984/5d67445d14d55129.jpg" alt="" width="200">
    </div>
</body>
</html>
运行实例 »
点击 "运行实例" 按钮查看在线实例
外边距 margin
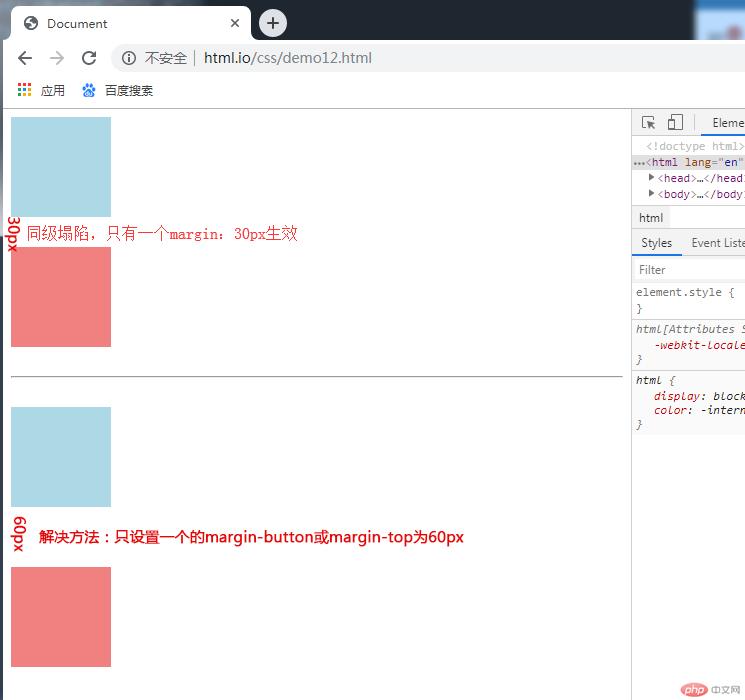
同级塌陷及解决方法
实例
<!DOCTYPE html>
<html lang="en">
<head>
    <meta charset="UTF-8">
    <style>
        .box1 {
            width: 100px;
            height: 100px;
            background-color: lightblue;
            margin-bottom: 30px;
        }
        .box2 {
            width: 100px;
            height: 100px;
            background-color: lightcoral;
            margin-top: 30px;
        }
        .box3 {
            width: 100px;
            height: 100px;
            background-color: lightblue;
            margin-bottom: 60px;
        }
        .box4 {
            width: 100px;
            height: 100px;
            background-color: lightcoral;
            /* margin-top: 60px; */
        }
    </style>
    <title>Document</title>
</head>
<body>
    <!-- 同级塌陷 -->
    <div class="box1">
    </div>
    <div class="box2">
    </div>
    <br>
    <hr>
    <br>
    <!-- 解决方案 -->
    <div class="box3">
    </div>
    <div class="box4">
    </div>
</body>
</html>
运行实例 »
点击 "运行实例" 按钮查看在线实例
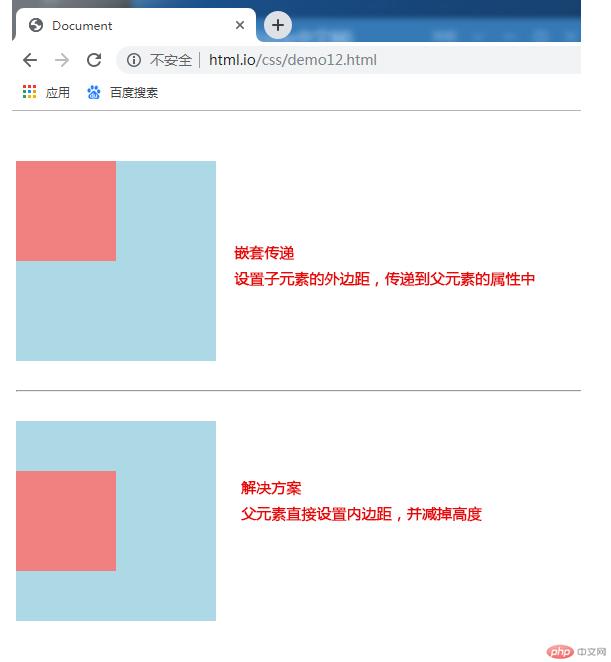
嵌套传递及解决方案
实例
<!DOCTYPE html>
<html lang="en">

<head>
    <meta charset="UTF-8">
    <style>
        .box1 {
            width: 200px;
            height: 200px;
            background-color: lightblue;
        }
        .box2 {
            width: 100px;
            height: 100px;
            background-color: lightcoral;
            margin-top: 50px;
        }
        .box3 {
            width: 200px;
            height: 200px;
            background-color: lightblue;
            padding-top: 50px;
            height: 150px;
          /*给大盒子设置内边距,并减掉高度*/
        }
        .box4 {
            width: 100px;
            height: 100px;
            background-color: lightcoral;
        }
    </style>
    <title>Document</title>
</head>
<body>
    <!-- 嵌套传递 -->
    <div class="box1">
        <div class="box2"></div>
    </div>
    <br>
    <hr>
    <br>
    <!-- 解决方案 -->
    <div class="box3">
        <div class="box4"> </div>
    </div>
</body>
</html>
运行实例 »
点击 "运行实例" 按钮查看在线实例
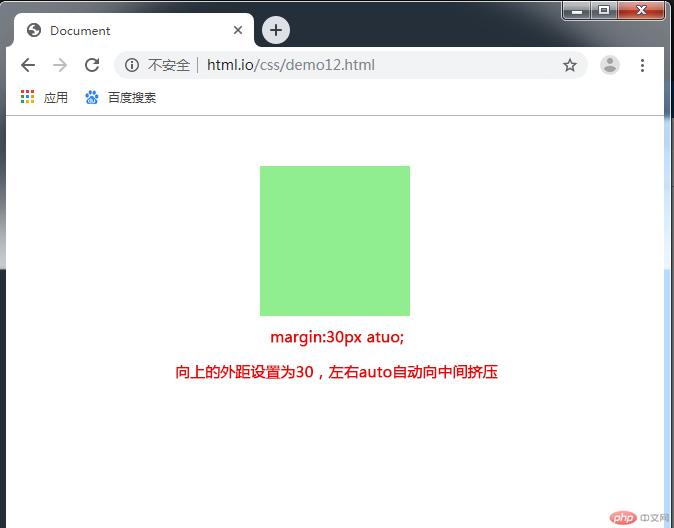
自动挤压
实例
<!DOCTYPE html>
<html lang="en">
<head>
    <meta charset="UTF-8">
    <style>
        .box1 {
            width: 150px;
            height: 150px;
            background-color: lightgreen;
        }
        .box1 {
            margin: 50px auto;
        }
    </style>
    <title>Document</title>
</head>
<body>
    <!-- 自动挤压 -->
    <div class="box1"></div>
</body>
</html>
运行实例 »
点击 "运行实例" 按钮查看在线实例
总结:通过本节的学习,掌握了除3种常用的选择器以外的其他选择器,并熟悉了外边距、内边距的使用方法,课后结合实际需要,多多练习

