
QQ 채팅 풍선을 구현한 h5의 예

- 零下一度원래의
- 2017-06-29 16:01:423116검색
이 글에서는 주로 HTML5의 QQ 채팅 풍선 효과 구현에 대해 소개합니다. HTML/CSS를 사용하여 QQ와 유사한 채팅 풍선을 만드는 데 관심이 있는 친구들이 참고할 수 있습니다.
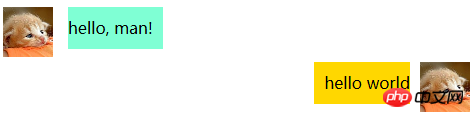
오늘은 HTML/CSS를 사용합니다. QQ와 비슷한 말풍선을 만들어 보았는데 렌더링은 다음과 같습니다.
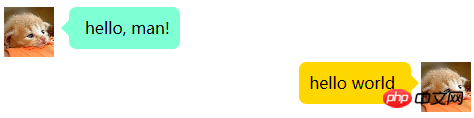
다음은 주요 장소의 스타일 설정입니다. 그런 다음 html 및 css 코드를 게시하세요(많지는 않음).
1단계: Layout
메시지는 p+float 레이아웃을 채택합니다. 각 메시지는 p 태그로 래핑되고 두 개의 p가 내부에 배치되어 각각 사용자 아이콘과 사용자 메시지 콘텐츠를 래핑합니다. 왼쪽 메시지의 경우 먼저 float를 지운 다음 float: left를 설정하세요. 이런 방식으로 사용자 아이콘과 메시지 내용을 같은 줄에 표시할 수 있으며, 사용자 아이콘은 왼쪽에, 메시지 내용은 사용자 아이콘 옆에 표시됩니다.
오른쪽 메시지의 경우 먼저 플로트를 삭제하세요. 그런 다음 사용자 아이콘과 메시지가 같은 줄에 표시되도록 float:right를 설정합니다. 아이콘은 맨 오른쪽에 있습니다. 아이콘 왼쪽에는 메시지가 있습니다.
2단계: 둥근 사각형 설정
border-radius:7px;

3단계: 삼각형 화살표
&n
p의 너비와 높이를 0으로 설정하고 테두리 너비를 설정하여 A로 표시되도록 합니다. 4개의 삼각형으로 구성된 직사각형은 테두리 너비와 색상을 설정하여 각 삼각형의 색상과 크기를 설정할 수 있습니다.
여기서 세 개의 삼각형의 색상을 투명하게 설정하세요. 삼각형 하나만 표시됩니다.

    .triangle{
        width: 0px;
        height: 0px;
        border-width: 15px;
        border-style: solid;
        border-color: red blue green gold;
    }
  .triangle{
        width: 0px;
        height: 0px;
        border-width: 15px;
        border-style: solid;
        border-color: transparent transparent transparent red;
    }
요점 4: 삼각형 후행 직사각형 상자
상대 위치 지정을 사용하세요. 삼각형은 항상 직사각형 프레임의 가장자리에 고정될 수 있습니다.
position:relative;
모든 코드:
<html>
<head>
<style>
  /* bubble style */
        .sender{
            clear:both;
        }
        .sender p:nth-of-type(1){
            float: left;
        }
        .sender p:nth-of-type(2){
            background-color: aquamarine;
            float: left;
            margin: 0 20px 10px 15px;
            padding: 10px 10px 10px 0px;
            border-radius:7px;
        }

        .receiver p:first-child img,
        .sender p:first-child img{
            width:50px;
            height: 50px;
        }

        .receiver{
            clear:both;
        }
        .receiver p:nth-child(1){
            float: right;
        }
        .receiver p:nth-of-type(2){
            float:right;
            background-color: gold;
            margin: 0 10px 10px 20px;
            padding: 10px 0px 10px 10px;
            border-radius:7px;
        }

        .left_triangle{
            height:0px;
            width:0px;
            border-width:8px;
            border-style:solid;
            border-color:transparent aquamarine transparent transparent;
            position: relative;
            left:-16px;
            top:3px;
        }

        .right_triangle{
            height:0px;
            width:0px;
            border-width:8px;
            border-style:solid;
            border-color:transparent transparent transparent gold;
            position: relative;
            right:-16px;
            top:3px;
        }

  </style>
</head>
<body>
<!-- Left -->
<p class="sender">
      <p>
          <img src="chatTemplateExample2_files/cat.jpg">
      </p>
  <p>
      <p class="left_triangle"></p>
      <span> hello, man! </span>
   </p>
  </p>
<!-- Right -->
  <p class="receiver">
      <p>
          <img src="chatTemplateExample2_files/cat.jpg">
      </p>
   <p>
        <p class="right_triangle"></p>
        <span> hello world </span>
   </p>
  </p>
</body>
</html>
위 내용은 QQ 채팅 풍선을 구현한 h5의 예의 상세 내용입니다. 자세한 내용은 PHP 중국어 웹사이트의 기타 관련 기사를 참조하세요!