Home >Software Tutorial >Office Software >A simple tutorial on using a brush to modify table line styles in Word
A simple tutorial on using a brush to modify table line styles in Word
- 王林forward
- 2024-04-26 09:31:30666browse
When editing a table in Word, you may want to customize the appearance of the table wireframe. PHP editor Xigua will guide you how to use the brush tool to easily modify the table line style. This tutorial will detail the following: How to select the Brush Tool How to adjust line thickness and color How to apply different line styles (such as dashed and dotted lines) If you're looking to add a personal touch to your table, keep reading this guide to learn more How to use the brush tool to modify table line styles.
1. Click the left mouse button in the table where you want to modify the line style.
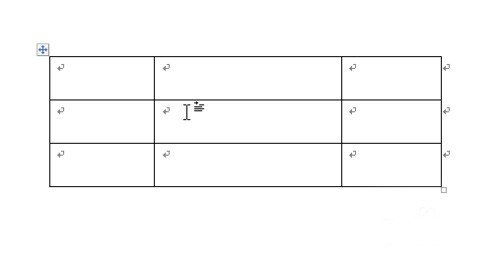
2. After clicking, when the active cursor flashes in the table, the [Design] tab will appear in the word menu bar. Mouse click on this tab.
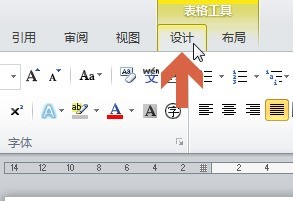
3. The location shown in the picture in the design tab is the option to modify the table style. The first row is the line style, the second row is the line thickness, and the third row is Line color.
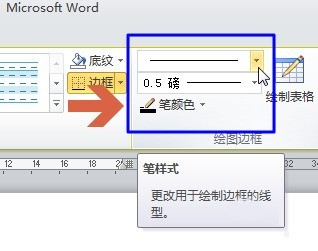
4. After setting the line style, thickness, and color, click the [Draw Table] button.
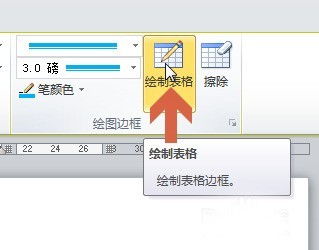
5. While holding down the left mouse button, slide on the table line whose style you want to modify.
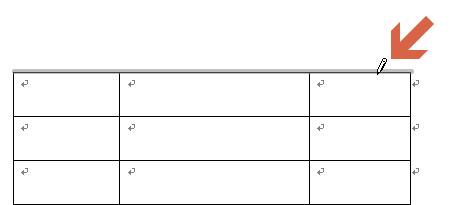
6. After releasing the left mouse button, the line style of the table will be modified.
The above is the detailed content of A simple tutorial on using a brush to modify table line styles in Word. For more information, please follow other related articles on the PHP Chinese website!

