
Home >Technology peripherals >It Industry >A Beginner's Guide to Keras: Digit Recognition in 30 Minutes
A Beginner's Guide to Keras: Digit Recognition in 30 Minutes

- Joseph Gordon-LevittOriginal
- 2025-02-10 15:27:16375browse
This article details building a Keras model for handwritten digit recognition using a Convolutional Neural Network (CNN) and the MNIST dataset. Let's rephrase it for clarity and improved flow.

Building a Handwritten Digit Recognizer with Keras
This tutorial demonstrates creating a model to recognize handwritten digits using Python's Keras library, a high-level API that simplifies building and training neural networks. We'll leverage the power of Convolutional Neural Networks (CNNs) and the widely used MNIST dataset.
Understanding the Approach
Our model employs a CNN, a particularly efficient architecture for image classification. Unlike traditional neural networks, CNNs process data in a 3D array (x, y coordinates and color), making them ideal for image data. The MNIST dataset, containing 60,000 training and 10,000 testing examples of handwritten digits, provides the necessary labeled data for training.
Artificial Neural Networks (ANNs) and CNNs
An ANN is a mathematical model transforming input data into output through hidden layers, each layer representing a probability. Training involves adjusting weights and biases based on errors, allowing the network to learn patterns.
CNNs offer a significant advantage for image processing. Their 3D array structure means each hidden layer node connects to only a small input region, dramatically increasing efficiency compared to traditional ANNs. Key CNN layers include convolutional layers (feature extraction), pooling layers (feature reduction), flattening layers (dimensionality reduction), and a final classification layer.


Working with the MNIST Dataset
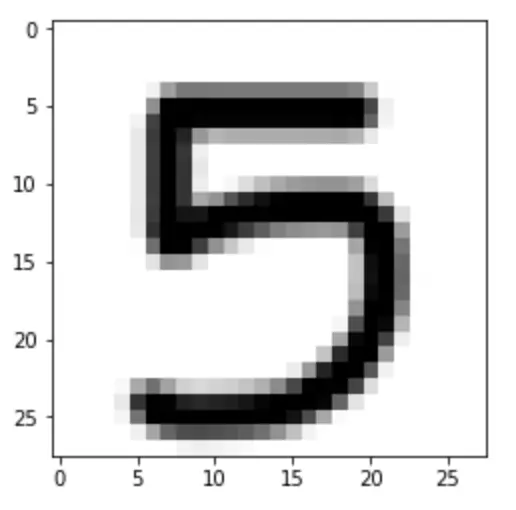
The MNIST dataset is readily available within Keras. We load the training and testing data using mnist.load_data(). Visualizing sample digits helps understand the data structure:
<code class="language-python">from keras.datasets import mnist
import matplotlib.pyplot as plt

(x_train, y_train), (x_test, y_test) = mnist.load_data()
image_index = 35
plt.imshow(x_train[image_index], cmap='Greys')
plt.show()</code>

The training and testing sets have dimensions (60000, 28, 28) and (10000, 28, 28) respectively, indicating 28x28 pixel images.
Data Preprocessing
Before model creation, data needs preprocessing:
-
Reshaping: Images are reshaped to (M x N x 1) format using
.reshape(). - Normalization: Pixel values (0-255) are normalized to 0-1 by dividing by 255.
-
One-Hot Encoding: The dependent variable (
y_train,y_test) is converted to a binary class matrix usingto_categorical()for compatibility with the model's output.
<code class="language-python">from keras.datasets import mnist
import matplotlib.pyplot as plt

(x_train, y_train), (x_test, y_test) = mnist.load_data()
image_index = 35
plt.imshow(x_train[image_index], cmap='Greys')
plt.show()</code>
Model Design and Training
Our CNN model is built sequentially:
- Convolutional Layers: Extract features from the input images.
- Pooling Layer: Reduces dimensionality and computational cost.
- Dropout Layer: Prevents overfitting.
- Flatten Layer: Converts the multi-dimensional output to a 1D array.
- Dense Layers: Perform final classification.
<code class="language-python">img_rows, img_cols = 28, 28
x_train = x_train.reshape(x_train.shape[0], img_rows, img_cols, 1) / 255
x_test = x_test.reshape(x_test.shape[0], img_rows, img_cols, 1) / 255
y_train = to_categorical(y_train, num_classes=10)
y_test = to_categorical(y_test, num_classes=10)</code>
The model is compiled using sparse_categorical_crossentropy loss (for integer labels), the Adam optimizer, and accuracy as the metric. Training is performed using .fit(), specifying epochs and batch size. The trained model is saved for later use.
<code class="language-python">from keras.models import Sequential
from keras.layers import Dense, Dropout, Flatten, Conv2D, MaxPooling2D

model = Sequential([
    Conv2D(32, (3, 3), activation='relu', input_shape=(img_rows, img_cols, 1)),
    Conv2D(64, (3, 3), activation='relu'),
    MaxPooling2D((2, 2)),
    Dropout(0.25),
    Flatten(),
    Dense(128, activation='relu'),
    Dropout(0.5),
    Dense(10, activation='softmax') # 10 output classes (digits 0-9)
])</code>
Testing with a Custom Image
To test the model, we load a custom handwritten digit image, preprocess it (convert to grayscale, reshape, normalize), load the saved model, and use .predict() to get the classification.
<code class="language-python">model.compile(loss='categorical_crossentropy', optimizer='adam', metrics=['accuracy'])
model.fit(x_train, y_train, batch_size=128, epochs=10, validation_data=(x_test, y_test))
model.save("test_model.h5")</code>
Conclusion
This tutorial provides a foundational understanding of building a handwritten digit recognition model using Keras and CNNs. While achieving high accuracy (e.g., >99%), further improvements are possible through model parameter tuning, data augmentation, and exploring more advanced CNN architectures. The provided FAQs offer further insights into the concepts involved.
The above is the detailed content of A Beginner's Guide to Keras: Digit Recognition in 30 Minutes. For more information, please follow other related articles on the PHP Chinese website!
Related articles
See more- Meng Wanzhou talks about taking office as rotating chairman: Huawei is a collective leadership, not an individual succession
- Hydrogen production and separator development trends under the global hydrogen energy arms race
- Counterpoint Research: 2022 is a milestone year for the global eSIM ecosystem, with more than 260 operators supporting eSIM
- Google sued by publishers in UK for £3.4 billion
- Making mobile phones like making cars: Meizu has changed! Finally taking off?