1)编程:实例演示 id,class,标签和css选择器获取元素的方法
实例
<!doctype html>
<html lang="en">
<head>
    <meta charset="UTF-8">
    <meta name="viewport"
          content="width=device-width, user-scalable=no, initial-scale=1.0, maximum-scale=1.0, minimum-scale=1.0">
    <meta http-equiv="X-UA-Compatible" content="ie=edge">
    <title>根据id选择元素</title>
</head>
<body>
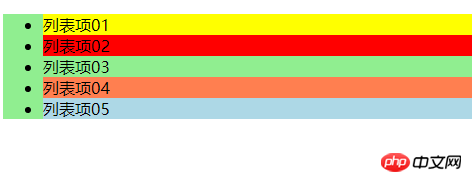
<ul id="ul">
    <li id="item1">列表项01</li>
    <li class="green">列表项02</li>
    <li>列表项03</li>
    <li>列表项04</li>
    <li>列表项05</li>
</ul>

<script>
    //使用id属性获取元素
    let item1 = document.getElementById('item1');

    //设置元素的样式
    item1.style.backgroundColor = 'yellow';

    //根据元素的class属性值获取元素
    let green = document.getElementsByClassName('green');
    console.log(green);   //返回一个html元素集合,与根据标签名获取的返回数据类型完全一样
    green[0].style.backgroundColor = 'red';

    let ul = document.getElementsByTagName('ul')[0];
    ul.style.backgroundColor = 'lightgreen';

    let lists = document.querySelectorAll('li');
    console.log(lists);     //返回节点列表数组,里面每个元素对应一个元素
    //可以使用
    lists[3].style.backgroundColor = 'coral';
    lists.item(4).style.backgroundColor = 'lightblue';


</script>
</body>
</html>
运行实例 »
点击 "运行实例" 按钮查看在线实例
运行效果图:

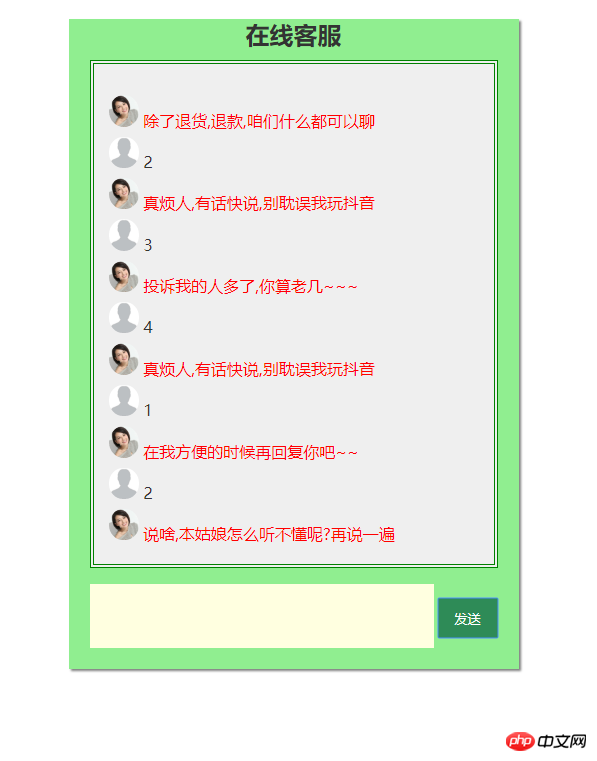
2)实战: 在线聊天机器人
实例
<!DOCTYPE html>
<html lang="en">
<head>
	<meta charset="UTF-8">
	<title>DOM实战:模拟智能在线***系统</title>
	<style type="text/css">
		div:nth-child(1) {
			width: 450px;
			height: 650px;
			background-color: lightgreen;
			margin: 30px auto;
			color: #333;
			box-shadow: 2px 2px 2px #808080
		}

		h2 {
			text-align: center;
			margin-bottom: -10px;
		}
		div:nth-child(2) {
			width: 400px;
			height: 500px;
			border: 4px double green;
			background-color: #efefef;
			margin: 20px auto 10px;
		}

		ul {
			list-style: none;
			line-height: 2em;
			/*border: 1px solid red;*/
			overflow: hidden;
			padding: 15px;
		}

		table {
			width: 90%;
			height:80px;
			margin: auto;
		}

		textarea{
			width: 340px;
			border: none;
			resize: none;
			background-color: lightyellow;

		}
		button {
			width: 60px;
			height: 40px;
			background-color: skyblue;
			color: white;
			border: none;
			/*text-align: left;*/

		}
		button:hover {
			cursor: pointer;
			background-color: seagreen;
		}
	</style>
</head>
<body>
	<div>
		<h2>在线***</h2>
		<div contenteditable="true">
			<ul>
				<li></li>
			</ul>
		</div>
		<table>
			<tr>
				<td align="right"><textarea cols="50" rows="4" name="text"></textarea></td>
				<td align="left"><button type=button>发送</button></td>
			</tr>
		</table>
	</div>
	<script type="text/javascript">
		//获取到页面中的按钮,文本域,对话内容区
		let btn = document.getElementsByTagName('button')[0];
		let text = document.getElementsByName('text')[0];
		let list = document.getElementsByTagName('ul')[0];
		let sum = 0;

		//添加按钮点击事件,获取用户数据并推送到对话窗口中
		btn.onclick = function () {
			// alert(text.value)
			//获取用户提交的内容
			if (text.value.length === 0) {
				alert('官人:是不是忘记输入内容了~~');
				return false;
			}
			let userComment = text.value;

			//立即清空用户信息区
			text.value = '';

			//创建一个新节点li
			let li = document.createElement('li');
			li.innerHTML = userComment;  //将用户输入的内容添加到新节点中
			let userPic = '<img src="inc/zwt.png" width="30" style="border-radius:50%">'; // 设置用户头像
			li.innerHTML = userPic + ' ' + userComment; // 将用户头像与用户的聊天内容合并
			list.appendChild(li);	//发送聊天内容,实际上就是将新节点插入到对话列表中
			sum += 1;	// 聊天记录自增1

			//设置定时器,默认2秒后会自动回复
			setTimeout(function(){
			let info = [
			    '真烦人,有话快说,别耽误我玩抖音',
				'除了退货,退款,咱们什么都可以聊',
				'说啥,本姑娘怎么听不懂呢?再说一遍',
				'在我方便的时候再回复你吧~~',
				'投诉我的人多了,你算老几~~~'
			];
			let temp = info[Math.floor(Math.random()*5)];
			//取1-5之间的一个整数:Math.floor(Math.random()*5)
			let reply = document.createElement('li');
			let kefuPic = '<img src="inc/gyy.jpg" width="30" style="border-radius:50%;">';
			// reply.innerHTML = '你有啥事呀,我的帅哥哥' +kefuPic
			reply.innerHTML = kefuPic + ' ' + '<span style="color:red">'+temp+'</span>';

			list.appendChild(reply);
			sum += 1;

			},2000);

			// 当聊天记录达到10条时清空窗口
			if (sum > 10) {
				list.innerHTML = '';
				sum = 0;
			}
		}


	</script>
</body>
</html>
运行实例 »
点击 "运行实例" 按钮查看在线实例
运行效果图:

总结:JS加上DOM确实是html前端的利器,变化多端,十分有趣,课堂上的例子演示了这样有趣的功能,JS有点入门的感觉了。

