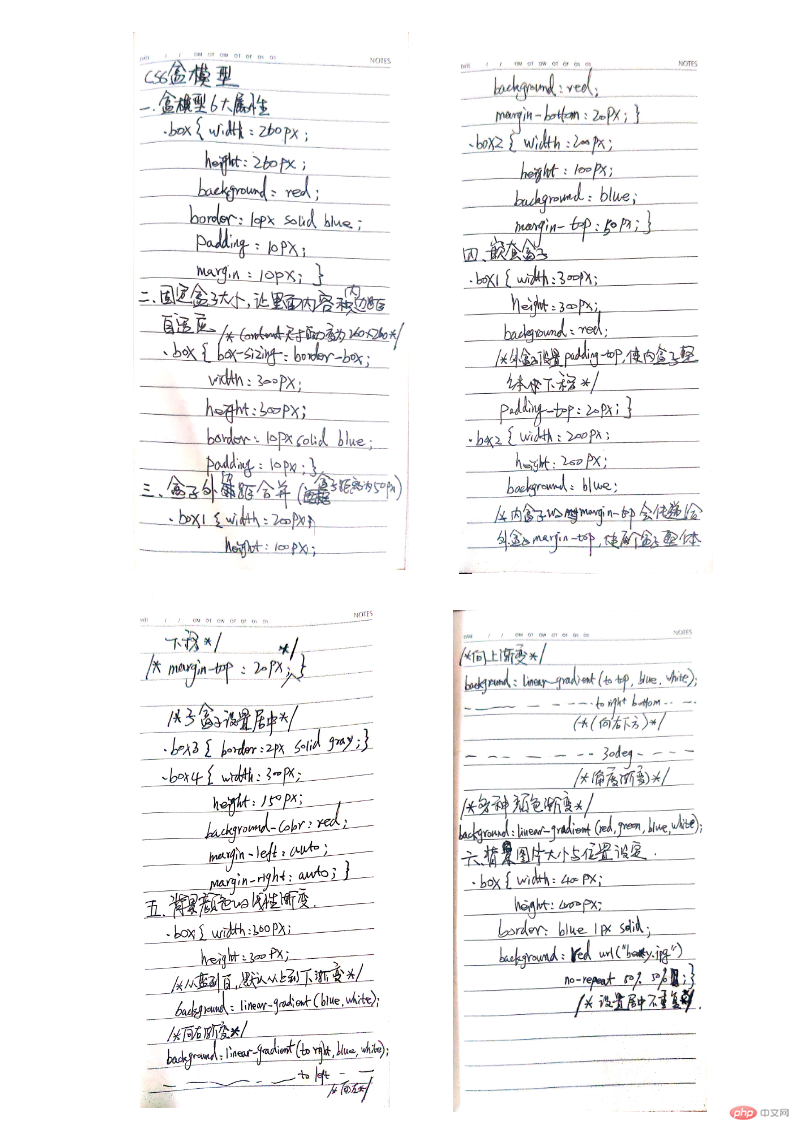
一、盒模型的全部属性及其应用场景。
1、盒模型包含6大属性,分别为width宽度,height高度,background背景,padding内边距,border边框,margin外边距。
实例
<style>
    .box {
        width: 260px;
        height: 260px;
        background: red;
        border: 10px solid blue;
        padding: 10px;
        margin: 10px;
    }
</style>点击 "运行实例" 按钮查看在线实例
盒模型padding,border,margin具有方向性,方向遵循:上、右、下、左的顺序,即顺时针旋转。padding/margin默认透明,只有宽度属性;border不透明,除宽度外还可设置样式和前景色。
二、box-sizing:解决了什么问题,不用它应该如何处理?
默认盒子的宽度和高度只包括了内容区的大小,即padding默认的0;当给盒子添加边框和内边距时,会撑开盒子改变大小,即盒子宽度=内容+(内边距左+内边距右)+(边框左+边框右),盒子高度同理,影响整体布局;所以设置盒子width,height时,应该将边框和内边距自适应计算在内更合理,由此我们可以通过给盒模型添加box-sizing属性解决此问题。
三、盒子外边距合并是怎么回事?
同级盒子之间,添加外边距后,会出现外边距合并, 也叫外边距的塌陷,即二个盒子之间的间距,最终由以较大值确定。
实例
<style>
    div{
        box-sizing: border-box;
    }
    .box1 {
        width: 200px;
        height: 100px;
        background: red;
        margin-bottom: 20px;
    }
    .box2 {
        width: 200px;
        height: 100px;
        background: blue;
        margin-top: 50px;
    }
</style>点击 "运行实例" 按钮查看在线实例
此实例两个盒子之间的上下距离由box2决定,即margin-top: 50px;决定。
四、嵌套盒子之间内边距与外边距的表现有何不同,如何处理?
嵌套盒子之间子盒子外边距会传递到父盒子,可以通过给父盒子添加内边距或边框来解决子盒子在父盒子内的位置;外边距在水平/垂直方向取值auto时, 可以实现子盒子的水平/垂直居中显示效果。
实例
/*子盒子设置外边距与父盒子设置内边距*/
<style>
div{
    box-sizing: border-box;
}
.box3 {
    width: 500px;
    height: 300px;
    border: blue 1px solid;
    padding-top: 10px;
}
.box4 {
    width: 200px;
    height: 100px;
    background: blue;
    /*margin-top: 10px;*/
}
/*子盒子设置居中*/
.box5 {
    border: 2px solid gray;
}
.box6 {
    width: 300px;
    height: 150px;
    background-color: blue;
    margin-left: auto;
    margin-right: auto;
}
</style>点击 "运行实例" 按钮查看在线实例
五、背景颜色的线性渐变
实例
<style>
    /*线性渐变*/
    .box {
        width: 300px;
        height: 300px;
        /*从蓝到白, 默认从上到下方向渐变*/
        background: linear-gradient(green, white);

        /*向右渐变*/
        background: linear-gradient(to right,green, white);

        /*向左渐变*/
        background: linear-gradient(to left,green, white);

        /*向上渐变*/
        background: linear-gradient(to top,green, white);

        /*向右下方渐变*/
        background: linear-gradient(to right bottom,green, white);

        /*角度渐变*/
        background: linear-gradient(30deg,green, white);

        /*可连续设置多种颜色的渐变效果*/
        background: linear-gradient(red, green, blue, white);
    }
</style>点击 "运行实例" 按钮查看在线实例
六、背景图片的大小与位置的设定
实例
<style>
    .box {
        width: 400px;
        height: 400px;
        border: blue 1px solid;
        background: lightblue url("beauty.jpg") no-repeat 50% 50%;
    }
</style>点击 "运行实例" 按钮查看在线实例
此实例backgroud依次表达的是背景色、背景图片地址、是否重复、图片所在位置。


