1实例演示相邻选择器与兄弟选择器,并分析异同:
下图中,选择ID选择器是第二哥小圆,使用相邻选择器时,后边第三个小圆获得了样式属性值,变成黄色。
相邻选择器的格式 ID名与+连接 星号

实例
<!DOCTYPE html>
<html>
<head>
	<meta charset="utf-8">
	<title>选择器</title>
	<link rel="stylesheet" type="text/css" href="div.css">
	<style type="text/css">


ul{
	margin: 0;
	padding-left: 0;
	/* border: 1px dashed red; */
}

ul li{
	list-style: none;
	width: 40px;
	height: 40px;
	background-color: wheat;
	/* border: 1px solid black;  */
	/* 水平和垂直居中 */
	text-align: center;
	line-height: 40px;
	border-radius: 50%;
	/* 将一个块级元素转为内联元素 */
	display: inline-block;
	box-shadow: 2px 2px 1px #888;
}
/* ID选择器 */
#bg-blue{
	background-color: lightblue;
}

/* 类选择器 */
.bg-green{
	background-color: lightgreen;
}
/* 属性选择器 */
li[id="bg-blue"] {
	border: 2px solid red;
}
/* 群组选择器 */
#bg-blue, .bg-green {
	border: 2px solid blue;
}

/* 相邻选择器 */
#bg-blue + * {
	background-color: yellow;
}


	</style>
</head>
<body>


	<ul>
		<li class="bg-green">1</li>
		<li id="bg-blue">2</li>
		<li class="bg-green">3</li>
		<li class="bg-green">4</li>
		<li>5</li>
		<li>6</li>
		<li>7</li>
		<li>8</li>
		<li>9</li>
		<li>10</li>

	</ul>


</body>
</html>
运行实例 »
点击 "运行实例" 按钮查看在线实例
兄弟选择器的相邻选择器相似,
#bg-blue ~ * {
background-color: yellow;
}
将+换成~,表示将这个ID名后边所有的元素都活着这个 样式。
实例
<!DOCTYPE html>
<html>
<head>
	<meta charset="utf-8">
	<title>选择器</title>
	<link rel="stylesheet" type="text/css" href="div.css">
	<style type="text/css">


ul{
	margin: 0;
	padding-left: 0;
	/* border: 1px dashed red; */
}

ul li{
	list-style: none;
	width: 40px;
	height: 40px;
	background-color: wheat;
	/* border: 1px solid black;  */
	/* 水平和垂直居中 */
	text-align: center;
	line-height: 40px;
	border-radius: 50%;
	/* 将一个块级元素转为内联元素 */
	display: inline-block;
	box-shadow: 2px 2px 1px #888;
}
/* ID选择器 */
#bg-blue{
	background-color: lightblue;
}

/* 类选择器 */
.bg-green{
	background-color: lightgreen;
}
/* 属性选择器 */
li[id="bg-blue"] {
	border: 2px solid red;
}
/* 群组选择器 */
#bg-blue, .bg-green {
	border: 2px solid blue;
}

/* 相邻选择器 */
#bg-blue + * {
	background-color: yellow;
}
/* 兄弟选择器 */
#bg-blue ~ * {
	background-color: yellow;
}


	</style>
</head>
<body>


	<ul>
		<li class="bg-green">1</li>
		<li id="bg-blue">2</li>
		<li class="bg-green">3</li>
		<li class="bg-green">4</li>
		<li>5</li>
		<li>6</li>
		<li>7</li>
		<li>8</li>
		<li>9</li>
		<li>10</li>

	</ul>


</body>
</html>
运行实例 »
点击 "运行实例" 按钮查看在线实例
2.实例演示nth-child()和:nth-of-type()选择器,并分析异同:
子选择器里nth-child() 获取的是()中第几个位置的元素,它只关注元素的位置
而nth-of-type()即关注元素的位置,也关注元素的类型。同样()里填写元素的位置,
元素位置单位从1开始,而不是从0.
实例
<!DOCTYPE html>
<html>
<head>
	<meta charset="utf-8">
	<title>选择器</title>
	<link rel="stylesheet" type="text/css" href="div.css">
	<style type="text/css">


ul{
	margin: 0;
	padding-left: 0;
	/* border: 1px dashed red; */
}

ul li{
	list-style: none;
	width: 40px;
	height: 40px;
	background-color: wheat;
	/* border: 1px solid black;  */
	/* 水平和垂直居中 */
	text-align: center;
	line-height: 40px;
	border-radius: 50%;
	/* 将一个块级元素转为内联元素 */
	display: inline-block;
	box-shadow: 2px 2px 1px #888;
}
/* ID选择器 */
#bg-blue{
	background-color: lightblue;
}

/* 类选择器 */
.bg-green{
	background-color: lightgreen;
}
/* 属性选择器 */
li[id="bg-blue"] {
	border: 2px solid red;
}
/* 群组选择器 */
#bg-blue, .bg-green {
	border: 2px solid blue;
}

/* 相邻选择器 */
#bg-blue + * {
	background-color: -yellow;
}
#bg-blue ~ * {
	background-color: -yellow;
}

/* 伪类选择器 */
/* 第一个元素背景颜色设置为珊瑚色 */
ul :first-child {
	background-color: coral;
}
/* 最后一个元素背景颜色设置为珊瑚色 */
ul :last-child {
	background-color: coral;
}
/* 第6个元素背景颜色设置为珊瑚色 */
ul :nth-child(6) {
	background-color: coral;
}

/* 从后往前数第3个元素背景颜色设置为珊瑚色 */
ul :nth-last-child(3) {
	background-color: coral;
}
/* 最后一个类型以及位置元素背景颜色设置为珊瑚色 */
ul li:last-of-type {
	background-color: coral;
	color: white;
}
/* 第七个类型以及位置元素背景颜色设置为珊瑚色 */
ul li:nth-of-type(7){
	background-color: coral;
	color: white;
}


	</style>
</head>
<body>


	<ul>
		<li class="bg-green">1</li>
		<li id="bg-blue">2</li>
		<li class="bg-green">3</li>
		<li class="bg-green">4</li>
		<li>5</li>
		<li>6</li>
		<li>7</li>
		<li>8</li>
		<li>9</li>
		<li>10</li>

	</ul>


</body>
</html>
运行实例 »
点击 "运行实例" 按钮查看在线实例
ul li:nth-of-type(7){
background-color: coral;
color: white;
}
如果前面使用了li 这种格式的文件类型,后边必须跟着type类型的样式格式!
3.实例演示padding对盒子大小的影响与解决方案,使用宽度分离或box-sizing
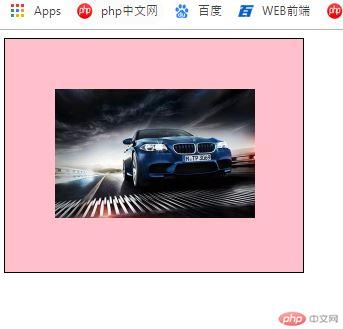
下面的代码用的是box-sizing方式实现居中,以后都使用这种方式,首先设置图片的宽度,然后将盒子的大小按照图片的属性设置,盒子的宽度-padding值正好是图片的宽度。
实例
<!DOCTYPE html>
<html>
<head>
	<meta charset="utf-8">
	<title>内边距</title>
	<link rel="stylesheet" type="text/css" href="div.css">
	<style type="text/css">

.box1 {
	box-sizing: border-box;
	padding: 50px;
	background-color: pink;
	border: 1px solid black;
	width: 300px;
}

	</style>
</head>
<body>

<!-- 图片在中间显示 -->
<div class="box1">
	<img src="https://timgsa.baidu.com/timg?image&quality=80&size=b9999_10000&sec=1567756551880&di=716e66d677ca8d10613c6a6196c23f17&imgtype=0&src=http%3A%2F%2Fphotocdn.sohu.com%2F20140409%2FImg397934455.jpg"
	alt="宝马"
	width="200">
</div>


</body>
</html>
运行实例 »
点击 "运行实例" 按钮查看在线实例

4.实例演示:margin中的同级塌陷,嵌套传递与自动挤压,并提出解决方案或应用场景
实例
<!DOCTYPE html>
<html>
<head>
	<meta charset="utf-8">
	<title>外边距</title>
	<link rel="stylesheet" type="text/css" href="div.css">
	<style type="text/css">

.box1 {
	width: 100px;
	height: 100px;
	background-color: lightblue;
}

.box2 {
	width: 100px;
	height: 100px;
	background-color: lightcoral;
}

.box1 {
	margin-bottom: 30px;
}

.box2 {
	margin-top: 30px;
}


	</style>
</head>
<body>

<div class="box1"></div>
<div class="box2"></div>


</body>
</html>
运行实例 »
点击 "运行实例" 按钮查看在线实例

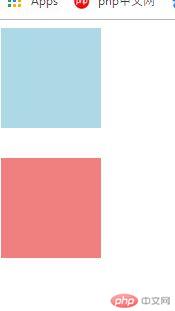
以上代码表示的是同级塌陷,在两个div之间有个30px的距离,而两个div的css都设置了之间的距离是30px,不过,
在实际中只实现了一个,同级塌陷只取较大值的属性,如果其中一个值(box2 margin-top 设置了50xp)则两个div之间的
距离就是50px,而这种情况,只出现在上下层级关系中。
实例
<!DOCTYPE html>
<html>
<head>
	<meta charset="utf-8">
	<title>外边距</title>
	<link rel="stylesheet" type="text/css" href="div.css">
	<style type="text/css">

.box1 {
	width: 200px;
	height: 200px;
	background-color: lightblue;
}

.box2 {
	width: 100px;
	height: 100px;
	background-color: lightcoral;
}

.box2 {
	margin-top: 50px;
}


	</style>
</head>
<body>

<div class="box1">
	<div class="box2"></div>
</div>


</body>
</html>
运行实例 »
点击 "运行实例" 按钮查看在线实例

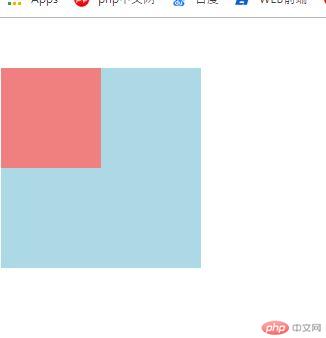
以上代码演示的是嵌套传递,当父元素向下设置一个距离50像素时,子元素继承了父元素一起向下移动50px。
也是CSS中的特性,子元素继承父元素的css样式。
实例
<!DOCTYPE html>
<html>
<head>
	<meta charset="utf-8">
	<title>外边距</title>
	<link rel="stylesheet" type="text/css" href="div.css">
	<style type="text/css">
.box1 {
	width: 150px;
	height: 150px;
	background-color: lightcoral;
}
.box1 {
	margin-left:  auto;

}


	</style>
</head>
<body>

<div class="box1">

</div>


</body>
</html>
运行实例 »
点击 "运行实例" 按钮查看在线实例
当margin-left:设置成auto时,默认系统认为左侧能有多大给多大,所以,div元素会靠左右边

当margin-right设置成auto时,系统会认为右侧能有多大给多大,所以,div元素会靠左边
实例
<!DOCTYPE html>
<html>
<head>
	<meta charset="utf-8">
	<title>外边距</title>
	<link rel="stylesheet" type="text/css" href="div.css">
	<style type="text/css">
.box1 {
	width: 150px;
	height: 150px;
	background-color: lightcoral;
}
.box1 {
	margin-right:   auto;

}


	</style>
</head>
<body>

<div class="box1">

</div>


</body>
</html>
运行实例 »
点击 "运行实例" 按钮查看在线实例

当margin直接设置成auto时,div元素会居中对齐,系统认为,这个元素左右两侧都给最大值,所以会居中。
实例
<!DOCTYPE html>
<html>
<head>
	<meta charset="utf-8">
	<title>外边距</title>
	<link rel="stylesheet" type="text/css" href="div.css">
	<style type="text/css">
.box1 {
	width: 150px;
	height: 150px;
	background-color: lightcoral;
}
.box1 {
	margin:   auto;

}


	</style>
</head>
<body>

<div class="box1">

</div>


</body>
</html>
运行实例 »
点击 "运行实例" 按钮查看在线实例

如果需要垂直方向设置一个高度,margin:30px auto,div元素就能距离窗口上边距30px,并且居中对齐了。

