Xiaoqiang의 HTML5 모바일 개발 로드(37) - jqMobi 빠른 시작
- 黄舟원래의
- 2017-02-13 14:15:331374검색
"Xiaoqiang의 HTML5 모바일 개발 로드(33)——"에서 jqMobi Basics "에서는 jqMobi가 무엇인지 알아보고 공식 웹사이트에서 jqMobi 개발 패키지를 다운로드했습니다. 다운로드 후 압축을 푼 디렉터리는 다음과 같습니다.
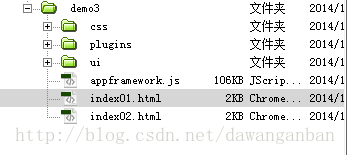
위의 /css 디렉터리, /plugins 디렉터리, /ui 디렉터리, /appframework.js를 복사합니다. 파일은 아래와 같이 표시됩니다.
복사도 가능합니다 필요한 index.html을 만들고 위의 index01.html 및 index02.html과 같이 직접 수정하세요.
그런 다음 CSS와 js 파일을 소개하세요
아아앙
index01.html
<link href="css/af.ui.css" rel="stylesheet" type="text/css"/>
<link href="css/icons.css" rel="stylesheet" type="text/css"/>
<script src="appframework.js" type="text/javascript"></script>
<script src="ui/appframework.ui.js" type="text/javascript"></script>
위 코드 설명:
UI 컨테이너
jqMobi <link href="css/af.ui.css" rel="stylesheet" type="text/css"/> <link href="css/icons.css" rel="stylesheet" type="text/css"/> <script src="appframework.js" type="text/javascript"></script> <script src="ui/appframework.ui.js" type="text/javascript"></script>
首页
2. 콘텐츠 영역
<p id="afui">
这里面是写的内容
</p>
3. jqMobi의 핵심이며 여러
<p id="afui">	<p id="content">		<!-- this is where your panels will go -->		这里写的是 panel	</p>
</p>
머리글과 바닥글
(1) 각 패널마다 머리글과 바닥글 별도
<p id="afui">
<p id="content">
<p id="main" title="Welcome" class="panel" selected="true">			在这个里面写我们的对应内容		</p>
</p>
</p>
(2) 공통 머리글, 바닥글 호출 가능 여러 패널에서
<p id="afui"> <p id="content"> <p id="main" title="Welcome" class="panel" selected="true"> <header> <h1>Welcome</h1> <a class="button" style="float:right;" class="icon home"></a> </header> 对应页面的内容 <footer> <a href='#about' class='icon info'>About</a> </footer> </p> </p> </p>(3) 다른 방법
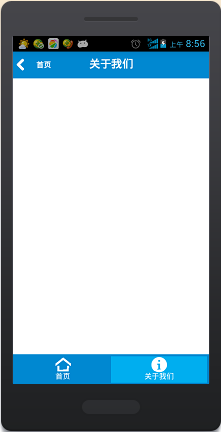
작동효과
<p id="afui"> <p id="content"> <p id="main" title="Welcome" class="panel" selected="true" data-footer="custom_footer" data-header="custom_header">对应页面的内容</p> <header id="custom_header"> <h1>Welcome</h1> <a class="button" style="float:right;" class="icon home"></a> </header> <footer id="custom_footer"> <a href='#about' class='icon info'>About</a> </footer> </p> </p>
위는 Xiaoqiang의 HTML5 모바일 개발 로드(37) - jqMobi 빠른 시작의 내용입니다. 더 많은 관련 내용은 PHP 중국어 웹사이트(www.php)를 참고하세요. .cn)!


