Home >Software Tutorial >Computer Software >How to add footnote dividing line in InDesign How to add footnote dividing line in InDesign
How to add footnote dividing line in InDesign How to add footnote dividing line in InDesign
- WBOYWBOYWBOYWBOYWBOYWBOYWBOYWBOYWBOYWBOYWBOYWBOYWBforward
- 2024-05-09 13:50:38681browse
When adding footnotes in InDesign, if you want to have a dividing line between the footnotes and the text, how should you do it? PHP editor Xigua brings you a detailed method of adding footnote dividing lines in InDesign. Friends who want to know more should not miss it! See the introduction below for details.
1. First, after opening the InDesig software interface, click the edit menu above

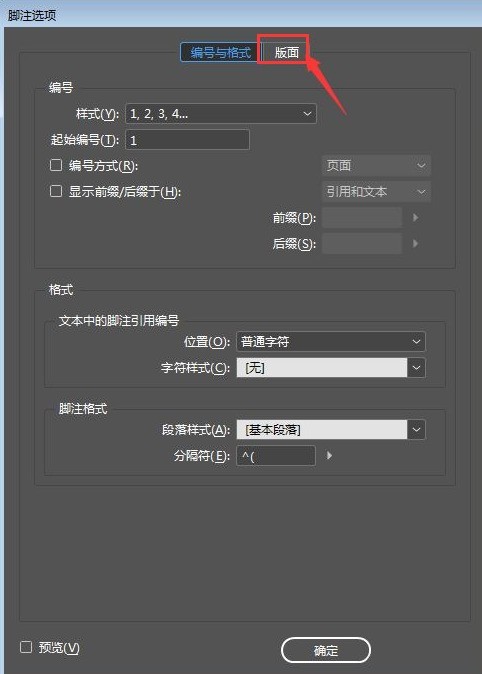
2. Then, find the document footnote option button

3. Next, switch the page to the layout column

4. Finally, click the mouse to check the Enable Footnote Line button to save it
The above is the detailed content of How to add footnote dividing line in InDesign How to add footnote dividing line in InDesign. For more information, please follow other related articles on the PHP Chinese website!
Related articles
See more- How to change the material of bedding in Kujiale_How to change the material of bedding in Kujiale
- How to use modified line in sai_Using the modified line method in sai
- Graphic and text method for creating mask animation in Flash
- A simple way to enter fractions in Geometry Sketchpad
- How to deal with the thickening of the cursor in the MathType input box

