Home >Software Tutorial >Office Software >Specific steps to set full background watermark in WPS
Specific steps to set full background watermark in WPS
- WBOYWBOYWBOYWBOYWBOYWBOYWBOYWBOYWBOYWBOYWBOYWBOYWBforward
- 2024-04-26 15:00:251566browse
Want to set a full background watermark for documents in WPS, but don’t know how? PHP editor Zimo will introduce you to the specific steps of setting a full background watermark in WPS today. If you have also encountered the same problem, then continue reading.
1. For the newly created word document or WPS text, find Insert-Watermark-click Add.

2. Check the picture, then select the picture, add the backup picture you want to set as a watermark, and then click [OK], blah blah blah:) Save the backup picture to the desktop for updates Easy to find.
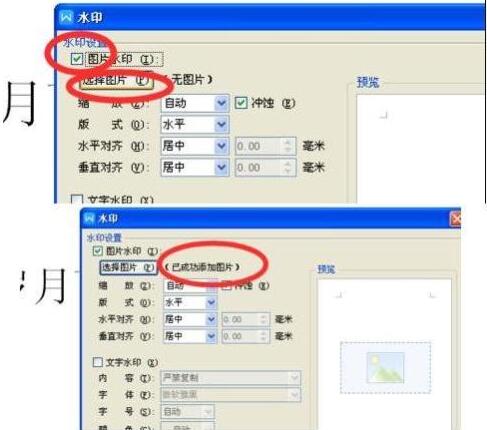
3. Click the watermark again, find the picture you have added, and click it. This means that the watermark has been added to the document.

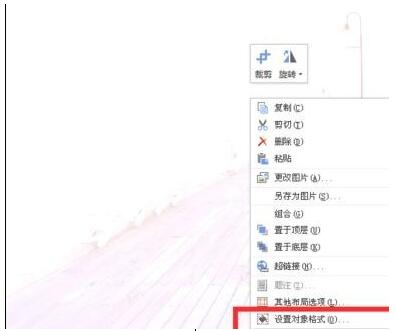
4. The following is how to set a full background watermark. Double-click on the header of the document to display the header words. Below is the added image watermark. Right-click on the image to select Set the object format, then select Properties-Picture-Crop.

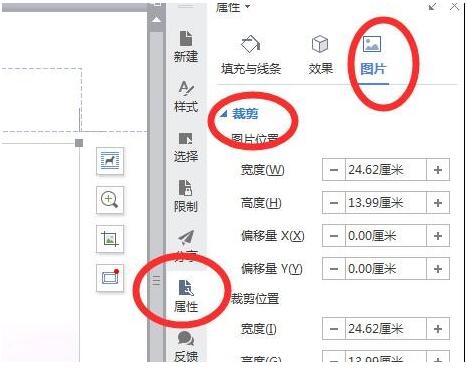
5. Edit each numerical parameter, usually the size of A4 paper, 29.7cm*21cm. Fill in the numerical value and the full background watermark will be set.


The above is the detailed content of Specific steps to set full background watermark in WPS. For more information, please follow other related articles on the PHP Chinese website!

