Home >Software Tutorial >Office Software >Steps to set up automatic numbering in word 2010 table
Steps to set up automatic numbering in word 2010 table
- 王林forward
- 2024-04-25 11:16:17765browse
In daily office work, we often need to add automatic numbers to tables to facilitate data management and sorting. In response to this demand, PHP editor Xigua has brought detailed steps for setting up automatic numbering in word2010 tables. Through the following content, you will learn how to easily add automatic numbering to tables, thereby improving office efficiency. Continue reading this guide to learn the specific setup steps to make your work easier.
1. Open word2010, select [Draw Table] in the [Insert] function bar, and draw the table.
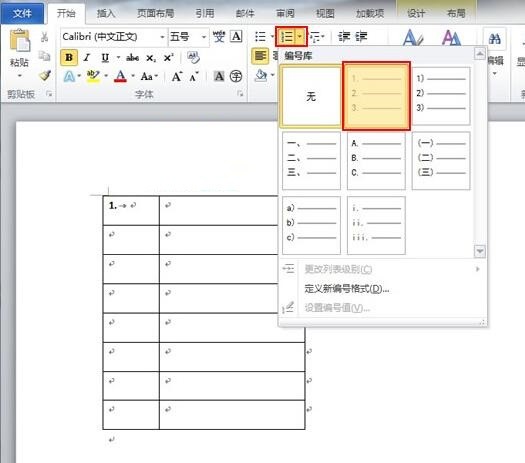
2. Position the mouse on the first cell, and select the [Number Library] button in the [Paragraph] group in the [Start] function bar.

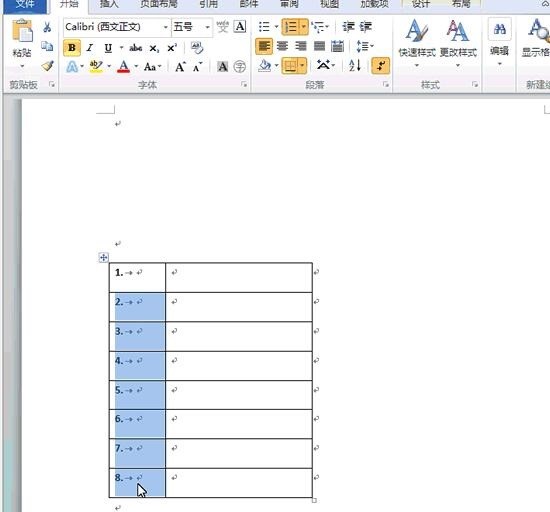
3. Select Format Painter in [Clipboard]. Then hold down the left mouse button on the second cell and drag it downward until the last cell is removed and release the mouse. The automatic number will be inserted into this column.

The above is the detailed content of Steps to set up automatic numbering in word 2010 table. For more information, please follow other related articles on the PHP Chinese website!

