
Home >Software Tutorial >Computer Software >How to set up shared folders in win11. Where to set up the tutorial?
How to set up shared folders in win11. Where to set up the tutorial?

- 王林forward
- 2024-02-14 23:42:301306browse
php editor Strawberry introduces to you the methods and tutorials on setting up shared folders in Win11 system. Shared folders are a convenient and fast way to share files, allowing multiple computers to share and access files on the same network. In the Win11 system, setting up a shared folder requires a series of steps, and the location is also different. Next, we will introduce in detail the specific method of setting up shared folders in Win11 system to help you easily complete the file sharing settings.
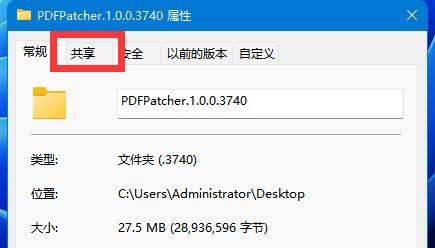
1. Right-click the folder to be shared and select [Properties] in the pop-up list to enter

2. In the [Folder Properties] window Select [Share] at the top
3. Click and select [Advanced Sharing] at the bottom of the interface

4. In the [Advanced Sharing] window, check [Share this folder]
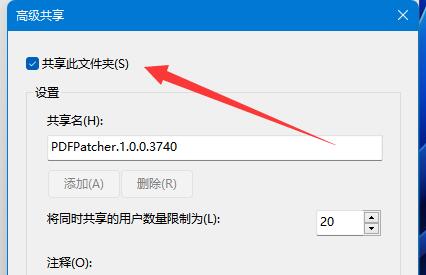
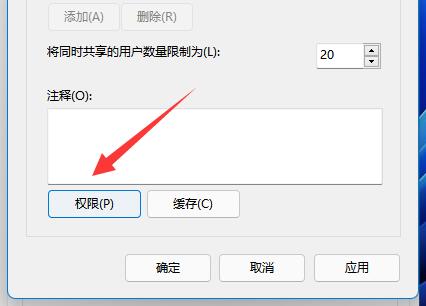
5. After checking, click [Permissions] below
6. Add the target account to be shared under [Group or User Name]
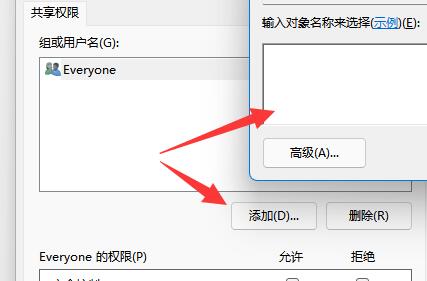
7. After the addition is completed, set the permissions and click [OK]
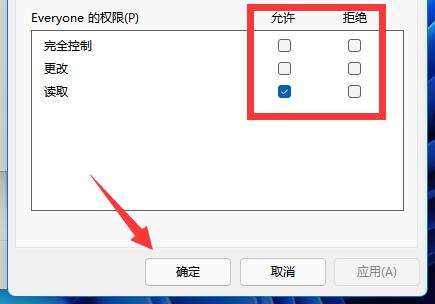
After the setup is completed, the added user can open the folder on his computer. In addition, be sure to pay attention to the permission settings. If only [Read] is set, your colleagues will not be able to modify it. You need to set the permissions accordingly. The above is the win11 related tutorial I brought to you, I hope it can help you.
Share to: If you like me, click me 0 tags: win11The above is the detailed content of How to set up shared folders in win11. Where to set up the tutorial?. For more information, please follow other related articles on the PHP Chinese website!