Home >Computer Tutorials >Computer Knowledge >ghou disk installation machine
ghou disk installation machine
- WBOYWBOYWBOYWBOYWBOYWBOYWBOYWBOYWBOYWBOYWBOYWBOYWBforward
- 2024-02-13 08:00:07895browse
Step one: Copy the GHOST WIN7 system (ISO or GHO) image to the U disk
1. Open the U disk and enter the "GHO" folder. Copy the downloaded GHOST WIN7 ISO/GHO image to this directory. Since ISO/GHO files are usually relatively large, you may need to wait 1 to 10 minutes.
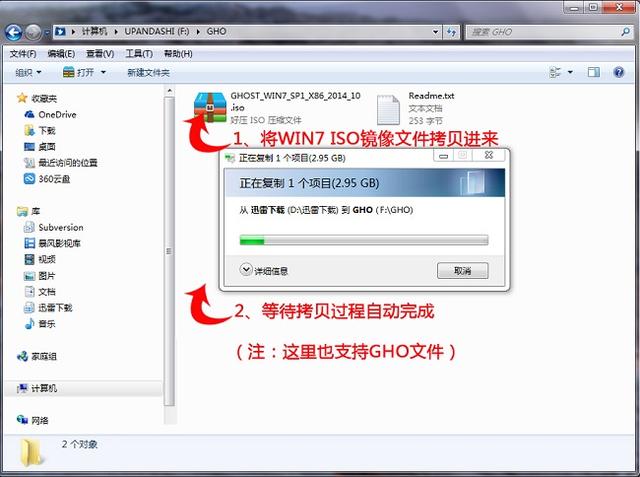
The author uses GHOST_WIN7_SP1_X86_2014_10.iso as an example.
Step 2: Restart the computer, start the U disk through the shortcut key to enter the U disk installation master
When the computer starts, you usually need to press the shortcut key to enter the boot menu, the most common one is F12 key. Different models may have different shortcut keys. For details, please refer to the startup key list below. After entering the boot menu, several options will be displayed. We need to use the up and down arrow keys "↑↓" to select the U disk, and then press the Enter key to enter the U Disk Installation Master main interface. (Usually one of the options will display the English name related to the USB or your USB flash drive brand, that is our USB flash drive!) The following is a list of shortcut keys for various brands of motherboards to enter the USB flash drive installation master with one click, you can find it below Your corresponding motherboard brand, and then find the hotkey for that motherboard to start the USB installation master with one click.
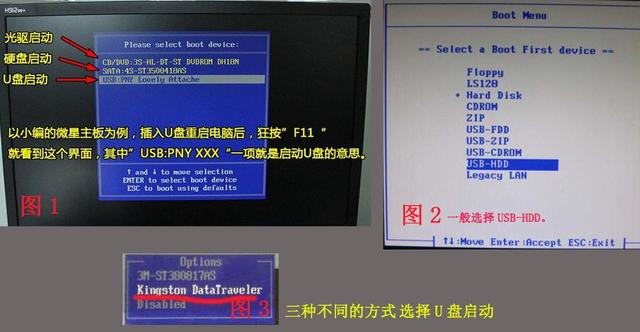
BIOS quick boot interface
BIOS quick boot hotkey
Assembly machine motherboard brand notebook brand desktop motherboard brand startup button notebook brand startup button desktop brand startup button ASUS F8 Lenovo F12 Lenovo F12 Gigabyte F12 Acer F12 HP F12 MSI F11 ASUS ESC Acer F12 Biostar F9 HP F9 Dell ESC Mei Jet ESC or F12 Lenovo Thinkpad F12 Shenzhou F12 Colorful ESC or F11 Dell F12 Asus F8 ASRock F11 Shenzhou F12 Founder F12 Spartak ESC Toshiba F12 Tsinghua Tongfang F12 Onda F11 Samsung F12 Haier F12 Dual-Smart ESCIBMF12 BenQ F8 ASL F10 Fujitsu F12 Elite ESC or F11 Haier F12 Guanmeng F11 or F12 Founder F12 Foxconn ESC or F12 Tsinghua Tongfang F12 Topstar F11 or F12 MSI F11 Maxxuan ESC BenQ F9 Yeston F8 Gigabyte F12 Jetway ESCGateway F12 IntelF12eMachinesF12 Note: For other models, please try or refer to the common startup hotspots of the above brands Key
Step 3: Enter the PE system and execute "U Disk Master One-click Installation" to install WIN7
1. Enter the U Disk Installation Master After starting the menu, use the up and down keys to select "[01] Run U Disk Master Win10PE (X64) UEFI version (preferred)". After selecting, press the "Enter key" to enter the PE system.
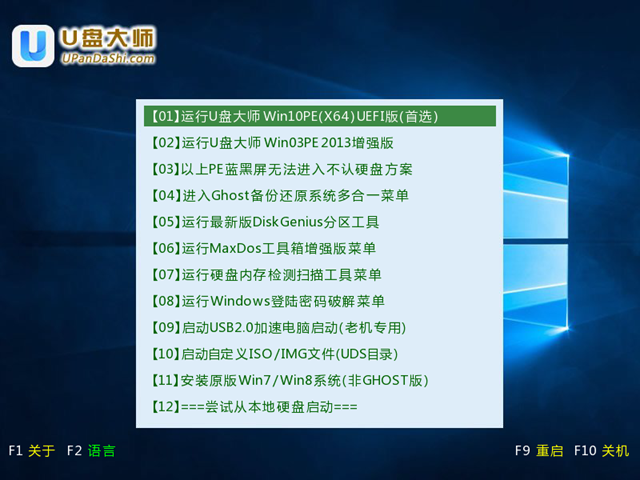
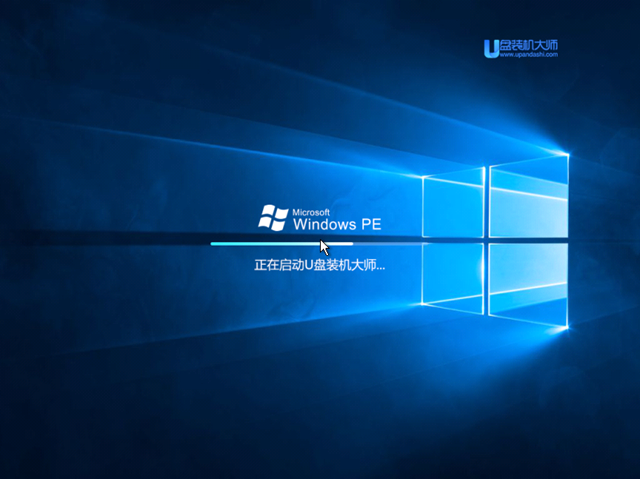
After PE starts, the U disk installation master interface is automatically loaded. After a few seconds, the PE system desktop is entered.
#2. One-click system installation
After entering the PE desktop, double-click the "U Disk Master One-click Installation" icon with the mouse, and it will open "U disk master one-click installation" software.
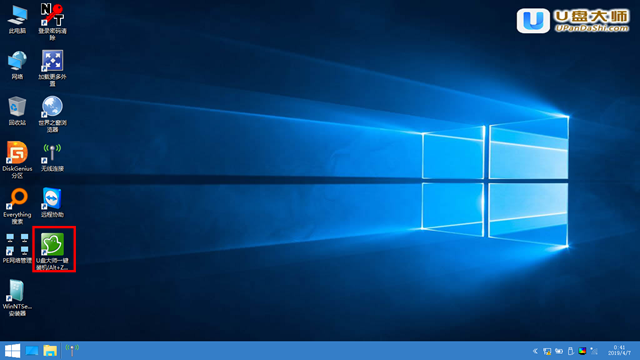
#3. After entering "U Disk Master One-click Installation", use the "Open" button to select the ISO file we copied into the U disk boot disk.
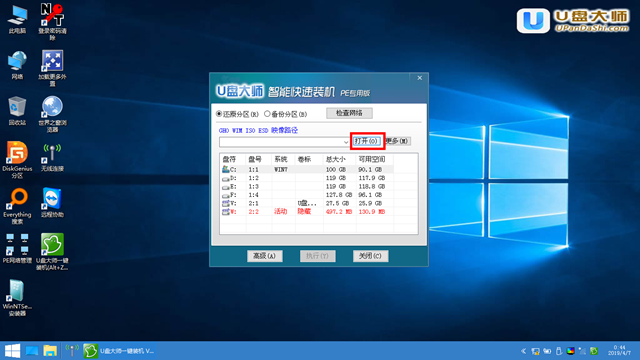
#4. In the pop-up window, first select the GHO directory of the USB boot disk through the drop-down list; then select the WIN7 system image you just copied; confirm the file After the name is correct, click the "Open" button.
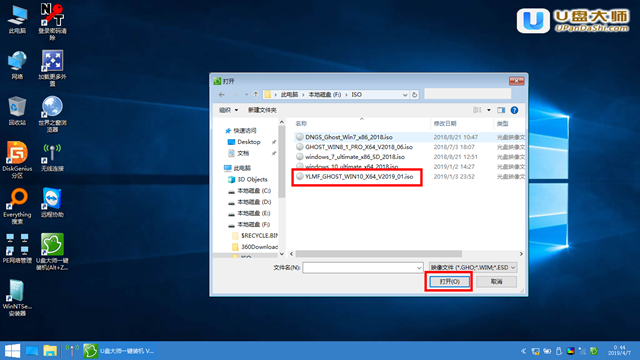
5. If the format is GHO, please skip this step. In the pop-up window interface, click with the mouse to select the WIN7.GHO file. After selecting, click the "OK" button.
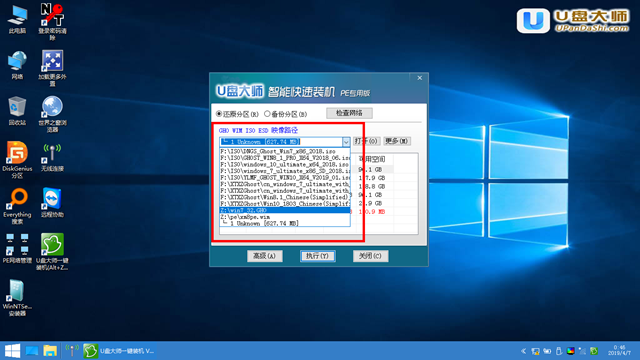
#6. Select the partition to be restored, usually the C: drive is the default, and then click "OK".
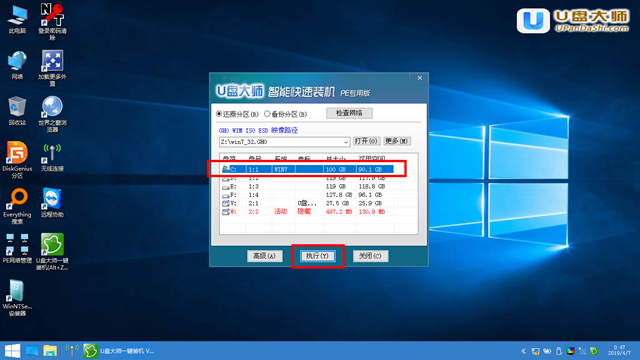
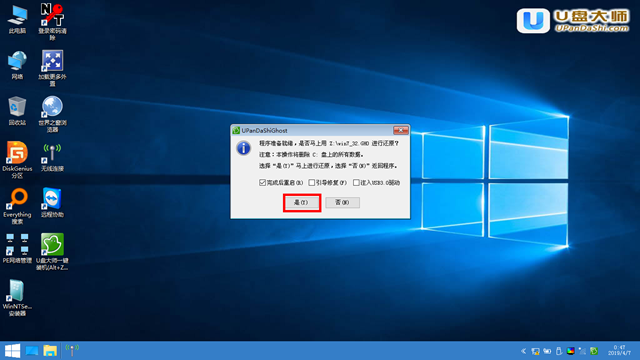
#7. Before starting to restore the system, the software will pop up again to confirm whether you want to continue the operation. After confirming that it is correct, click the "Yes" button.
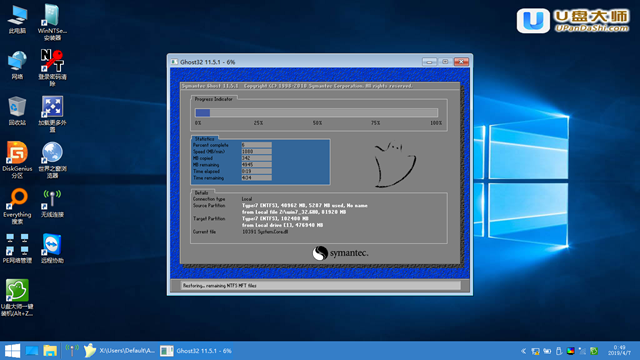
#8. At this time, the Ghost system restore interface will automatically pop up. We wait patiently for Ghost restore to automatically install the WIN7 system.
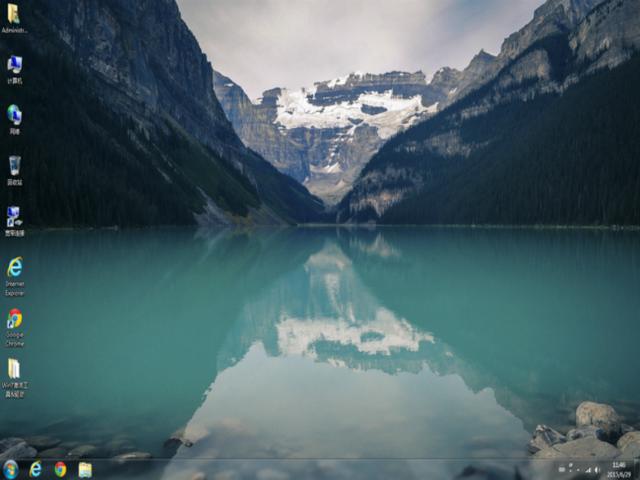
9. After the restoration is completed, unplug the USB disk and automatically install the Windows system. For more computer and network problems, please pay attention to "Brother from North Suzhou
The above is the detailed content of ghou disk installation machine. For more information, please follow other related articles on the PHP Chinese website!

