Home >Web Front-end >Vue.js >Detailed examples to help you play with Vue animation
Detailed examples to help you play with Vue animation
- 青灯夜游forward
- 2022-09-09 20:39:432639browse
Vue provides us with a lot of animation interfaces to facilitate us to achieve animation effects. Transition animations can implement some simple animations. If an animation contains several simple animations, you need to use animation hooks. This article lists several examples, which are often encountered in daily development.

In developing ToC projects, many animations need to be used, such as common routing animations, pop-up box animations and some business animations, etc. This article summarizes the animations learned A summary to facilitate future review. I would be honored if it was helpful to you.
First of all, let’s review the animations provided by Vue to help us quickly achieve the desired animation effect. [Related recommendations: vuejs video tutorial]
Vue animation
CSS transition
to display Take the hidden animation as an example:
<div>
  <button>
    Toggle
  </button>
  <transition>
    <p>hello</p>
  </transition>
</div>
From hiding to showing
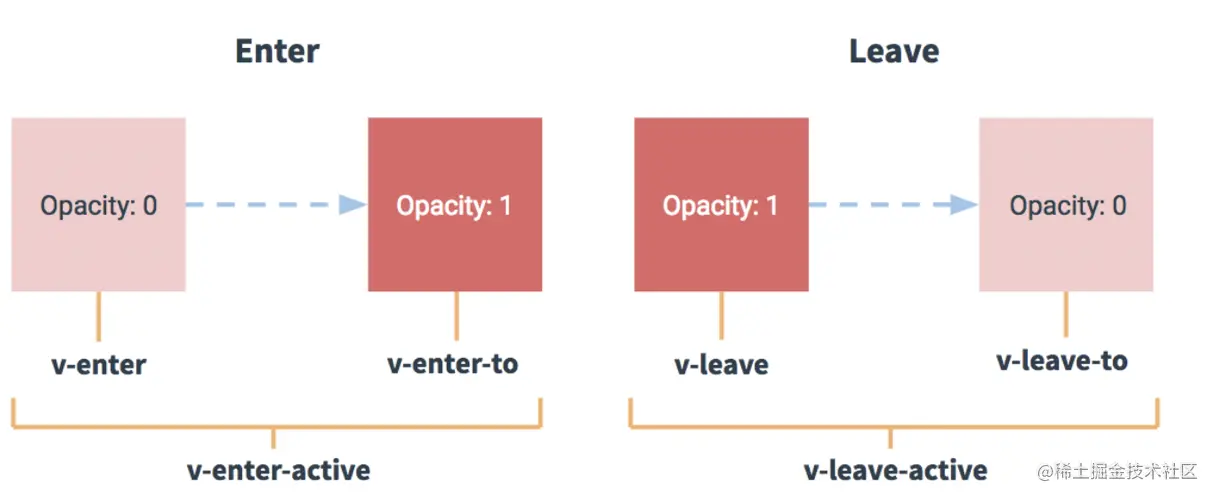
When the animation starts, the P tag is still hidden. At this time, Vue will add two class:
.fade-enter {
   opacity: 0;
}
.fade-enter-active {
   transition: opacity 0.5s;
}

When the animation starts, .fade-enter will be removed (effective before the element is inserted, after the element is inserted removed in the next frame), at this time the opacity of the P tag will return to 1, that is, displayed. At this time, transition will be triggered, and opacity will be detected. changes, animation will be generated. When the animation ends, the class(v-enter-to, v-enter-active) added by Vue will be removed.

How is the above process implemented? It mainly uses the requestAnimationFrame API. We can implement a simple version of animation ourselves, and add or delete a class when generating the next frame to form an animation effect.
nbsp;html>
<title>Document</title>
<style>
.box {
width: 100px;
height: 100px;
background-color: red;
}
.enter {
opacity: 0;
}
.mov {
transition: opacity 5s linear;
}
</style>
<div></div>
<script>
var box = document.getElementById('box')
// 第一帧之后执行
requestAnimationFrame(function() {
box.setAttribute('class', 'box mov')
})
</script>
When the next frame is generated, the enter class will be removed, then the div will be displayed, and transition will be triggered to produce animation effects.
From display to hide
An animation is also generated when hiding, as shown below:

.fade-leave-to {
   opacity: 0;
}
.fade-leave-active {
   transition: opacity 0.5s;
}
Just now The start P tag is displayed because the style of fade-leave (takes effect immediately when the leave transition is triggered and is removed in the next frame) is opacity is 1, executed When reaching the second frame, add fade-leave-to (it will take effect in the next frame after the leave transition is triggered, and at the same time fade-leave will be deleted), at this timeopacity is 0. Since the attribute changes, transition will monitor it and form an animation.
Showing and hiding in this way forms a complete animation.
The principle is that when you change css properties, such as opacity, through a click event, transition will detect the change and form an animation.
CSS Animation
The principle of CSS animation is similar to that of CSS transition. The difference is that in the animation, the v-enter class name will not be deleted immediately after the node is inserted into the DOM, but Deleted when the animationend event is triggered.
<style>
  .bounce-enter-active {
    animation: bounce-in 3s;
  }
  .bounce-leave-active {
    animation: bounce-in 3s reverse;
  }
  @keyframes bounce-in {
    0% {
      transform: scale(0);
    }
    50% {
      transform: scale(1.5);
    }
    100% {
      transform: scale(1);
    }
  }
</style>

<div>
  <button>Toggle show</button>
  <transition>
    <p>
      Lorem ipsum dolor sit amet, consectetur adipiscing elit. Mauris
      facilisis enim libero, at lacinia diam fermentum id. Pellentesque
      habitant morbi tristique senectus et netus.
    </p>
  </transition>
</div>
When we click to change show to false, the class .bounce-leave-active will be added to the P tag, this The class will execute the animation animation, and delete .bounce-leave-active when the animation is completed.
JavaScript hook animation
nbsp;html>
...
<script></script>
<script></script>
<div>
<button>
Toggle
</button>
<transition>
<p>
Demo
</p>
</transition>
</div>
<script>
new Vue({
el: '#demo',
data: {
show: true
},
methods: {
beforeEnter: function(el) {
el.style.opacity = 0
el.style.transformOrigin = 'left'
},
enter: function(el, done) {
Velocity(el, { opacity: 1, fontSize: '1.4em' }, { duration: 1000 })
Velocity(el, { fontSize: '1em' }, { complete: done })
},
leave: function(el, done) {
Velocity(
el,
{ translateX: '15px', rotateZ: '50deg' },
{ duration: 600 }
)
Velocity(
el,
{
rotateZ: '45deg',
translateY: '30px',
translateX: '30px',
opacity: 0
},
{ complete: done }
)
}
}
})
</script>
before-enter: refers to the function executed before the animation;
-
enter: It is the entire animation process. After execution, a done() must be added to tell vue that the execution has been completed; when only JavaScript is used for transition, done must be used for callback in enter and leave. Otherwise, they are called synchronously and the transition is completed immediately.
after-enter: Executed after the animation ends;
Javascript hook animation is generally used for more complex animations, rather than Simple transition animation. Later, we will use a lot of space to illustrate through several examples how to use Javascript hook animation to complete complex animations.
Transition of initial rendering
Because CSS transition animation needs to have a trigger condition, for example, opacity must have a change, if there is no change, it will not will trigger. Then, you can set the transition of the node in the initial rendering through the appear attribute:
<transition>
    <!-- ... -->
</transition>
CSS animation (animation) does not require trigger conditions.
多个元素的过渡
一旦涉及到多个元素的过渡,那么就会出现旧元素和新元素进出的先后问题。<transition></transition> 的默认行为是进入和离开同时发生,但是这样就会产生一些不协调的效果,所以 Vue 提供了过渡模式:
-
in-out:新元素先进行过渡,完成之后当前元素过渡离开(in-out模式不是经常用到,但对于一些稍微不同的过渡效果还是有用的)。 -
out-in:当前元素先进行过渡,完成之后新元素过渡进入(这个用的比较多)。
<transition>
    <!-- ... the buttons ... -->
</transition>
但是这两个模式并不能完全满足实际需要,实际上我们可以定制我们要想的先后效果,比如后台管理系统中有一个面包屑导航栏,当改变路由的时候需要更改面包屑里面的内容,那么这个更改的动画可以让旧的元素向左滑出,新的元素从右边滑入。
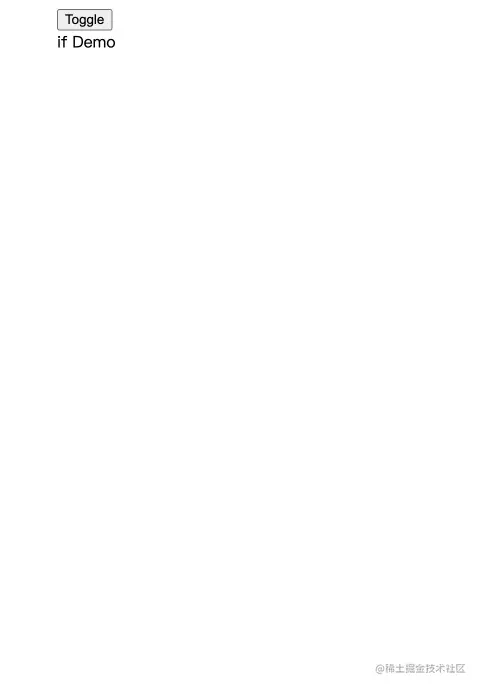
<div>
  <div>
    <button>
      Toggle
    </button>
  </div>

  <transition>
    // 一定要设置key
    <div>
      if Demo
    </div>
    <div>else demo</div>
  </transition>
</div>

<style>
  .cls {
    display: inline-block;
  }
  .fade-enter-active,
  .fade-leave-active {
    transition: all 1s;
    // 这个定位设置很关键
    position: absolute;
  }

  .fade-enter {
    opacity: 0;
    transform: translateX(30px);
  }

  .fade-leave-to {
    opacity: 0;
    transform: translateX(-30px);
  }
</style>

当有相同标签名的元素切换时,需要通过 key attribute 设置唯一的值来标记以让 Vue 区分它们,否则 Vue 为了效率只会替换相同标签内部的内容。即使在技术上没有必要,给在 transition 组件中的多个元素设置 key 是一个更好的实践。
多个组件的过渡
多个组件的过渡简单很多 - 我们不需要使用 key attribute。相反,我们只需要使用动态组件:
<transition>
    <component></component>
</transition>

new Vue({
  el: '#transition-components-demo',
  data: {
    view: 'v-a'
  },
  components: {
    'v-a': {
      template: '<div>Component A</div>'
    },
    'v-b': {
      template: '<div>Component B</div>'
    }
  }
})

.component-fade-enter-active, .component-fade-leave-active {
  transition: opacity .3s ease;
}
.component-fade-enter, .component-fade-leave-to {
  opacity: 0;
}
列表过渡
上面讲的动画都是针对单个节点,或者同一时间渲染多个节点中的一个,那么怎么同时渲染整个列表,比如使用 v-for?
在这种场景中,使用 <transition-group></transition-group> 组件,这个组件的几个特点:
- 不同于
<transition></transition>,它会以一个真实元素呈现:默认为一个<span></span>。你也可以通过tagattribute 更换为其他元素。 - 过渡模式不可用,因为我们不再相互切换特有的元素。
- 内部元素总是需要提供唯一的
keyattribute 值。 - CSS 过渡的类将会应用在内部的元素中,而不是这个组/容器本身。
后面我们会通过一个例子演示如何使用<transition-group></transition-group> 。
案例
路由动画
在后台管理系统中,当路由变化时,对应的组件内容也会发生变化,当在变化时加上一个动画,让整个页面效果更加自然。
<transition>
  // 这里加了key
  <router-view>
</router-view></transition>

computed: {
  key() {
      return this.$route.path
  }
}

.fade-transform-leave-active,
.fade-transform-enter-active {
    transition: all 0.5s;
}

.fade-transform-enter {
    opacity: 0;
    transform: translateX(-30px)
}

.fade-transform-leave-to {
    opacity: 0;
    transform: translateX(30px)
}
H5 页面弹框从底部弹出动画
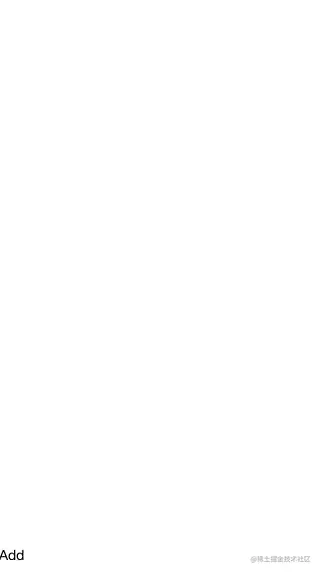
在 H5 页面开发中,一个常用的功能是点击一个按钮,隐藏的内容从屏幕底部弹出,同时弹出的时候有个动画效果,一般是缓慢上升。
<div>
  <transition>
    // 外面一层遮罩
    <div>
      // 这里面才是内容
      <div></div>
    </div>
  </transition>

  <div>
    Add
  </div>
</div>

<style>
  .add {
    position: fixed;
    bottom: 0;
    left: 0;
    text-align: center;
    line-height: 40px;
  }

  .playlist {
    position: fixed;
    z-index: 200;
    top: 0;
    right: 0;
    bottom: 0;
    left: 0;
    background-color: rgba(0, 0, 0, 0.3);
  }
  .list-wrapper {
    position: absolute;
    bottom: 0;
    left: 0;
    width: 100%;
    height: 400px;
    background-color: #333;
  }

  // 针对最外面一层的遮罩
  .list-fade-enter-active,
  .list-fade-leave-active {
    transition: opacity 0.3s;
  }
  // 针对类为list-wrapper的内容
  .list-fade-enter-active .list-wrapper,
  .list-fade-leave-active .list-wrapper {
    transition: all 0.3s;
  }

  .list-fade-enter,
  .list-fade-leave-to {
    opacity: 0;
  }

  // 最开始内容是隐藏的,所以translate3d(0, 100%, 0)
  .list-fade-enter .list-wrapper,
  .list-fade-leave-to .list-wrapper {
    transform: translate3d(0, 100%, 0);
  }
</style>
这个动画有两层,一层是最外层的内容,另一层是最里面部分的内容,效果如下:

列表删除动画
在 H5 页面开发中,如果在一个列表页中删除其中一个子项,要求有一个删除动画效果。
<div>
  <transition-group>
    <li>
      <span></span>
      <span>
        delete
      </span>
    </li>
  </transition-group>
</div>

.item {
  height: 40px;
}
.list-enter-active,
.list-leave-active {
  transition: all 0.1s
}
.list-enter,
.list-leave-to {
  height: 0
}
复杂动画-案例1
看下面的图片,这个动画该怎么实现呢?

一般复杂的动画,并不能用简单的 css 过渡或者 css 动画能实现的,需要使用 javascript钩子动画实现。
针对上面图片的动画进行拆解:
当从底部谈起的时候,页面顶部(向下的箭头和歌曲名称部分)从上往下滑入,同时有个回弹的效果,同时,底部(播放进度条的部分)从下往上滑入,也有一个回弹的效果。
左下角旋转的圆有两个动画效果,一个是从小变大,一个是从左下角滑动到中心部分
圆的旋转动画
代码结构:
<div>
    <transition>
      <div>
        <div>
          // 顶部区域...
        </div>
        <div>
          // 中间区域...
        </div>
        <div>
          // 底部区域...
        </div>
      </div>
    </transition>
    <transition>
      <div>
         // 内容区域...
      </div>
    </transition>
</div>
实现第一个动画效果
// 这是stylus的写法
.normal-enter-active,
.normal-leave-active
  transition: all 0.4s
  .top,
  .bottom
    // 通过这个白塞尔曲线,使得动画有个回弹的效果
    transition: all 0.4s cubic-bezier(0.86, 0.18, 0.82, 1.32)
.normal-enter,
.normal-leave-to
  opacity: 0
  .top
    // 从上往下滑入
    transform: translate3d(0, -100px, 0)
  .bottom
    // 从下往上滑入
    transform: translate3d(0, 100px, 0)
通过第一章节部分的学习,看懂这段动画代码应该不难。
实现第二个动画效果
要实现这个动画效果,必须要计算左下角的圆到中心部分的圆的 x 轴和 y 轴方向上的距离,因为H5页面在不同的手机屏幕下,这个距离是不同的,所以一开始就不能写死,只能通过 javascript 去动态的获取。
// 计算从小圆中心到大圆中心的距离以及缩放比例
_getPosAndScale() {
  const targetWidth = 40
  const paddingLeft = 40
  const paddingBottom = 30
  const paddingTop = 80
  const width = window.innerWidth * 0.8
  const scale = targetWidth / width
  const x = -(window.innerWidth / 2 - paddingLeft)
  const y = window.innerHeight - paddingTop - width / 2 - paddingBottom
  return {
    x,
    y,
    scale
  }
}
这段代码细节可以不用看,只需要知道它是计算左下角小圆的原心到中心部分圆的原心的距离(x, y),以及根据圆的直径获取放大缩小倍数(scale)。
// 这个库可以让我们使用js来创建一个keyframe的动画,为什么要用js来生成呢?这是因为有些变化的属性需要动态的计算,而不是一开始就定好了
import animations from 'create-keyframe-animation'


// 动画钩子
// done:当动画执行完后执行done函数,然后跳到afterEnter钩子函数
enter(el, done) {
  const { x, y, scale } = this._getPosAndScale()
  // 对于大圆来说,进入的时机就是从小圆到小圆
  let animation = {
    0: {
      // 一开始大圆相对于小圆的位置,所以x为负数,y为整数
      transform: `translate3d(${x}px, ${y}px, 0) scale(${scale})`
    },
    // scale: 1.1 这样圆就有个放大后变回原样的效果
    60: {
      transform: 'translate3d(0, 0, 0) scale(1.1)'
    },
    100: {
      transform: 'translate3d(0, 0, 0) scale(1)'
    }
  }
  // 设置animation
  animations.registerAnimation({
    name: 'move',
    animation,
    presets: {
      duration: 400,
      easing: 'linear'
    }
  })
  // 往dom上加上这个animation,并执行动画
  animations.runAnimation(this.$refs.cdWrapper, 'move', done)
},
// 动画结束之后把样式置为空
afterEnter() {
  animations.unregisterAnimation('move')
  this.$refs.cdWrapper.style.animation = ''
},
leave(el, done) {
  this.$refs.cdWrapper.style.transition = 'all 0.4s'
  const { x, y, scale } = this._getPosAndScale()
  this.$refs.cdWrapper.style[
    transform
  ] = `translate3d(${x}px,${y}px,0) scale(${scale})`
  // 这样写的目的是如果没有监听到动画结束的事件,那么我们自己就写一个定时器,400ms后执行done函数
  const timer = setTimeout(done, 400)
  // 监听动画结束
  this.$refs.cdWrapper.addEventListener('transitionend', () => {
    clearTimeout(timer)
    done()
  })
}
这段代码的效果就是大圆的动画效果。当点击小圆的时候,大圆开始进入,进入的过程就是动画的过程。当点击向下的箭头,大圆将消失,消失的过程就是大圆退出的动画过程。
虽然有点复杂,但是也不难看懂,以后我们对于复杂动画可以模仿上面的代码。
那小圆的动画呢?它非常简单,就是一个显示隐藏的动画:
.mini-enter-active,
.mini-leave-active
  transition: all 0.4s
.mini-enter,
.mini-leave-to
  opacity: 0
至此,就完成小圆和大圆的联动动画,整体效果还是很惊艳的。
实现第三个动画
// 模板部分
<div>
  <img  class="image lazy" src="/static/imghwm/default1.png" data-src="currentSong.image" alt="Detailed examples to help you play with Vue animation" >
</div>

// 逻辑部分
// 通过事件来控制playing的值,然后改变img标签的class,从而是动画停止和展示
cdCls() {
   return this.playing ? 'play' : 'play pause'
}

// css部分
.play
  animation: rotate 20s linear infinite
.pause
  animation-play-state: paused

@keyframes rotate
  0%
    transform: rotate(0)
  100%
    transform: rotate(360deg)
复杂动画-案例2
首先对动画进行拆解:
当点击 + 的时候,有一个小圆从右侧向xiang左侧滚动出来到指定的位置,既有滚动的效果,也有从右往左移动的效果。同时,当点击 - 的时候,小圆从左侧滚动到右侧并消失。
当点击 + 的时候,会出现一个小球,这个小球会从点击的位置做一个抛物线运动轨迹到左下角的购物车中。同时,当我连续点击的时候,会出现多个小球同时做抛物线运行出现在屏幕中。
实现第一个动画
通过上面的学习,对这一个动画的实现应该不难。代码如下:
<div>
  // 小圆 -
  <transition>
    <div>0" @click.stop="decrease">
      <span> - </span>
    </div>
  </transition>
  <div>0">{{food.count}}</div>
  // 小圆 +
  <div> + </div>
</div>

.move-enter-active, &.move-leave-active
  transition: all 0.4s linear
.move-enter, &.move-leave-active
  // 外层动画是从右往左运动
  opacity: 0
  transform: translate3d(24px, 0, 0)
  .inner
    // 内层动画是旋转180°
    transform: rotate(180deg)
实现第二个动画
创建小球,因为这个动画就是对小球的动画
<div>
  <div>
    <transition>
      <div>
        <div></div>
      </div>
    </transition>
  </div>
</div>

<script>
function createBalls() {
  let balls = []
  for (let i = 0; i < BALL_LEN; i++) {
    balls.push({ show: false })
  }
  return balls
}

data() {
  return {
    balls: createBalls()
  }
},
</script>
这里创建是10个小球,小球开始的状态都是隐藏的。
点击 + 按钮的时候,触发一个小球弹出
// 点击加号调用这个函数,同时把加号的dom传递,这样就能知道小球运动的起点位置
onAdd(target) {
  // shopCart就是图中底部组件,执行drop函数
  this.$refs.shopCart.drop(target)
},

// 把加号对应的dom传入,并绑定到小球el属性上
drop(el) {
  for (let i = 0; i <p>因为小球的<code>ball.show</code>为true,那么就会触发对应的动画钩子函数,首先触发<code>beforeDrop</code>:</p><pre class="brush:php;toolbar:false">beforeDrop(el) {
  // 取出最后一个小球
  const ball = this.dropBalls[this.dropBalls.length - 1]
  // 获取小球的起点位置,就是在哪个地方点击的加号按钮
  const rect = ball.el.getBoundingClientRect()
  const x = rect.left - 32
  const y = -(window.innerHeight - rect.top - 22)
  // 设置小球的位置,把小球设置到点击加号按钮的那个地方
  el.style.display = ''
  // 外层动画,向下
  el.style.transform = el.style.webkitTransform = `translate3d(0,${y}px,0)`
  const inner = el.getElementsByClassName(innerClsHook)[0]
  // 内层动画向左
  inner.style.transform = inner.style.webkitTransform = `translate3d(${x}px,0,0)`
}接着执行enter事件函数dropping:
dropping(el, done) {
  // 触发浏览器重绘,把beforeDrop事件中设置的小球位置从底部位置移动到点击加号的位置,这样小球就会从上面往下面落下
  this._reflow = document.body.offsetHeight
  // 设置小球落下的终点位置
  el.style.transform = el.style.webkitTransform = `translate3d(0,0,0)`
  const inner = el.getElementsByClassName(innerClsHook)[0]
  inner.style.transform = inner.style.webkitTransform = `translate3d(0,0,0)`
  // 监听动画结束
  el.addEventListener('transitionend', done)
}最后执行after-enter事件函数afterDrop:
afterDrop(el) {
  // 取出第一个小球,设置属性show为false,同时要设置el.style.display = 'none'
  const ball = this.dropBalls.shift()
  if (ball) {
    ball.show = false
    el.style.display = 'none'
  }
}
我们来梳理下流程:
点击加号位置,触发
drop函数,然后把一个隐藏的小球设置为显示状态,存储在dropBalls中,因为用户可以快速点击,所以dropBalls里面可能有多个小球。当把小球状态设置为显示状态,就会触发动画钩子
before-enter,enter,after-enter这三个钩子。before-enter的作用是把小球的位置设置到点击的位置,同时利用offsetHeight触发浏览器重绘,这样就会把小球的位置放在点击的位置。enter的作用就是让小球从点击的位置落下,动画分为两层,一层是向下,另一层是向左,当两者结合就构成了一个从右上角到左下角斜线的动画轨迹,但是一个斜的直线动画轨迹比较丑,这里就使用了时间函数cubic-bezier来改变动画轨迹,使其有一个先向上运动,最后向下运动的抛物线轨迹动画。
.ball
  position: fixed
  left: 32px
  bottom: 22px
  z-index: 200
  transition: all 0.4s cubic-bezier(0.49, -0.29, 0.75, 0.41)
  .inner
    width: 16px
    height: 16px
    border-radius: 50%
    background: $color-blue
    transition: all 0.4s linear
after-enter当小球到达目的后,需要把小球隐藏起来,所以取出第一个小球,然后设置show的属性为false,这样小球就隐藏起来,等待下一次动画执行。
所以函数的执行顺序是:drop -> before-enter -> enter -> after-enter -> drop -> before-enter -> enter -> after-enter...,这样就形成了在页面中同时出现多个小球的动画。
注意:当我们设置
show的属性为false就可以了,但是代码中同时也设置了el.style.display = 'none',如果不设置这个小球消失有一个延迟。
好了,整个 Vue 动画到此就结束了,动画其实是一个比较难的功能,特别是复杂动画。通过上面两个复杂动画可以给我们做一个借鉴,相信你也能写出自己想要的动画效果。
(Learning video sharing: web front-end development, Basic programming video)
The above is the detailed content of Detailed examples to help you play with Vue animation. For more information, please follow other related articles on the PHP Chinese website!
Related articles
See more- Quickly understand the setup execution timing of Vue3 (with code examples)
- Let's talk about how to encapsulate axios in vite+vue3.0+ts?
- Detailed explanation of the difference between reactive and ref in vue3 (source code analysis)
- An article explaining in detail how to introduce SVG icons in Vue3 projects
- Let's talk about how to use Vue3 to build Web Components


