phpmyadmin是一款非常好用的数据库管理界面,尤其适合对数据库操作命令不熟悉的新手。其中phpmyadmin也有很多的配置项,我们今天就来详解一下phpmyadmin的配置文件,也可参考mysql数据库视频教程:mysql教程
phpmyadmin快速入门教程
PHPMyadmin配置文件config.inc.php内容如下,在需要设置的地方增加了相关注释。
下面我就说下怎么安装该工具:
1. phpmyadmin下载
先到网上下载phpmyadmin,再解压到可以访问的web目录下(如果是虚拟空间,可以解压后通过ftp等上传到web目录下),当然您可以修改解压后该文件的名称。
相关教程推荐:
1.《phpMyAdmin最新下载安装视频教程》
2. mysql基础知识(mysql新手教程)
2. 配置config文件
打开libraries下的config.default.php文件,依次找到下面各项,按照说明配置即可:
A.访问网址
$cfg['PmaAbsoluteUri'] = '';
这里填写phpmyadmin的访问网址,如:$cfg['PmaAbsoluteUri'] = 'http://你的站点/phpmyadmin/';
B.mysql主机信息
$cfg['Servers'][$i]['host'] = 'localhost'; // MySQL hostname or IP address
填写localhost或mysql所在服务器的ip地址,如果mysql和该phpmyadmin在同一服务器,则按默认localhost
$cfg['Servers'][$i]['port'] = ''; // MySQL port - leave blank for default port
mysql端口,如果是默认3306,保留为空即可
C.mysql用户名和密码
$cfg['Servers'][$i]['user'] = 'root';
MySQL user 访问phpmyadmin使用的mysql用户名
fg['Servers'][$i]['password'] = '';
MySQL password (only needed对应上述mysql用户名的密码
D.认证方法
$cfg['Servers'][$i]['auth_type'] = 'cookie';
在此有四种模式可供选择:cookie,http,HTTP,config
01:config方式即输入phpmyadmin的访问网址即可直接进入,无需输入用户名和密码,是不安全的,不推荐使用。
02:当该项设置为cookie,http或HTTP时,登录phpmyadmin需要数据用户名和密码进行验证,
具体如下:
PHP安装模式为Apache,可以使用http和cookie;
PHP安装模式为CGI,可以使用cookie
E.短语密码(blowfish_secret)的设置
$cfg['blowfish_secret'] = '';
如果认证方法设置为cookie,就需要设置短语密码,置于设置为什么密码,由您自己决定 ,但是不能留空,否则会在登录phpmyadmin时提示错误 。
好了,到此为止,您已经成功安装了phpmyadmin,简单吧 ,赶快登录体验下吧
说明:
该文档说明的只是安装phpmyadmin的基本配置,关于config.default.php文件中各个配置参数的详细说明可以看其英文注释。
相关视频推荐:
1.《phpMyadmin导入数据库sql文件的方法详解(附视频)》
2.《phpMyadmin导出备份数据库文件的步骤详解(附视频)》
3.《怎么使用phpmyadmin对数据库、数据表进行增删改查等操作?(图文+视频)》
详解版:
phpMyAdmin 就是一种 MySQL 数据库的管理工具,安装该工具后,即可以通过 web 形式直接管理 MySQL 数据,而不需要通过执行系统命令来管理,非常适合对数据库操作命令不熟悉的数据库管理者,下面详细说明该工具的安装方法。
一、下载
1、先到站点下载phpMyAdmin 安装包:http://www.php.cn/xiazai/gongju/97(安装包含各种语言all-languages)
2、再解压到 web 可以访问的目录下,如果是虚拟空间,可以解压后通过 ftp 工具上传到 web 目录下,同时您可以修改解压后该文件的名称(你可以自定义目录名称)。
二、配置
3、打开 /libraries/config.default.php文件(旧版本是根目录下的config.inc.php文件)
用写字板(不要用记事本,这是UTF8编码)进行编辑,按照说明配置即可。
4、查找 $cfg['PmaAbsoluteUri']=‘'; // 修改为你将上传到空间的phpMyAdmin的网址

如:$cfg['PmaAbsoluteUri'] =‘http: // 网站域名/phpmyadmin/';
5、查找 $cfg['Servers'][$i]['host'] =‘localhost'; // 通常用默认,也有例外,可以不用修改
6、查找 $cfg['Servers'][$i]['auth_type'] =‘config'; // 在自己的机子里调试用config;如果在网络上的空间用cookie.
在此有四种模式可供选择:cookie,http,HTTP,config
① config 方式即输入phpMyAdmin 的访问网址即可直接进入,无需输入用户名和密码,是不安全的,不推荐使用。
② 设置cookie,http,HTTP方式,登录 phpMyAdmin 需要数据用户名和密码进行验证。
具体如下:PHP 安装模式为 Apache,可以使用 http 和 cookie;PHP 安装模式为 CGI,可以使用 cookie。
7、查找 $cfg['Servers'][$i]['user'] = ‘root'; // MySQL用户名
8、查找 $cfg['Servers'][$i]['password'] =''; // MySQL 密码 (only needed 留空就可以了)
9、查找 $cfg['Servers'][$i]['only_db'] = ''; // 你只有一个数据就设置一下,设置为你的数据库名;如果你想架设服务器,那么建议留空
10、查找 $cfg['DefaultLang'] = ‘zh'; // 这里是选择语言,zh代表简体中文的意思
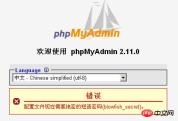
11、查找$cfg['blowfish_secret'] =''; // 如果认证方法设置为cookie,就需要设置短语密码,设置为什么密码,由您自己决定,这里不能留空,否则会在登录 phpMyAdmin 时提示如下图所示的错误。
12、设置完毕后保存,现在可以上传到网络空间上了,浏览http://网站域名/phpmyadmin/测试一下。(输入数据库的用户名及密码就可以了) 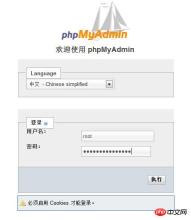
三:常见问题
1. 如果要安装过程中出现:“phpMyAdmin - 错误 缺少 mysqli 扩展。请检查 PHP 配置。”错误。
解决方法如下:
①到phpmyadmin文件夹的\libraries\config.default.php文件中找:$cfg['Servers'][$i]['extension']='mysql';语句。
②如果有找到$cfg['Servers'][$i]['extension']='mysql';这句,就继续查找下面这句$cfg['Servers'][$i]['extension']='<span style="COLOR: #ff0000">mysqli</span>'; 并把其的注释去掉。
③如果没有找到$cfg['Servers'][$i]['extension']='mysql';这句,就把$cfg['Servers'][$i]['extension']='<span style="COLOR: #ff0000">mysqli</span>';语句,改成$cfg['Servers'][$i]['extension']='mysql'; 语句。(即确保 " mysql " 值能生效)
<?php /* $Id: config.inc.php,v 1.204.2.1 2003/10/10 14:24:24 nijel Exp $ */
// vim: expandtab sw=4 ts=4 sts=4:
/**
* phpMyAdmin Configuration File
*
* All directives are explained in Documentation.html
*/
/**
* Sets the php error reporting - Please do not change this line!
*/
if (!isset($old_error_reporting)) {
error_reporting(E_ALL);
@ini_set('display_errors', '1');
}
/**
* Your phpMyAdmin url
*
* Complete the variable below with the full url ie
* http://www.your_web.net/path_to_your_phpMyAdmin_directory/
*
* It must contain characters that are valid for a URL, and the path is
* case sensitive on some Web servers, for example Unix-based servers.
*
* In most cases you can leave this variable empty, as the correct value
* will be detected automatically. However, we recommend that you do
* test to see that the auto-detection code works in your system. A good
* test is to browse a table, then edit a row and save it. There will be
* an error message if phpMyAdmin cannot auto-detect the correct value.
*
* If the auto-detection code does work properly, you can set to TRUE the
* $cfg['PmaAbsoluteUri_DisableWarning'] variable below.
*/
$cfg['PmaAbsoluteUri'] = '';-----这里设置你的phpmyadmin的URL,如:http://localhost/phpmyadmin/
/**
* Disable the default warning about $cfg['PmaAbsoluteUri'] not being set
* You should use this if and ONLY if the PmaAbsoluteUri auto-detection
* works perfectly.
*/
$cfg['PmaAbsoluteUri_DisableWarning'] = FALSE;
/**
* Disable the default warning that is displayed on the DB Details Structure page if
* any of the required Tables for the relationfeatures could not be found
*/
$cfg['PmaNoRelation_DisableWarning'] = FALSE;
/**
* The 'cookie' auth_type uses blowfish algorithm to encrypt the password. If
* at least one server configuration uses 'cookie' auth_type, enter here a
* passphrase that will be used by blowfish.
$cfg['blowfish_secret'] = '';-----设定好root密码后这里也要填写
/**
* Server(s) configuration
*/
$i = 0;
// The $cfg['Servers'] array starts with $cfg['Servers'][1]. Do not use $cfg['Servers'][0].
// You can disable a server config entry by setting host to ''.
$i++;
$cfg['Servers'][$i]['host'] = 'localhost'; // MySQL hostname or IP address----这里可以设定远程MySQL服务器IP地址
$cfg['Servers'][$i]['port'] = ''; // MySQL port - leave blank for default port-----默认为3306
$cfg['Servers'][$i]['socket'] = ''; // Path to the socket - leave blank for default socket
$cfg['Servers'][$i]['connect_type'] = 'tcp'; // How to connect to MySQL server ('tcp' or 'socket')-----连接MySQL服务器的方式
$cfg['Servers'][$i]['compress'] = FALSE; // Use compressed protocol for the MySQL connection
// (requires PHP >= 4.3.0)-----是否使用压缩协议,PHP版本须>= 4.3.0
$cfg['Servers'][$i]['controluser'] = ''; // MySQL control user settings
// (this user must have read-only
$cfg['Servers'][$i]['controlpass'] = ''; // access to the "mysql/user"
// and "mysql/db" tables)-----MySQL控制用户设定,该用户只对mysql数据库下的user和db表有完全权限
$cfg['Servers'][$i]['auth_type'] = 'config';
// Authentication method (config, http or cookie based)?-----如果PHP安装模式为Apache,可以使用http和cookie;如果PHP安装模式为CGI,可以使用cookie;默认为config,是不安全的,不推荐。
$cfg['Servers'][$i]['user'] = 'root'; // MySQL user-----MySQL连接用户
$cfg['Servers'][$i]['password'] = '';
// MySQL password (only needed with 'config' auth_type)-----MySQL连接密码,建议在安装好PHP和MySQL后,先用phpmyadmin设定root密码,然后在这里填写
$cfg['Servers'][$i]['only_db'] = ''; // If set to a db-name, only
// this db is displayed
// at left frame
// It may also be an array
// of db-names-----如果在这里设定一个数据库的名字,那么登陆后框架左边将只显示这个数据库
$cfg['Servers'][$i]['verbose'] = ''; // Verbose name for this host - leave blank to show the hostname
$cfg['Servers'][$i]['pmadb'] = ''; // Database used for Relation, Bookmark and PDF Features
// (see scripts/create_tables.sql)
// - leave blank for no support
// DEFAULT: 'phpmyadmin'
$cfg['Servers'][$i]['bookmarktable'] = ''; // Bookmark table
// - leave blank for no bookmark support
// DEFAULT: 'pma_bookmark'
$cfg['Servers'][$i]['relation'] = ''; // table to describe the relation between links (see doc)
// - leave blank for no relation-links support
// DEFAULT: 'pma_relation'
$cfg['Servers'][$i]['table_info'] = ''; // table to describe the display fields
// - leave blank for no display fields support
// DEFAULT: 'pma_table_info'
$cfg['Servers'][$i]['table_coords'] = ''; // table to describe the tables position for the PDF schema
// - leave blank for no PDF schema support
// DEFAULT: 'pma_table_coords'
$cfg['Servers'][$i]['pdf_pages'] = ''; // table to describe pages of relationpdf
// - leave blank if you don't want to use this
// DEFAULT: 'pma_pdf_pages'
$cfg['Servers'][$i]['column_info'] = ''; // table to store column information
// - leave blank for no column comments/mime types
// DEFAULT: 'pma_column_info'
$cfg['Servers'][$i]['history'] = ''; // table to store SQL history
// - leave blank for no SQL query history
// DEFAULT: 'pma_history'
$cfg['Servers'][$i]['verbose_check'] = TRUE; // set to FALSE if you know that your pma_* tables
// are up to date. This prevents compatibility
// checks and thereby increases performance.
$cfg['Servers'][$i]['AllowDeny']['order'] // Host authentication order, leave blank to not use
= '';
$cfg['Servers'][$i]['AllowDeny']['rules'] // Host authentication rules, leave blank for defaults
= array();
$i++;
$cfg['Servers'][$i]['host'] = '';
$cfg['Servers'][$i]['port'] = '';
$cfg['Servers'][$i]['socket'] = '';
$cfg['Servers'][$i]['connect_type'] = 'tcp';
$cfg['Servers'][$i]['compress'] = FALSE;
$cfg['Servers'][$i]['controluser'] = '';
$cfg['Servers'][$i]['controlpass'] = '';
$cfg['Servers'][$i]['auth_type'] = 'config';
$cfg['Servers'][$i]['user'] = 'root';
$cfg['Servers'][$i]['password'] = '';
$cfg['Servers'][$i]['only_db'] = '';
$cfg['Servers'][$i]['verbose'] = '';
$cfg['Servers'][$i]['pmadb'] = ''; // 'phpmyadmin' - see scripts/create_tables.sql
$cfg['Servers'][$i]['bookmarktable'] = ''; // 'pma_bookmark'
$cfg['Servers'][$i]['relation'] = ''; // 'pma_relation'
$cfg['Servers'][$i]['table_info'] = ''; // 'pma_table_info'
$cfg['Servers'][$i]['table_coords'] = ''; // 'pma_table_coords'
$cfg['Servers'][$i]['pdf_pages'] = ''; // 'pma_pdf_pages'
$cfg['Servers'][$i]['column_info'] = ''; // 'pma_column_info'
$cfg['Servers'][$i]['history'] = ''; // 'pma_history'
$cfg['Servers'][$i]['verbose_check'] = TRUE;
$cfg['Servers'][$i]['AllowDeny']['order']
= '';
$cfg['Servers'][$i]['AllowDeny']['rules']
= array();
$i++;
$cfg['Servers'][$i]['host'] = '';
$cfg['Servers'][$i]['port'] = '';
$cfg['Servers'][$i]['socket'] = '';
$cfg['Servers'][$i]['connect_type'] = 'tcp';
$cfg['Servers'][$i]['compress'] = FALSE;
$cfg['Servers'][$i]['controluser'] = '';
$cfg['Servers'][$i]['controlpass'] = '';
$cfg['Servers'][$i]['auth_type'] = 'config';
$cfg['Servers'][$i]['user'] = 'root';
$cfg['Servers'][$i]['password'] = '';
$cfg['Servers'][$i]['only_db'] = '';
$cfg['Servers'][$i]['verbose'] = '';
$cfg['Servers'][$i]['pmadb'] = ''; // 'phpmyadmin' - see scripts/create_tables.sql
$cfg['Servers'][$i]['bookmarktable'] = ''; // 'pma_bookmark'
$cfg['Servers'][$i]['relation'] = ''; // 'pma_relation'
$cfg['Servers'][$i]['table_info'] = ''; // 'pma_table_info'
$cfg['Servers'][$i]['table_coords'] = ''; // 'pma_table_coords'
$cfg['Servers'][$i]['pdf_pages'] = ''; // 'pma_pdf_pages'
$cfg['Servers'][$i]['column_info'] = ''; // 'pma_column_info'
$cfg['Servers'][$i]['history'] = ''; // 'pma_history'
$cfg['Servers'][$i]['verbose_check'] = TRUE;
$cfg['Servers'][$i]['AllowDeny']['order']
= '';
$cfg['Servers'][$i]['AllowDeny']['rules']
= array();
// If you have more than one server configured, you can set $cfg['ServerDefault']
// to any one of them to autoconnect to that server when phpMyAdmin is started,
// or set it to 0 to be given a list of servers without logging in
// If you have only one server configured, $cfg['ServerDefault'] *MUST* be
// set to that server.[color]=red]-----是否显示所有的MySQL服务器
$cfg['ServerDefault'] = 1; // Default server (0 = no default server)
$cfg['Server'] = '';
unset($cfg['Servers'][0]);
/**
* Other core phpMyAdmin settings
*/
$cfg['OBGzip'] = 'auto'; // use GZIP output buffering if possible (TRUE|FALSE|'auto')-----有必要的话是否使用GZIP输出缓冲
$cfg['PersistentConnections'] = FALSE; // use persistent connections to MySQL database-----是否使用MySQL持久连接,即pconnect
$cfg['ExecTimeLimit'] = 300; // maximum execution time in seconds (0 for no limit)-----最大脚本执行时间,单位:秒
$cfg['SkipLockedTables'] = FALSE; // mark used tables, make possible to show
// locked tables (since MySQL 3.23.30)
$cfg['ShowSQL'] = TRUE; // show SQL queries as run-----运行查询时显示SQL查询语句
$cfg['AllowUserDropDatabase'] = FALSE; // show a 'Drop database' link to normal users-----是否对普通用户显示“删除数据库”连接
$cfg['Confirm'] = TRUE; // confirm 'DROP TABLE' & 'DROP DATABASE'-----删除数据表/库前是否出现确认提示框
$cfg['LoginCookieRecall'] = TRUE; // recall previous login in cookie auth. mode or not-----是否收回先前cookie认证模式的cookie
$cfg['UseDbSearch'] = TRUE; // whether to enable the "database search" feature
// or not
$cfg['IgnoreMultiSubmitErrors'] = FALSE; // if set to true, PMA continues computing multiple-statement queries
// even if one of the queries failed
$cfg['VerboseMultiSubmit'] = TRUE; // if set to true, PMA will show the affected rows of EACH statement on
// multiple-statement queries. See the read_dump.php file for hardcoded
// defaults on how many queries a statement may contain!
$cfg['AllowArbitraryServer'] = FALSE; // allow login to any user entered server in cookie based auth
2. 在日常开发中,有的人可能会不小心将我们www下的phpmyadmin给删除了,这时我们再通http://localhost/phpMyAdmin/访问我们的数据库就没办法访问了,页面会提示Not Found了,也就是文件不存在,我们已经删除了phpmyadmin怎么会存在呢?对吧!
第一步:
我们可以到phpmyadmin的官网来下载phpmyadmin进行安装
地址:https://www.phpmyadmin.net/
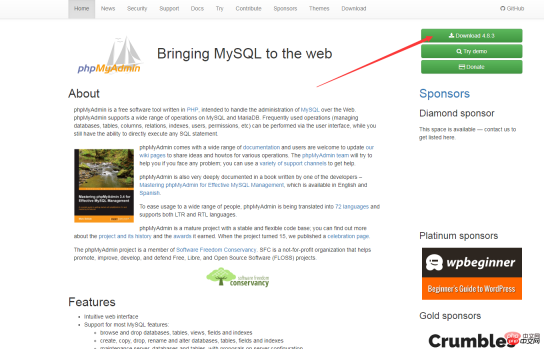
那么我们如何来重新下载安装呢?
第二步:
将解压到C盘根目录下,重命名为phpMyAdmin,进入该文件夹,找到config.sample.inc.php,改名为config.inc.php,编辑器打开改文件。找到下列代码
$cfg['blowfish_secret'] = ''
改为
$cfg['blowfish_secret'] = 'c4ca4238a0b923820dcc509a6f75849b';//一个长字符串密码就行
保存退出
第三步:
进入到环境中的apache的conf文件夹下,新建一个phpmyadmin.conf文件,代码编辑器打开,加入下列代码:
Alias /phpmyadmin "c:/phpMyAdmin/"
<directory>
Options Indexes FollowSymLinks MultiViews
AllowOverride all
Require all granted
php_admin_value upload_max_filesize 128M
php_admin_value post_max_size 128M
php_admin_value max_execution_time 360
php_admin_value max_input_time 360
</directory>
保存退出
第四步:
在该文件夹内找到配置文件httdp.conf,用文本编辑器打开,在末尾增加一行以下代码:
Include conf/phpmyadmin.conf
保存退出
第五步:最后一步将apache重启一下
这个时候我们再来访问http://localhost/phpmyadmin/已经恢复正常了!
相关推荐:
1. PHPMyAdmin中使用sql-parser进行SQL语法分析
2. phpmyadmin用法教程
3. MySQL可视化管理工具phpMyAdmin的学习
php免费学习视频:立即使用
踏上前端学习之旅,开启通往精通之路!从前端基础到项目实战,循序渐进,一步一个脚印,迈向巅峰!