




wcf本质上提供一个跨进程、跨机器以致跨网络的服务调用 ,本示例中 主要实现了计算器的功能,大部分的函数来源于网上别人的帖子,这叫站在巨人的肩膀上,o(∩_∩)o哈哈~,但是为了加深自己的对wcf的理解,因此决定自己在写个类似的demo,把写demo中遇到的问题展现出来,我相信对于初识wcf的程序员了来说,也会遇到各种问题。好了步入正题。
WCF 分为四个部分 1、契约(Interface)2、服务契约(Service)3、WCF 宿主程序(控制台或者IIS) 4、客户端(Client)
本人在写wcf的时候喜欢将四个部分分别拆分成不同的类库来管理。
1、契约
契约是对外开放的接口,暴露给客户端的函数名称首先,新建一个wcf服务库,名称为Interface,如图所示:
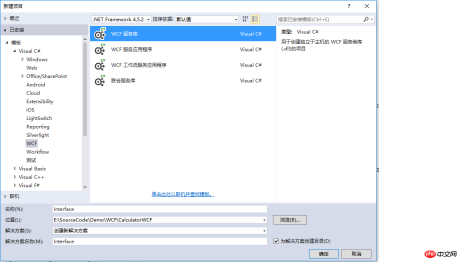
删掉程序中默认的文件(App.config,IService1.cs,Service1.cs),新建ICalculator
namespace Interface
{
    [ServiceContract(Name = "CalculatorService", Namespace = "")]public interface ICalculator
    {
        [OperationContract]double Add(double x, double y);

        [OperationContract]double Subtract(double x, double y);

        [OperationContract]double Multiply(double x, double y);

        [OperationContract]double Divide(double x, double y);

    }
}
2、新建服务契约,其实就是实现契约的类 ,添加"新建项目"->WCF->"WCF服务库" (如 第一步新建契约是一样的步骤),类库的名称为Service,
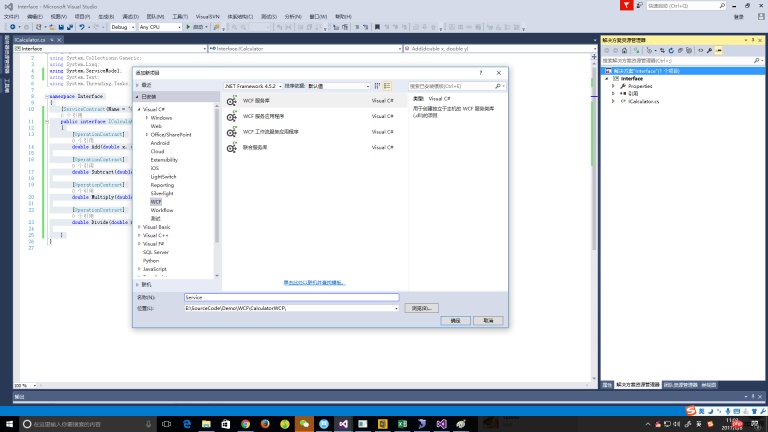
新建成功后,删除默认文件(App.config,IService1.cs,Service1.cs),添加引用"Interface" 类库,新建CalculatorService 并实现ICalculator
namespace Service
{
    [ServiceBehavior(InstanceContextMode = InstanceContextMode.PerCall, ConcurrencyMode = ConcurrencyMode.Multiple)]public class CalculatorService : ICalculator
    {public double Add(double x, double y)
        {return x + y;
        }public double Subtract(double x, double y)
        {return x - y;
        }public double Multiply(double x, double y)
        {return x * y;
        }public double Divide(double x, double y)
        {return x / y;
        }
    }
3、新建WCF宿主程序,WCF的契约和服务契约都已经建完,但是还需要一个程序来承载这些接口供外部程序调用,因此称之为宿主程序,宿主程序可以部署在IIS上,也可以用控制台程序运行方便调试,下面我就介绍用控制台程序作为宿主程序。在解决方案的名称右键添加"控制台程序" 名称为Hosting ,添加对Interface和Service的引用
实现wcf对外开放有两种方式,一种方式是配置文件,将所有的WCF信息都写到配置文件中
第一种:WCF的相关信息写到配置文件(App.config)中
<?xml  version="1.0" encoding="utf-8"?><configuration>
  <startup>
    <supportedruntime></supportedruntime>
  </startup>
  <system.servicemodel>
    <services>
      <service>
        <endpoint>
        </endpoint>
        <endpoint>
        </endpoint>
        <endpoint></endpoint>
        <endpoint></endpoint>
        <host>
          <baseaddresses>
            <add></add>
            <add></add>
          </baseaddresses>
        </host>
      </service>
    </services>
    <behaviors>
      <servicebehaviors>
        <behavior>
          <servicemetadata></servicemetadata>
          <servicedebug></servicedebug>
        </behavior>
      </servicebehaviors>
    </behaviors>
  </system.servicemodel></configuration>
Main方法的主要代码如下,
    public class Program
    {internal static ServiceHost host = null;static void Main(string[] args)
        {using (ServiceHost host = new ServiceHost(typeof(CalculatorService)))
            {

                host.Opened += delegate{
                    Console.WriteLine("CalculaorService已经启动,按任意键终止服务!");
                };
                host.Open();
                Console.ReadLine();
            }
        }
    }
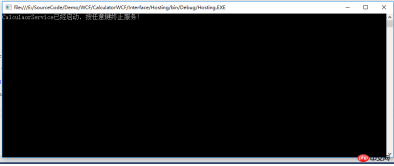
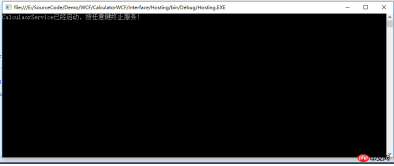
运行控制台程序,如下图所示:
第二种:写一个WCFHelper类,添加帮助类的时候,一定引用System.Runtime.Serialization ,并且删掉App.config 对wcf的配置,否则会报错代码如下:
 public static class WCFHelper
    {public static string IP { get; set; }public static int Port { get; set; }static WCFHelper()
        {try{
                IP = System.Environment.MachineName;// ConfigurationManager.AppSettings["ServiceIP"];//                Port = int.Parse(ConfigurationManager.AppSettings["ServicePort"]);
            }catch{

            }

            EndpointAddress.Add(BindingProtocol.Http, "http://{0}:{1}/{2}/{3}");
            EndpointAddress.Add(BindingProtocol.NetTcp, "net.tcp://{0}:{1}/{2}/{3}");//EndpointAddress.Add(BindingProtocol.NetMsmq, "net.msmq://{0}:{1}/" + schema + "/{2}");//EndpointAddress.Add(BindingProtocol.NetPipe, "net.pipe://{0}:{1}/" + schema + "/{2}");try{
                httpBinding = new BasicHttpBinding();
                httpBinding.MaxBufferSize = 200065536;
                httpBinding.MaxReceivedMessageSize = 200065536;
                httpBinding.CloseTimeout = new TimeSpan(0, 10, 0);
                httpBinding.OpenTimeout = new TimeSpan(0, 10, 0);
                httpBinding.ReceiveTimeout = new TimeSpan(0, 10, 0);
                httpBinding.SendTimeout = new TimeSpan(0, 1, 0);

                httpBinding.Security.Mode = BasicHttpSecurityMode.None;

                httpBinding.ReaderQuotas.MaxDepth = 64;
                httpBinding.ReaderQuotas.MaxStringContentLength = 2147483647;
                httpBinding.ReaderQuotas.MaxArrayLength = 16384;
                httpBinding.ReaderQuotas.MaxBytesPerRead = 4096;
                httpBinding.ReaderQuotas.MaxNameTableCharCount = 16384;
            }catch{
                httpBinding = new BasicHttpBinding();
            }try{
                tcpBinding = new NetTcpBinding();
                tcpBinding.CloseTimeout = new TimeSpan(0, 1, 0);
                tcpBinding.OpenTimeout = new TimeSpan(0, 1, 0);
                tcpBinding.ReceiveTimeout = new TimeSpan(0, 10, 0);
                tcpBinding.SendTimeout = new TimeSpan(0, 1, 0);
                tcpBinding.TransactionFlow = false;
                tcpBinding.TransferMode = TransferMode.Buffered;
                tcpBinding.TransactionProtocol = TransactionProtocol.OleTransactions;
                tcpBinding.HostNameComparisonMode = HostNameComparisonMode.StrongWildcard;
                tcpBinding.ListenBacklog = 100000;
                tcpBinding.MaxBufferPoolSize = 524288;
                tcpBinding.MaxBufferSize = 200065536;
                tcpBinding.MaxConnections = 2000;
                tcpBinding.MaxReceivedMessageSize = 200065536;
                tcpBinding.PortSharingEnabled = true;

                tcpBinding.Security.Mode = SecurityMode.None;

                tcpBinding.ReaderQuotas.MaxDepth = 64;
                tcpBinding.ReaderQuotas.MaxStringContentLength = 2147483647;
                tcpBinding.ReaderQuotas.MaxArrayLength = 163840000;
                tcpBinding.ReaderQuotas.MaxBytesPerRead = 4096;
                tcpBinding.ReaderQuotas.MaxNameTableCharCount = 16384;

                tcpBinding.ReliableSession.Ordered = true;
                tcpBinding.ReliableSession.InactivityTimeout = new TimeSpan(0, 10, 0);
                tcpBinding.ReliableSession.Enabled = false;
            }catch{
                tcpBinding = new NetTcpBinding();
            }
        }private static BasicHttpBinding httpBinding;public static BasicHttpBinding HttpBinding
        {get{return httpBinding;
            }
        }private static NetTcpBinding tcpBinding;public static NetTcpBinding TcpBinding
        {get{return tcpBinding;
            }
        }public static EndpointAddress GetEndpointAddress(string ip, int port, string serviceSchema, string serviceName, BindingProtocol protocol)
        {string address = EndpointAddress[protocol];
            address = string.Format(address, ip, port, serviceSchema, serviceName);return new EndpointAddress(address);
        }public static EndpointAddress GetEndpointAddress(string serviceSchema, string serviceName, BindingProtocol protocol)
        {string address = EndpointAddress[protocol];
            address = string.Format(address, IP, Port, serviceSchema, serviceName);return new EndpointAddress(address);
        }public static Uri GetBaseAddress(string ip, int port, string serviceSchema, string serviceName, BindingProtocol protocol)
        {string address = EndpointAddress[protocol];

            address = string.Format(address, ip, port + 1, serviceSchema, serviceName);return new Uri(address);
        }public static Uri GetBaseAddress(string serviceSchema, string serviceName, BindingProtocol protocol)
        {string address = EndpointAddress[protocol];

            address = string.Format(address, IP, Port + 1, serviceSchema, serviceName);return new Uri(address);
        }private readonly static Dictionary<bindingprotocol> EndpointAddress = new Dictionary<bindingprotocol>();public enum BindingProtocol
        {
            Http = 1,
            NetTcp = 2,//NetPipe = 3,//NetMsmq = 4        }
    }</bindingprotocol></bindingprotocol>
将 宿主程序中的main方法改成如下:

    static void Main(string[] args)
        {
            WCFHelper.IP = "127.0.0.10";
            WCFHelper.Port = 9999;

            Uri httpUri = WCFHelper.GetBaseAddress(WCFHelper.IP, WCFHelper.Port, "Calculator", "Inspect", WCFHelper.BindingProtocol.Http);using (ServiceHost host = new ServiceHost(typeof(CalculatorService), httpUri))
            {
                host.AddServiceEndpoint(typeof(ICalculator), WCFHelper.TcpBinding, WCFHelper.GetEndpointAddress(WCFHelper.IP, WCFHelper.Port, "Calculator", "InspectService", WCFHelper.BindingProtocol.NetTcp).Uri.AbsoluteUri);
                ServiceMetadataBehavior behavior = new ServiceMetadataBehavior();#if DEBUGbehavior.HttpGetEnabled = true;#elsebehavior.HttpGetEnabled = false;#endifhost.Description.Behaviors.Add(behavior);
                host.Opened += delegate{
                    Console.WriteLine("CalculaorService已经启动,按任意键终止服务!");
                };
                host.Open();

                Console.ReadLine();
            }
}
4、宿主程序建完了,WCF的所有锲约已经对外可以访问了,那现在需要建立Client 去调用wcf程序了 ,
首先,编译宿主程序Host,找到bin/debug/ Host.exe 右键管理员打开,如果如下图证明服务已经于宁
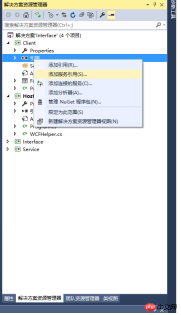
其次,在解决方案名称->右键添加Winform程序 新建WinForm 程序,添加"服务引用"
添加服务引用 (此引用方式,是以"3、添加宿主程序" ->"第二种 WCF帮助类的方式")
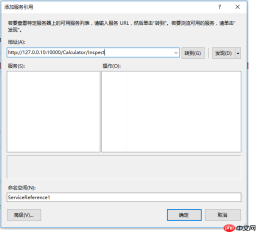
点击“转到” 系统发现WCF服务,如下图所示:
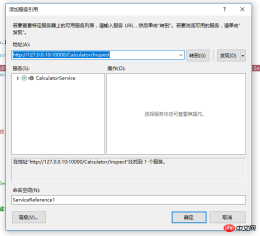
点击确定,就成功的将wcf的引用了,下面开始调用WCF的程序了,例如调用Add方法,代码如下:
 ServiceReference1.CalculatorServiceClient client = new ServiceReference1.CalculatorServiceClient();
            textBox3.Text = client.Add(double.Parse(textBox1.Text), double.Parse(textBox2.Text)).ToString();
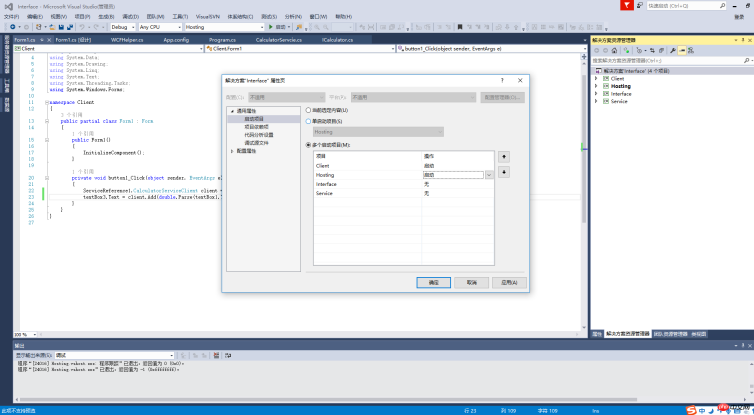
到此为止,wcf程序已经完成的跑通了,记得 调试的时候已经把宿主程序和client程序同时运行。
如果闲麻烦,vs 支持同时启动多个项目,可以同时把client 和host同时启动