Home >Web Front-end >H5 Tutorial >HTML5 drag and drop (Drag and Drop) detailed explanation and examples
HTML5 drag and drop (Drag and Drop) detailed explanation and examples
- 高洛峰Original
- 2017-02-09 15:09:551918browse
Introduction
Drag-and-drop is a common feature where you grab an object and then drag it to another location.
In HTML5, drag and drop is part of the standard, and any element can be dragged and dropped.
First click on a small example: execute JavaScript when the user starts dragging the
element
<p draggable="true" ondragstart="myFunction(event)">拖动我!</p>
Tips: Links and images are draggable by default and do not require the draggable attribute.
Definition and usage
The following events will be triggered during the drag and drop process:
Trigger events on the drag target (source element):
ondragstart - triggered when the user starts dragging the element
ondrag - triggered when the element is being dragged
ondragend - triggered when the user finishes dragging the element
Event triggered when the target is released :
ondragenter - This event is triggered when the object being dragged by the mouse enters the scope of its container
ondragover - When a dragged object is dragged within the scope of another object's container Trigger this event
ondragleave - This event is triggered when the object being dragged by the mouse leaves the scope of its container
ondrop - This event is triggered when the mouse button is released during a dragging process
Browser support
Internet Explorer 9+, Firefox, Opera, Chrome, and Safari support dragging.
Note: Safari 5.1.2 does not support dragging; when dragging an element, the ondragover event will be triggered every 350 milliseconds.
Example
First paste the code, and then explain one by one:
<!DOCTYPE html>
<html>
<head>
<title>HTML5拖拽</title>
<meta charset="utf-8">
<style>
#div1 {width:350px;height:70px;padding:10px;border:1px solid #aaaaaa;}
</style>
</head>
<body>
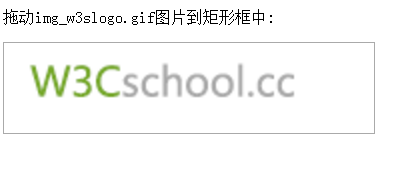
<p>拖动img_w3slogo.gif图片到矩形框中:</p>
<div id="div1" ondrop="drop(event)" ondragover="allowDrop(event)"></div>
<br>
<img id="drag1" src="images/img_w3slogo.gif" draggable="true" ondragstart="drag(event)" width="300" height="56">

<script>
function allowDrop(ev){
    ev.preventDefault();
}

function drag(ev){
    ev.dataTransfer.setData("Text",ev.target.id);
}

function drop(ev){
    ev.preventDefault();
    var data=ev.dataTransfer.getData("Text");
    ev.target.appendChild(document.getElementById(data));
}

</script>
</body>
</html>
The page effect before dragging is:

Let’s analyze the meaning of the above code separately.
Set the element to be draggable
First, in order to make the element draggable, set the draggable attribute to true:
<img draggable="true">
What to drag - ondragstart and setData()
Then, specify what happens when the element is dragged.
In the above example, the ondragstart attribute calls a function, drag(event), which specifies the data to be dragged.
dataTransfer.setData() method sets the data type and value of the dragged data:
function drag(ev)
{
    ev.dataTransfer.setData("Text",ev.target.id);
}
In this example, the data type is "Text" and the value is the id of the draggable element ( "drag1").
Where to put it - ondragover
The ondragover event specifies where to place the dragged data.
By default, data/elements cannot be placed into other elements. If we need to allow placement, we must prevent the default handling of the element.
This is done by calling the event.preventDefault() method of the ondragover event:
event.preventDefault()
Placement - ondrop
When the dragged data is placed, the drop event will occur.
In the above example, the ondrop attribute calls a function, drop(event):
function drop(ev)
{
    ev.preventDefault();
    var data=ev.dataTransfer.getData("Text");
    ev.target.appendChild(document.getElementById(data));
}
Code explanation:
Call preventDefault() to prevent the browser from modifying the data The default processing (the default behavior of the drop event is to open as a link)
Get the dragged data through the dataTransfer.getData("Text") method. This method will return any data set to the same type in the setData() method.
The dragged data is the id of the dragged element ("drag1")
Append the dragged element to the placed element (target element)
The result of the implementation is as shown in the figure :

dataTransfer object
During the drag operation, we can use the dataTransfer object to transfer data so that the data can be processed at the end of the drag operation. Perform other operations.
Object properties:
dropEffect: Sets or returns the drag-and-drop behavior allowed to occur on the drag-and-drop target. If the drag-and-drop behavior set here is no longer among the multiple drag-and-drop behaviors set by the effectAllowed property, the drag-and-drop operation will fail. The attribute value is only allowed to be one of the four values "null", "copy", "link" and "move".
effectAllowed: Sets or returns the dragging behavior allowed for the dragged element. The property values can be set to "none", "copy", "copyLink", "copyMove", "link", "linkMove", "move", "all" and "uninitialized".
items: This property returns the DataTransferItems object, which represents the drag data.
types: This property returns a DOMStringList object, which includes all types of data stored in dataTransfer.
Object method:
setData(format,data): Assign data in the specified format to the dataTransfer object. The parameter format defines the format of the data, which is the type of data, and data is the data to be assigned.
getData(format): Get data in the specified format from the dataTransfer object. format represents the data format and data is the data.
clearData([format]): Delete data in the specified format from the dataTransfer object. The parameter is optional. If not given, all data in the object will be deleted.
addElement(element): Add a custom icon
setDragImage(element,x,y):设置拖放操作的自定义图标。其中element设置自定义图标,x设置图标与鼠标在水平方向上的距离,y设置图标与鼠标在垂直方向上的距离。
Identify what is draggable
function dragstart_handler(ev) {
 console.log("dragStart");
 // Add the target element's id to the data transfer object
 ev.dataTransfer.setData("text/plain", ev.target.id);
}

<body>
 <p id="p1" draggable="true" ondragstart="dragstart_handler(event);">This element is draggable.</p>
</body>
Define the drag's data
function dragstart_handler(ev) {
  // Add the drag data
  ev.dataTransfer.setData("text/plain", ev.target.id);
  ev.dataTransfer.setData("text/html", "<p>Example paragraph</p>");
  ev.dataTransfer.setData("text/uri-list", "http://developer.mozilla.org");
}
Define the drag image
function dragstart_handler(ev) {
  // Create an image and then use it for the drag image.
  // NOTE: change "example.gif" to an existing image or the image
  // will not be created and the default drag image will be used.
  var img = new Image();
  img.src = 'example.gif';
  ev.dataTransfer.setDragImage(img, 10, 10);
}
Define the drag effect
function dragstart_handler(ev) {  // Set the drag effect to copy
  ev.dataTransfer.dropEffect = "copy";
}
Define a drop zone
function dragover_handler(ev) {
 ev.preventDefault();
 // Set the dropEffect to move
 ev.dataTransfer.dropEffect = "move"
}
function drop_handler(ev) {
 ev.preventDefault();
 // Get the id of the target and add the moved element to the target's DOM
 var data = ev.dataTransfer.getData("text");
 ev.target.appendChild(document.getElementById(data));
}
<body>
 <div id="target" ondrop="drop_handler(event);" ondragover="dragover_handler(event);">Drop Zone</div>
</body>
火狐浏览器拖拽问题
但是进行到这儿在火狐浏览器中发现一个问题:
html5的拖拽,用了preventDefault防止弹出新页面,但在火狐下不管用?
解决办法:
document.body.ondrop = function (event) {
    event.preventDefault();
    event.stopPropagation();
}
更多HTML5 拖放(Drag 和 Drop)详解与实例相关文章请关注PHP中文网!
Related articles
See more- AlloyTouch full-screen scrolling plug-in creates a smooth H5 page in 30 seconds
- HTML5 actual combat and analysis of touch events (touchstart, touchmove and touchend)
- Detailed explanation of image drawing examples in HTML5 canvas 9
- Regular expressions and new HTML5 elements
- How to combine NodeJS and HTML5 to drag and drop multiple files to upload to the server

