Home >Software Tutorial >Computer Software >How to do extended stroke effect in PS_Introduction to the method of adding white edges to character graphics in PS
How to do extended stroke effect in PS_Introduction to the method of adding white edges to character graphics in PS
- WBOYWBOYWBOYWBOYWBOYWBOYWBOYWBOYWBOYWBOYWBOYWBOYWBOriginal
- 2024-06-02 21:45:301171browse
How to easily create PS extended stroke effect? In this guide, PHP editor Yuzai will introduce you to a simple and easy-to-understand method that allows you to add exquisite stroke effects to images or character graphics in PS. Whether you're highlighting a specific element or enhancing a visual effect, this tutorial will guide you step-by-step through the process, making it easy to achieve professional-grade strokes. Read on to find out more!
1. After inserting the picture material, click the subject button in the selection menu

2. After selecting the character, find the modification column in the selection menu again and click the expand button

3. In the expanded selection window, change the expansion amount to 20 pixels and click OK to save.

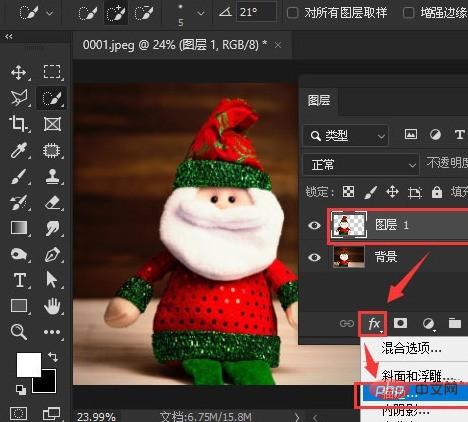
4. Press the keyboard Use the Ctrl J key to copy the layer, click the stroke button in the fx options

5. Set the stroke size to 10 pixels, select white as the color, and click OK to save

The above is the detailed content of How to do extended stroke effect in PS_Introduction to the method of adding white edges to character graphics in PS. For more information, please follow other related articles on the PHP Chinese website!
Related articles
See more- How to change the material of bedding in Kujiale_How to change the material of bedding in Kujiale
- How to use modified line in sai_Using the modified line method in sai
- Graphic and text method for creating mask animation in Flash
- A simple way to enter fractions in Geometry Sketchpad
- How to deal with the thickening of the cursor in the MathType input box

