Heim >Web-Frontend >js-Tutorial >Ausführliche Erklärung von Bootstrap, dem besten Front-End-Framework im Jahr 2018
Ausführliche Erklärung von Bootstrap, dem besten Front-End-Framework im Jahr 2018
- PHPzOriginal
- 2018-02-01 10:34:334511Durchsuche
Bootstrap basiert auf HTML, CSS und JAVASCRIPT und wird zur Entwicklung responsiver Layout- und Mobile-First-WEB-Projekte verwendet. Bootstrap hat basierend auf JQuery weitere personalisierte Verbesserungen vorgenommen, um einen eigenen, einzigartigen Website-Stil zu schaffen, und ist mit den meisten jQuery-Plug-Ins kompatibel. Machen Sie die Frontend-Entwicklung schneller und einfacher.
Grundstruktur: Bootstrap bietet eine Grundstruktur mit einem Rastersystem, Linkstilen und Hintergründen.
CSS: Bootstrap verfügt über die folgenden Funktionen: globale CSS-Einstellungen, Definition grundlegender HTML-Elementstile, erweiterbare Klassen und ein erweitertes Rastersystem.
Komponenten: Bootstrap enthält mehr als ein Dutzend wiederverwendbare Komponenten zum Erstellen von Bildern, Dropdown-Menüs, Navigation, Warnfeldern, Popup-Feldern und mehr.
JavaScript-Plug-ins: Bootstrap enthält mehr als ein Dutzend benutzerdefinierte jQuery-Plug-ins. Sie können alle Plug-Ins direkt oder einzeln einbinden.
Anpassung: Sie können Bootstrap-Komponenten, LESS-Variablen und jQuery-Plug-Ins anpassen, um Ihre eigene Version zu erhalten.
[Verwandte Videoempfehlungen: Bootstrap-Tutorial]
1. Bootstrap-Basisvorlage
<!DOCTYPE html> <html lang="zh-CN"> <head> <meta charset="utf-8"> <!--让浏览器使用最新的IE内核进行渲染页面--> <meta http-equiv="X-UA-Compatible" content="IE=edge"> <!--设置视口宽度等于当前设备宽度,默认缩放比为1--> <meta name="viewport" content="width=device-width, initial-scale=1"> <!-- 上述3个meta标签*必须*放在最前面,任何其他内容都*必须*跟随其后! --> <title>Bootstrap 101 Template</title> <!-- 导入Bootstrap核心CSS文件 --> <link href="css/bootstrap.css" rel="external nofollow" rel="stylesheet"> <!-- HTML5 shim and Respond.js for IE8 support of HTML5 elements and media queries --> <!-- WARNING: Respond.js doesn't work if you view the page via file:// --> <!-- ①<!--[if lt IE 9]>…… <![endif]- ->这一对标签用于检测当前浏览器的版本,lt表示小于,gt表示大写。所以这句话作用是,当浏览器版本低于IE9执行。 ②html5shiv:解决ie9以下浏览器对html5新增标签的不识别,并导致CSS不起作用的问题。 ③respond.min:让不支持css3 Media Query的浏览器包括IE6-IE8等其他浏览器支持查询。 --> <!--[if lt IE 9]> <script src="https://cdn.bootcss.com/html5shiv/3.7.3/html5shiv.min.js"></script> <script src="https://cdn.bootcss.com/respond.js/1.4.2/respond.min.js"></script> <![endif]--> </head> <body> <h1>你好!</h1> <script src="js/jquery-3.1.1.js"></script> <!-- 导入BootStrap的JS插件 ①如果不使用BootStrap提供的JS插件,则这个JS文件无需导入; ②BootStrap的JS插件功能依赖JQuery,因此这个JS必须在JQuery之后导入; --> <script src="js/bootstrap.min.js"></script> </body> </html>
Kopieren Sie die über dem HTML-Code ist dies die einfachste Bootstrap-Seite. Es ist wichtig zu beachten, dass alle JavaScript-Plugins für Bootstrap von jQuery abhängen, sodass jQuery vor Bootstrap eingeführt werden muss.
2. Komponenten
Bootstrap enthält eine Fülle von Webkomponenten. Basierend auf diesen Komponenten können Sie schnell eine schöne und voll funktionsfähige Website erstellen. Es umfasst die folgenden Komponenten:
Dropdown-Menü, Schaltflächengruppe, Schaltflächen-Dropdown-Menü, Navigation, Navigationsleiste, Pfadnavigation, Paginierung, Layout, Miniaturansichten, Warndialog, Fortschrittsbalken, Medienobjekte usw .
2.1 Schriftsymbole
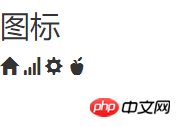
bootstrap bietet standardmäßig mehr als 200 Symbole. Wir können diese Symbole über Span-Tags verwenden:
<h3>图标</h3>
 <span class="glyphicon glyphicon-home"></span>
 <span class="glyphicon glyphicon-signal"></span>
 <span class="glyphicon glyphicon-cog"></span>
 <span class="glyphicon glyphicon-apple"></span>
Sehen wir uns den Effekt an:
2.2 Schaltflächen
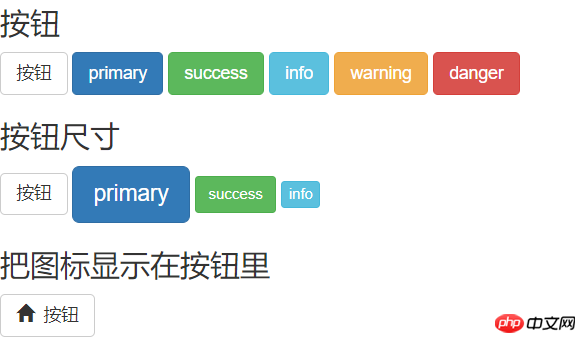
< Das Tag ;button> wird zum Erstellen von Schaltflächen verwendet, und Bootstrap bietet umfangreiche Schaltflächenstile. Zusätzlich zur Standardgröße der Schaltfläche bietet Bootstrap auch drei Parameter zum Anpassen der Schaltflächengröße, nämlich: btn-lg, btn-sm und btn-xs.
<h3>按钮</h3>
 <button type="button" class="btn btn-default">按钮</button>
 <button type="button" class="btn btn-primary">primary</button>
 <button type="button" class="btn btn-success">success</button>
 <button type="button" class="btn btn-info">info</button>
 <button type="button" class="btn btn-warning">warning</button>
 <button type="button" class="btn btn-danger">danger</button>
 <h3>按钮尺寸</h3>
 <button type="button" class="btn btn-default">按钮</button>
 <button type="button" class="btn btn-primary btn-lg">primary</button>
 <button type="button" class="btn btn-success btn-sm">success</button>
 <button type="button" class="btn btn-info btn-xs">info</button>
 <h3>把图标显示在按钮里</h3>
 <button type="button" class="btn btn-default"><span class="glyphicon glyphicon-home"></span>  按钮</button>
Wirkung:
2.3 Dropdown-Menü
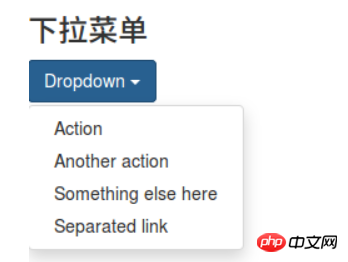
Das Dropdown-Menü ist eine der häufigsten Interaktionen, Bootstrap verleiht uns einen schönen Stil.
 <h3>下拉菜单</h3>
 <p class="dropdown">
 <button class="btn btn-primary dropdown-toggle" type="button" id="dropdownMenu1" data-toggle="dropdown" aria-expanded="true">
 Dropdown
 <span class="caret"></span>
 </button>
 <ul class="dropdown-menu" role="menu" aria-labelledby="dropdownMenu1">
 <li role="presentation"><a role="menuitem" tabindex="-1" href="#" rel="external nofollow" rel="external nofollow" rel="external nofollow" rel="external nofollow" rel="external nofollow" rel="external nofollow" rel="external nofollow" rel="external nofollow" rel="external nofollow" rel="external nofollow" rel="external nofollow" rel="external nofollow" rel="external nofollow" >Action</a></li>
 <li role="presentation"><a role="menuitem" tabindex="-1" href="#" rel="external nofollow" rel="external nofollow" rel="external nofollow" rel="external nofollow" rel="external nofollow" rel="external nofollow" rel="external nofollow" rel="external nofollow" rel="external nofollow" rel="external nofollow" rel="external nofollow" rel="external nofollow" rel="external nofollow" >Another action</a></li>
 <li role="presentation"><a role="menuitem" tabindex="-1" href="#" rel="external nofollow" rel="external nofollow" rel="external nofollow" rel="external nofollow" rel="external nofollow" rel="external nofollow" rel="external nofollow" rel="external nofollow" rel="external nofollow" rel="external nofollow" rel="external nofollow" rel="external nofollow" rel="external nofollow" >Something else here</a></li>
 <li role="presentation"><a role="menuitem" tabindex="-1" href="#" rel="external nofollow" rel="external nofollow" rel="external nofollow" rel="external nofollow" rel="external nofollow" rel="external nofollow" rel="external nofollow" rel="external nofollow" rel="external nofollow" rel="external nofollow" rel="external nofollow" rel="external nofollow" rel="external nofollow" >Separated link</a></li>
 </ul>
 </p>
Sehen Sie sich den Effekt an:
2.4 Eingabefeld
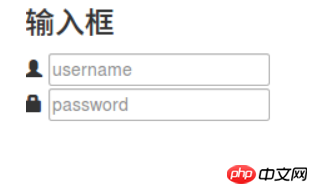
Erstellen Sie es über
 <h3>输入框</h3>
 <p class="input-group">
 <span class="glyphicon glyphicon-user"></span>
 <input type="text" placeholder="username">
 </p>
 <p class="input-group">
 <span class="glyphicon glyphicon-lock"></span>
 <input type="password" placeholder="password">
 </p>
Rendering:
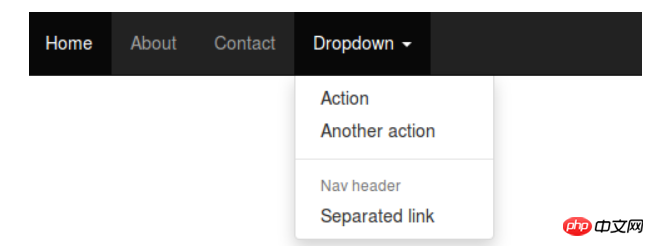
2.5 Navigationsleiste
Die Navigationsleiste ist als Orientierungshilfe für die gesamte Website unerlässlich.
 <h3>导航栏</h3>
 <nav class="navbar navbar-inverse navbar-fixed-top">
 <p id="navbar" class="navbar-collapse collapse">
 <ul class="nav navbar-nav">
 <li class="active"><a href="#" rel="external nofollow" rel="external nofollow" rel="external nofollow" rel="external nofollow" rel="external nofollow" rel="external nofollow" rel="external nofollow" rel="external nofollow" rel="external nofollow" rel="external nofollow" rel="external nofollow" rel="external nofollow" rel="external nofollow" >Home</a></li>
 <li><a href="#about" rel="external nofollow" >About</a></li>
 <li><a href="#contact" rel="external nofollow" >Contact</a></li>
 <li class="dropdown">
 <a href="#" rel="external nofollow" rel="external nofollow" rel="external nofollow" rel="external nofollow" rel="external nofollow" rel="external nofollow" rel="external nofollow" rel="external nofollow" rel="external nofollow" rel="external nofollow" rel="external nofollow" rel="external nofollow" rel="external nofollow" class="dropdown-toggle" data-toggle="dropdown" role="button" aria-expanded="false">Dropdown <span class="caret"></span></a>
 <ul class="dropdown-menu" role="menu">
 <li><a href="#" rel="external nofollow" rel="external nofollow" rel="external nofollow" rel="external nofollow" rel="external nofollow" rel="external nofollow" rel="external nofollow" rel="external nofollow" rel="external nofollow" rel="external nofollow" rel="external nofollow" rel="external nofollow" rel="external nofollow" >Action</a></li>
 <li><a href="#" rel="external nofollow" rel="external nofollow" rel="external nofollow" rel="external nofollow" rel="external nofollow" rel="external nofollow" rel="external nofollow" rel="external nofollow" rel="external nofollow" rel="external nofollow" rel="external nofollow" rel="external nofollow" rel="external nofollow" >Another action</a></li>
 <li class="pider"></li>
 <li class="dropdown-header">Nav header</li>
 <li><a href="#" rel="external nofollow" rel="external nofollow" rel="external nofollow" rel="external nofollow" rel="external nofollow" rel="external nofollow" rel="external nofollow" rel="external nofollow" rel="external nofollow" rel="external nofollow" rel="external nofollow" rel="external nofollow" rel="external nofollow" >Separated link</a></li>
 </ul>
 </li>
 </ul>
 </p><!--/.nav-collapse -->
 </p>
 </nav>
Was ist die Wirkung?
2.6 Formulare
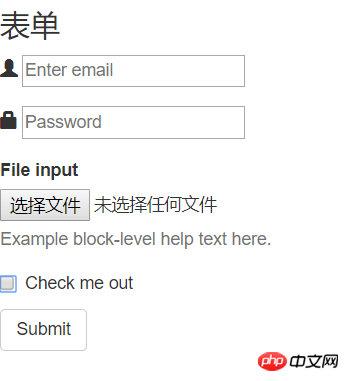
Die Übertragung von Daten zwischen Menschen und Systemen erfordert Formulare vollständig. Zum Beispiel Übermittlung von Registrierungs-/Anmeldeinformationen, Übermittlung von Abfragebedingungen usw. Verwenden Sie das Tag
, um ein Formular zu erstellen.<h3>表单</h3> <form> <p class="form-group"> <span class="glyphicon glyphicon-user"></span> <input type="email" id="exampleInputEmail1" placeholder="Enter email"> </p> <p class="form-group"> <span class="glyphicon glyphicon-lock"></span> <input type="password" id="exampleInputPassword1" placeholder="Password"> </p> <p class="form-group"> <label for="exampleInputFile">File input</label> <input type="file" id="exampleInputFile"> <p class="help-block">Example block-level help text here.</p> </p> <p class="checkbox"> <label> <input type="checkbox"> Check me out </label> </p> <button type="submit" class="btn btn-default">Submit</button> </form>
Die Wirkung ist wie folgt:
2.7 Warnbox
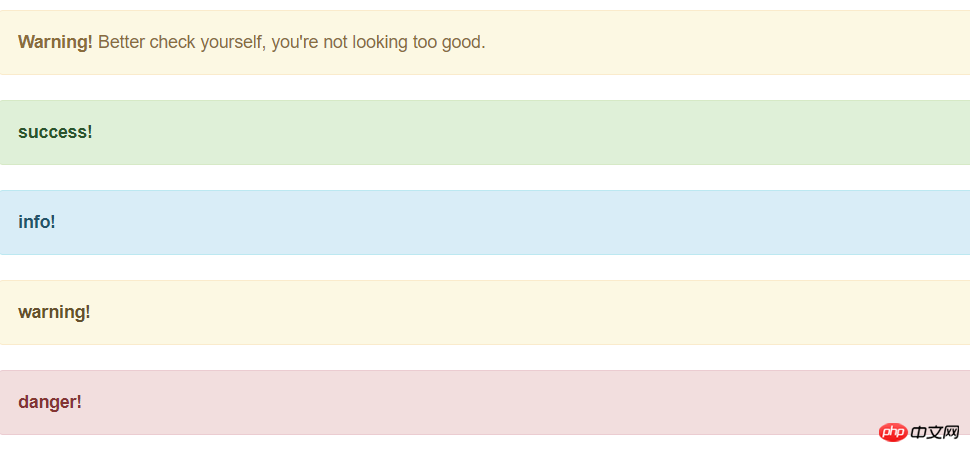
Die Warnbox ist ein wichtiges Mittel für das System Informationen vermitteln und Benutzern Orientierung geben. Es gibt kein Tag für die Warnbox. Mit den von Bootstrap bereitgestellten Stilen können Sie sofort eine schöne Warnbox erstellen.
 <h3>警告框</h3>
 <p class="alert alert-warning alert-dismissible" role="alert">
 <button type="button" class="close" data-dismiss="alert" aria-label="Close"><span aria-hidden="true">×</span></button>
 <strong>Warning!</strong> Better check yourself, you're not looking too good.
 </p>
 <p class="alert alert-success" role="alert">
 <a href="#" rel="external nofollow" rel="external nofollow" rel="external nofollow" rel="external nofollow" rel="external nofollow" rel="external nofollow" rel="external nofollow" rel="external nofollow" rel="external nofollow" rel="external nofollow" rel="external nofollow" rel="external nofollow" rel="external nofollow" class="alert-link">success!</a>
 </p>
 <p class="alert alert-info" role="alert">
 <a href="#" rel="external nofollow" rel="external nofollow" rel="external nofollow" rel="external nofollow" rel="external nofollow" rel="external nofollow" rel="external nofollow" rel="external nofollow" rel="external nofollow" rel="external nofollow" rel="external nofollow" rel="external nofollow" rel="external nofollow" class="alert-link">info!</a>
 </p>
 <p class="alert alert-warning" role="alert">
 <a href="#" rel="external nofollow" rel="external nofollow" rel="external nofollow" rel="external nofollow" rel="external nofollow" rel="external nofollow" rel="external nofollow" rel="external nofollow" rel="external nofollow" rel="external nofollow" rel="external nofollow" rel="external nofollow" rel="external nofollow" class="alert-link">warning!</a>
 </p>
 <p class="alert alert-danger" role="alert">
 <a href="#" rel="external nofollow" rel="external nofollow" rel="external nofollow" rel="external nofollow" rel="external nofollow" rel="external nofollow" rel="external nofollow" rel="external nofollow" rel="external nofollow" rel="external nofollow" rel="external nofollow" rel="external nofollow" rel="external nofollow" class="alert-link">danger!</a>
 </p>
Rendering:
2.8 Fortschrittsbalken
Die Verarbeitung des Systems erfordert häufig, dass Benutzer warten, und der Fortschrittsbalken ermöglicht es Benutzern Die Verarbeitung des Systems wahrzunehmen und dadurch die Toleranz zu erhöhen.
 <h3>进度条</h3>
 <p class="progress">
 <p class="progress-bar" role="progressbar" aria-valuenow="70" aria-valuemin="0" aria-valuemax="100" style="width: 60%;">
 70%
 </p>
 </p>
3. Bootstrap-Grid-System
Zunächst müssen wir verstehen, was ein Grid-System ist! Schauen Sie nach unten↓

Bootstrap bietet ein reaktionsfähiges, mobiles, flüssiges Rastersystem. Wenn die Bildschirm- oder Ansichtsfenstergröße zunimmt, unterteilt das System es automatisch in bis zu 12 Spalten. Es enthält benutzerfreundliche vordefinierte Klassen und leistungsstarke Mixins zum Generieren semantischerer Layouts.
Das Rastersystem wird verwendet, um Seitenlayouts durch eine Reihe von Zeilen und Spalten zu erstellen, und unsere Inhalte können in diesen erstellten Layouts platziert werden. Hier ist eine Einführung in die Funktionsweise des Bootstrap-Rastersystems:
„Row“ muss in .container (feste Breite) oder .container-fluid (100 % Breite) enthalten sein, um ihm die entsprechende Ausrichtung und Polsterung zu verleihen .
Erstellen Sie eine Reihe von „Spalten“ in horizontaler Richtung durch „Zeilen“.
你的内容应当放置于“列(column)”内,并且,只有“列(column)”可以作为行(row)”的直接子元素。
类似 .row 和 .col-xs-4 这种预定义的类,可以用来快速创建栅格布局。Bootstrap 源码中定义的 mixin 也可以用来创建语义化的布局。
通过为“列(column)”设置 padding 属性,从而创建列与列之间的间隔(gutter)。通过为 .row 元素设置负值 margin 从而抵消掉为 .container 元素设置的 padding,也就间接为“行(row)”所包含的“列(column)”抵消掉了padding。
栅格系统中的列是通过指定1到12的值来表示其跨越的范围。例如,三个等宽的列可以使用三个 .col-xs-4 来创建。
如果一“行(row)”中包含了的“列(column)”大于 12,多余的“列(column)”所在的元素将被作为一个整体另起一行排列。
栅格类适用于与屏幕宽度大于或等于分界点大小的设备 , 并且针对小屏幕设备覆盖栅格类。 因此,在元素上应用任何 .col-md-*栅格类适用于与屏幕宽度大于或等于分界点大小的设备 , 并且针对小屏幕设备覆盖栅格类。 因此,在元素上应用任何 .col-lg-*不存在, 也影响大屏幕设备。
3.1媒体查询
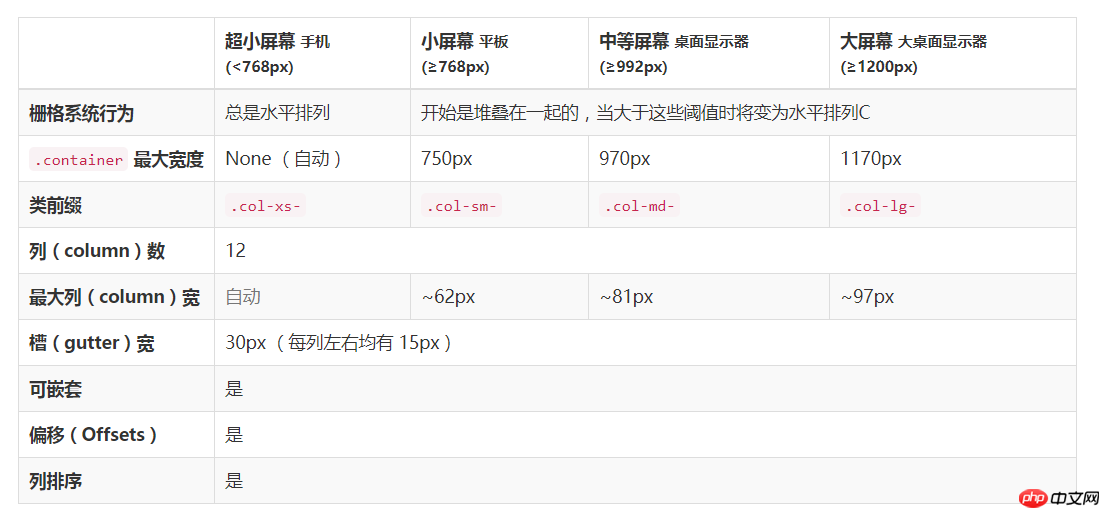
在栅格系统中,我们在 Less 文件中使用以下媒体查询(media query)来创建关键的分界点阈值。
/* 超小屏幕(手机,小于 768px) */
/* 没有任何媒体查询相关的代码,因为这在 Bootstrap 中是默认的( Bootstrap 是移动设备优先) */
/* 小屏幕(平板,大于等于 768px) */
@media (min-width: @screen-sm-min) { ... }
/* 中等屏幕(桌面显示器,大于等于 992px) */
@media (min-width: @screen-md-min) { ... }
/* 大屏幕(大桌面显示器,大于等于 1200px) */
@media (min-width: @screen-lg-min) { ... }
3.2栅格参数
<p class="row">
 <p class="col-md-1">.col-md-1</p>
 <p class="col-md-1">.col-md-1</p>
 <p class="col-md-1">.col-md-1</p>
 <p class="col-md-1">.col-md-1</p>
 <p class="col-md-1">.col-md-1</p>
 <p class="col-md-1">.col-md-1</p>
 <p class="col-md-1">.col-md-1</p>
 <p class="col-md-1">.col-md-1</p>
 <p class="col-md-1">.col-md-1</p>
 <p class="col-md-1">.col-md-1</p>
 <p class="col-md-1">.col-md-1</p>
 <p class="col-md-1">.col-md-1</p>
</p>
<p class="row">
 <p class="col-md-8">.col-md-8</p>
 <p class="col-md-4">.col-md-4</p>
</p>
<p class="row">
 <p class="col-md-4">.col-md-4</p>
 <p class="col-md-4">.col-md-4</p>
 <p class="col-md-4">.col-md-4</p>
</p>
<p class="row">
 <p class="col-md-6">.col-md-6</p>
 <p class="col-md-6">.col-md-6</p>
</p>

输入上面的代码就可以实现上图的样式,是不是已经对栅格系统有所了解了,我们继续往下看↓
3.3响应式列重置
即便有给出的栅格class,你也不免会碰到一些问题,例如,在某些阈值时,某些列可能会出现比别的列高的情况。为了克服这一问题,建议联合使用 .clearfix 和响应式工具类。
<p class="row">
 <p class="col-xs-6 col-sm-3">.col-xs-6 .col-sm-3</p>
 <p class="col-xs-6 col-sm-3">.col-xs-6 .col-sm-3</p>
 <p class="clearfix visible-xs-block"></p>
 <p class="col-xs-6 col-sm-3">.col-xs-6 .col-sm-3</p>
 <p class="col-xs-6 col-sm-3">.col-xs-6 .col-sm-3</p>
</p>
除了列在分界点清除响应, 您可能需要 重置偏移, 后推或前拉某个列。
<p class="row"> <p class="col-sm-5 col-md-6">.col-sm-5 .col-md-6</p> <p class="col-sm-5 col-sm-offset-2 col-md-6 col-md-offset-0">.col-sm-5 .col-sm-offset-2 .col-md-6 .col-md-offset-0</p> </p> <p class="row"> <p class="col-sm-6 col-md-5 col-lg-6">.col-sm-6 .col-md-5 .col-lg-6</p> <p class="col-sm-6 col-md-5 col-md-offset-2 col-lg-6 col-lg-offset-0">.col-sm-6 .col-md-5 .col-md-offset-2 .col-lg-6 .col-lg-offset-0</p> </p> <h2 style="margin: 8px 0px 0px; padding: 0px; font-weight: bold; font-size: 16px; line-height: 28px; max-width: 100%; color: #59c3f9; min-height: 32px; border-bottom-width: 1.5px; border-bottom-style: solid; border-color: #59c3f9; text-align: justify;"><span style="font-family: 'Microsoft YaHei'; font-size: 14px;"><span class="autonum" style="background-color: #59c3f9; color: #ffffff; display: block; float: left; line-height: 20px; margin: 0px 8px 0px 0px; max-width: 100%; padding: 4px 10px; word-wrap: break-word !important;" title="" src-title="">3.2.1</span><span style="font-size: 16px;"><strong class="135brush" style="border-color: #59c3f9; color: inherit;" data-brushtype="text">内部类作为事件监听器</strong></span></span></h2>

3.4列偏移
使用 .col-md-offset-* 类可以将列向右侧偏移。这些类实际是通过使用 * 选择器为当前元素增加了左侧的边距(margin)。例如,.col-md-offset-4 类将 .col-md-4 元素向右侧偏移了4个列(column)的宽度。
<p class="row">
 <p class="col-md-4">.col-md-4</p>
 <p class="col-md-4 col-md-offset-4">.col-md-4 .col-md-offset-4</p>
</p>
<p class="row">
 <p class="col-md-3 col-md-offset-3">.col-md-3 .col-md-offset-3</p>
 <p class="col-md-3 col-md-offset-3">.col-md-3 .col-md-offset-3</p>
</p>
<p class="row">
 <p class="col-md-6 col-md-offset-3">.col-md-6 .col-md-offset-3</p>
</p>

3.5嵌套列
为了使用内置的栅格系统将内容再次嵌套,可以通过添加一个新的 .row 元素和一系列 .col-sm-* 元素到已经存在的 .col-sm-* 元素内。被嵌套的行(row)所包含的列(column)的个数不能超过12(其实,没有要求你必须占满12列)。
<p class="row">
 <p class="col-sm-9">
 Level 1: .col-sm-9
 <p class="row">
 <p class="col-xs-8 col-sm-6">
 Level 2: .col-xs-8 .col-sm-6
 </p>
 <p class="col-xs-4 col-sm-6">
 Level 2: .col-xs-4 .col-sm-6
 </p>
 </p>
 </p>
</p>

3.6列排序
通过使用 .col-md-push-* 和 .col-md-pull-* 类就可以很容易的改变列(column)的顺序。
<p class="row">
 <p class="col-md-9 col-md-push-3">.col-md-9 .col-md-push-3</p>
 <p class="col-md-3 col-md-pull-9">.col-md-3 .col-md-pull-9</p>
</p>

相关推荐:
Das obige ist der detaillierte Inhalt vonAusführliche Erklärung von Bootstrap, dem besten Front-End-Framework im Jahr 2018. Für weitere Informationen folgen Sie bitte anderen verwandten Artikeln auf der PHP chinesischen Website!

