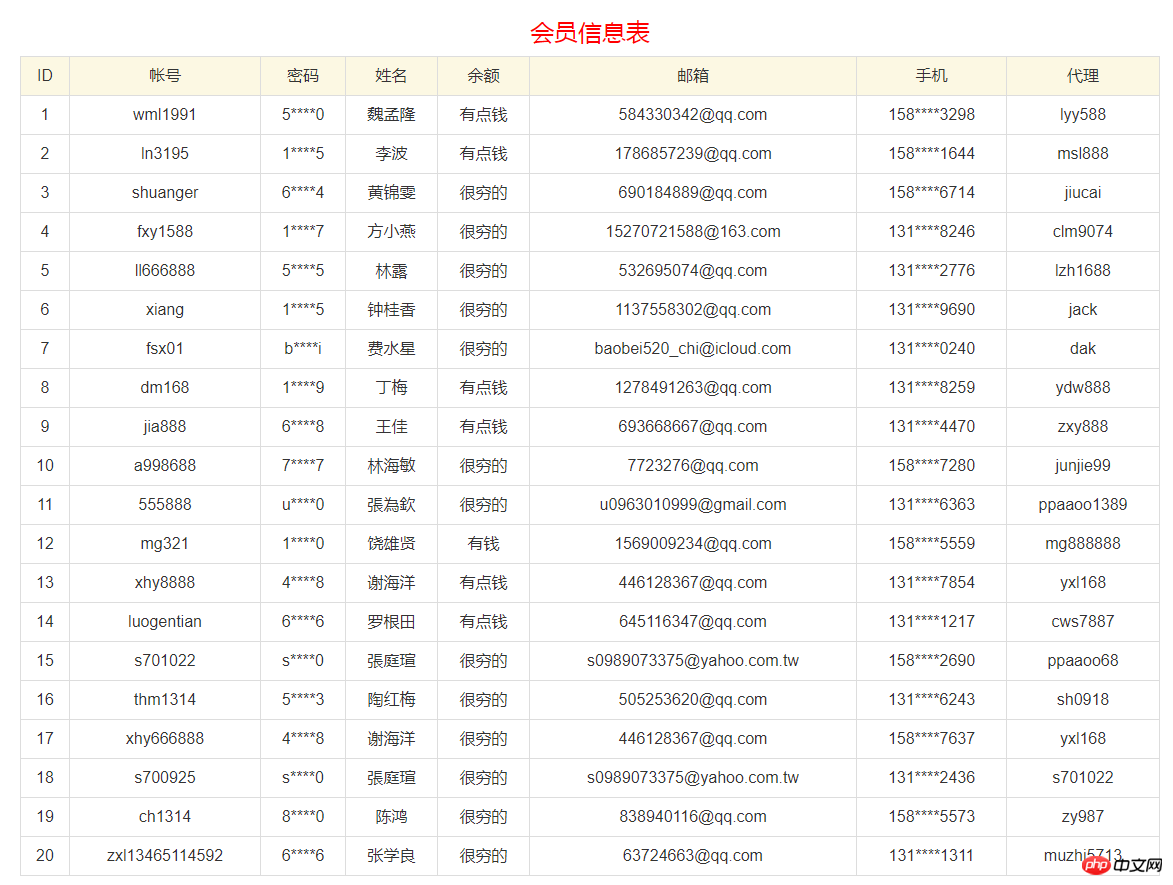
模型文件:tp51/application/index/model/User.php
<?php
namespace app\index\model;
use think\Model;

class User extends Model
{
	protected $table = 'users';  //设置数据库表名
	protected $pk = 'id'; //设置主键
}
控制器文件:tp51/application/index/controller/staff.php
<?php
namespace app\index\controller;
use think\Controller;
use app\index\model\Users; //导入模型
use think\facade\Request;

class Staff extends Controller
{
	//循环标签
	public function users()
	{

	}

	//分页显示
	public function page()
	{

	}

	//文件上传界面
	public function upload()
	{

	}

	//处理文件上传
	public function file()
	{

	}
}
循环标签
控制器文件:tp51/application/index/controller/staff.php
//循环标签
	public function users()
	{
		//用模型all方法来获取表中数据,传入闭包查询
		$users = User::all(function($query){
			$query->field(['id','user','pass','name','money','email','phone','upline']);//限定字段
		});
		//halt($users); === dump($users);exit;  //测试能否获取到数据
		//模版赋值
		$this->view->assign('users',$users);

		//渲染模板
		return $this->view->fetch();
	}
//测试能否获取到数据
halt($users); ==== dump($users); exit;
视图文件知识点:
资源文件加载:
系统提供了专门的标签来简化上面的导入:
{load href="/static/js/common.js" /}
{load href="/static/css/style.css" /}
并且支持同时加载多个资源文件合并:
{load href="/static/js/common.js,/static/css/style.css" /}系统还提供了两个标签别名 js 和 css 用法和 load 一致:
{js href="/static/js/common.js" /}
{css href="/static/css/style.css" /}
tp51\public\static 目录专门用来存入外部访问目录 例如:images js css uptemp等等
模板中的二种注释的区别: {//这种双斜杠注释:源码中看不到} <!--这种html格式注释:源码中可以看到-->
视图文件:tp51/application/index/view/staff/users.html
一、foreach循环标签:类似于原生的foreach语句
{css href="/static/bootstrap/css/bootstrap.css" /}
<div class="container">
	<div class="row">
		<h3 class="text-center" style="color:red;">会员信息表</h3>
		<div class="col-md-12">
			<table class="table table-bordered table-hover text-center">
				<tr class="warning">
					<td>ID</td>
					<td>帐号</td>
					<td>密码</td>
					<td>姓名</td>
					<td>余额</td>
					<td>邮箱</td>
					<td>手机</td>
					<td>代理</td>
				</tr>
				{//基本用法: $staff是控制器或模板中的变量,$key与$value可自定义}
				{foreach $users as $user}
				<tr>
					<td>{$user.id}</td>
					<td>{$user.user}</td>
					<td>{$user.pass}</td>
					<td>{$user.name}</td>
					<td>{$user.money}</td>
					<td>{$user.email}</td>
					<td>{$user.phone}</td>
					<td>{$user.upline}</td>
				</tr>
				{/foreach}
			</table>
		</div>
	</div>
</div>
其实模板可以绕过控制器,直接获取数据:assign标签可以在模板中直接定义变量
{//assign name="users" value=":\app\index\model\User::all()" /}
{//name值的获取过程可以用助手函数model进行简化,这也是推荐的方式}
{//assign name="users" value=":model('user')::all()" /}
二、volist循环标签:使用最广泛,参数众多,功能强大
{//基本用法:name="变量名,与控制器对应不可更改" id="循环变量,可自定义"}
				{volist name="users" id="user"}
				<tr>
					<td>{$user.id}</td>
					<td>{$user.user}</td>
					<td>{$user.pass}</td>
					<td>{$user.name}</td>
					<td>{$user.money}</td>
					<td>{$user.email}</td>
					<td>{$user.phone}</td>
					<td>{$user.upline}</td>
				</tr>
				{/volist}
扩展用法_1:获取指定范围内的数据:offset="起始位置" length="记录数量"
{//从索引1开始,获取10条,索引是从0开始计算,其实是从第2条开始输出10条}
{volist name="staffs" id="staff" offset="1" length="20"}
{/volist}

{//直接输出20条数据}
{volist name="staffs" id="staff" length="20"}
{/volist}
扩展用法_2:获取偶数或奇数行的数据: mod="" 将索引进行模除后的结果
{volist name="staffs" id="staff" mod="2"}
{//当前索引除以2余数为1,说明为偶数行,例如第4条记录,索引为3,余数为1}
{//eq name="mod" value="1"}
{//eq}
{//想获取所有的奇数行数据,value="0"}
{eq name="mod" value="0"}
{/eq}
扩展用法_3:数据集合为空
                                {empty name="users"}
		                <h3 style="color: red;">当前没有符合条件的数据,请检查~~</h3>
				{else /}
				{volist name="users" id="user"}
				<tr>
					<td>{$user.id}</td>
					<td>{$user.user}</td>
					<td>{$user.pass}</td>
					<td>{$user.name}</td>
					<td>{$user.money}</td>
					<td>{$user.email}</td>
					<td>{$user.phone}</td>
					<td>{$user.upline}</td>
				</tr>
				{/volist}
				{/empty}
扩展用法_4:条件判断
{//性别必须是0或1,才是合法数据}
{in name="staff.sex" value="0,1"}
	{if $staff.sex == 0}
		男
	{else /}
		女
	{/if}
{/in}
使用 PHP 和 between 标签
                                {empty name="users"}
				<h3 style="color: red;">当前没有符合条件的数据,请检查~~</h3>
				{else /}
				{volist name="users" id="user" length="20"}
				<tr>
					<td>{$user.id}</td>
					<td>{$user.user}</td>
					<td>{//$user.pass}
						{php}echo substr_replace(($user['pass']),'医院医院', 1, 4);{/php}
					</td>
					<td>{$user.name}</td>
					<td>{//$user.money}
						{//between标签:是指一定范围内}
						{between name="user.money" value="0,100"}
						很穷的
						{/between}
						{between name="user.money" value="101,500"}
						有点钱
						{/between}
						{between name="user.money" value="501,1000"}
						有钱
						{/between}
						{between name="user.money" value="1001,5000"}
						很有钱
						{/between}
				    </td>
					<td>{$user.email}</td>
					<td>{//$user.phone}
						{php}echo substr_replace(($user['phone']),'医院医院', 3, 4);{/php}
					</td>
					<td>{$user.upline}</td>
				</tr>
				{/volist}
				{/empty}
分页查询
控制器文件:tp51/application/index/controller/staff.php
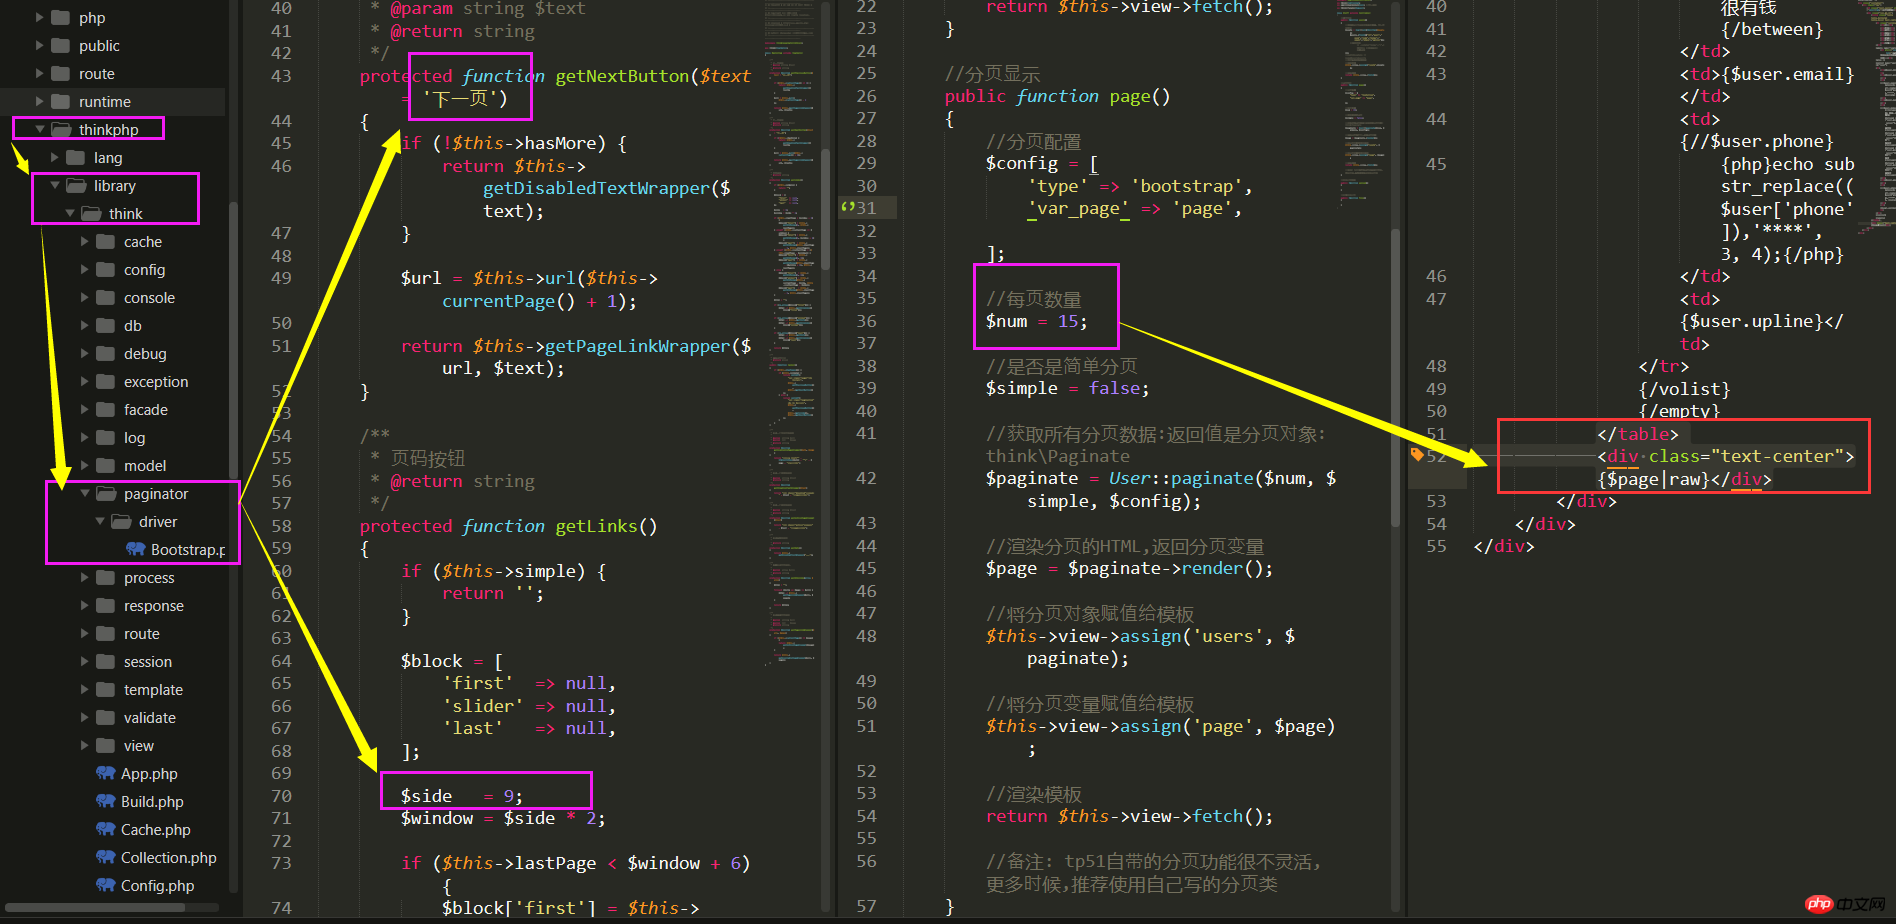
//备注: tp51自带的分页功能很不灵活,更多时候,推荐使用自己写的分页类
public function page()
	{
		//分页配置
		$config = [
			'type' => 'bootstrap',
			'var_page' => 'page',

		];

		//每页数量
		$num = 15;

		//是否是简单分页
		$simple = false;

		//获取所有分页数据:返回值是分页对象: think\Paginate
		$paginate = User::paginate($num, $simple, $config);

		//渲染分页的HTML,返回分页变量
		$page = $paginate->render();

		//将分页对象赋值给模板
		$this->view->assign('users', $paginate);

		//将分页变量赋值给模板
		$this->view->assign('page', $page);

		//渲染模板
		return $this->view->fetch();
	}
配置分页参数

视图文件:tp51/application/index/view/staff/page.html
</table> //在表格标签外面添加分页查询
	<div class="text-center">{$page|raw}</div>
文件上传
控制器文件:tp51/application/index/controller/staff.php
//1.渲染一个文件上传的表单
	public function upload()
	{
		return $this->view->fetch();
	}
视图文件:tp51/application/index/view/staff/upload.html
<div class="upbox" style="width: 400px;height: 200px;text-align: center;border: 2px solid red;">
	<h3>文件上传</h3>
	<form action="upfile" method="post" enctype="multipart/form-data">
		<input type="file" name="file">
		<button>提交</button>
	</form>
</div>
处理文件上传
控制器文件:tp51/application/index/controller/staff.php
public function file()
	{
		//1.获取上传的文件信息(Request请求对象中的file(),返回文件对象think/File)
		$file = Request::file('file');

		//2.将文件从临时目录移到到服务器上的指定目录
		if (is_null($file)) {
			$this->error('没有选择任何文件');
		}
		//3.判断上传文件
		$rule = ['size'=>2097152, 'ext'=>'jpg,jpeg,png,gif'];
		if($file->check($rule)) {
			$fileInfo = $file->move('uptemp');
			$res = '<h3 style="color:green;">上传成功</h3>文件名是:'.$fileInfo->getSaveName();
		} else {
			$res = '<h3 style="color:red;">上传失败</h3>'.$file->getError();
		}

		return $res;
	}
视图文件:tp51/application/index/view/staff/upfile.html 为空即可

