浮动元素高度塌陷产生的原因与解决方案 三列经典布局
浮动元素高度塌陷产生的原因与解决方案
浮动元素高度塌陷产生的原因
- 父元素在文档流中的高度默认是子元素撑起来的
- 当子元素浮动后,就会脱离文档流,然后无法撑起父元素
- 父元素产生高度塌陷 导致页面布局混乱
示例代码
<!DOCTYPE html><html lang="en"> <head> <meta charset="UTF-8" /> <meta name="viewport" content="width=device-width, initial-scale=1.0" /> <title>浮动元素高度塌陷与解决办法</title> <style> .container { border: 2px dashed red; } .item { width: 100px; height: 100px; background-color: greenyellow; } .item { float: left; } </style> </head> <body> <div class="container"> <div class="item"></div> </div> </body></html>
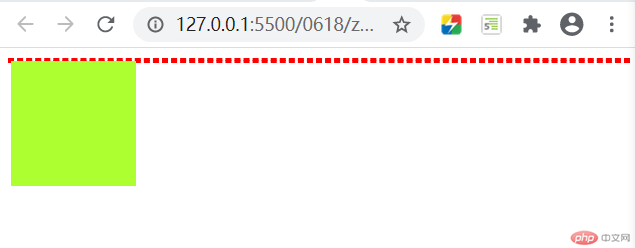
代码效果
说明
- 从上图可以看出 父元素
container的高度没了 边框线成了一条线
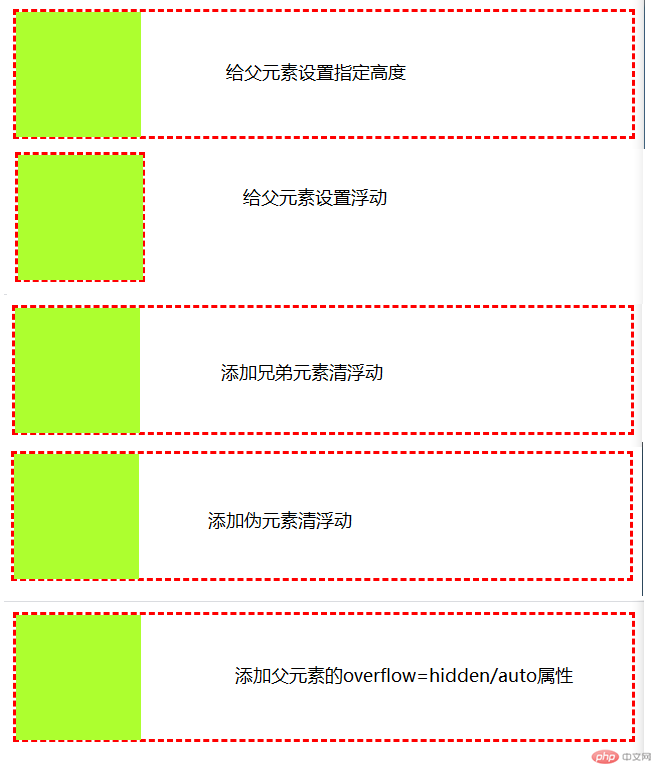
解决方案
- 给父元素设定一个给定的高度
- 给父元素也进行浮动操作
- 在该浮动元素后面添加一个同级元素 利用新的同级元素撑起父级
- 通过添加伪元素来解决
- 给父元素设置
overflow: hidden/auto
示例代码
<!DOCTYPE html><html lang="en"> <head> <meta charset="UTF-8" /> <meta name="viewport" content="width=device-width, initial-scale=1.0" /> <title>浮动元素高度塌陷与解决办法</title> <style> .container { border: 2px dashed red; } .item { width: 100px; height: 100px; background-color: greenyellow; } .item { float: left; } /* 1.给父元素设置指定高度 */ /* .container { height: 100px; } */ /* 2.给父元素设置浮动 */ /* .container { float: left; } */ /* 3.添加兄弟元素清浮动 */ /* .clear { clear: both; } */ /* 4.添加伪元素清浮动 */ /* .container::after { content: ""; display: block; clear: both; } */ /* 5.设置父元素的overflow=hidden/auto属性 */ .container { /* overflow: hidden; */ overflow: auto; } </style> </head> <body> <div class="container"> <div class="item"></div> <!-- <div class="clear"></div> --> </div> </body></html>
代码效果
使用浮动与定位实现三列经典布局
示例代码
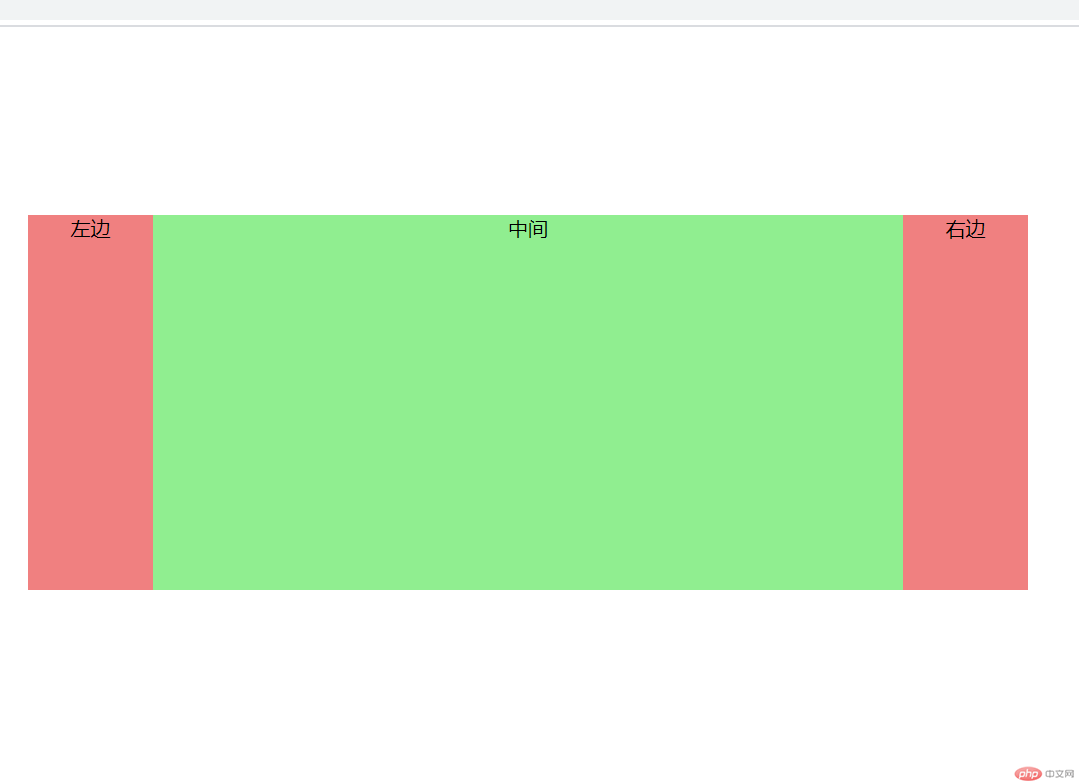
<!DOCTYPE html><html lang="en"> <head> <meta charset="UTF-8" /> <meta name="viewport" content="width=device-width, initial-scale=1.0" /> <title>三列经典布局</title> <style> * { margin: 50px auto; padding: 0; box-sizing: border-box; text-align: center; } </style> </head> <body> <div class="container"> <div class="item1">左边</div> <div class="item2">中间</div> <div class="item3">右边</div> </div> </body></html>
使用定位完成布局
.container { width: 800px; min-height: 300px; position: relative;}.container > .item1 { background-color: lightcoral; width: 100px; height: 300px; position: absolute; top: 0; left: 0;}.container > .item3 { background-color: lightcoral; width: 100px; height: 300px; position: absolute; top: 0; right: 0;}.container > .item2 { background-color: lightgreen; width: 600px; height: 300px; position: absolute; top: 0; left: 100px;}
使用浮动完成布局
.container { width: 800px; min-height: 300px; overflow: hidden;}.container > .item1 { width: 100px; height: 300px; background-color: lightpink; float: left;}.container > .item2 { width: 600px; height: 300px; background-color: lightblue; float: left;}.container > .item3 { width: 100px; height: 300px; background-color: lightpink; float: right;}
代码效果
