盒模型
官方如是讲:
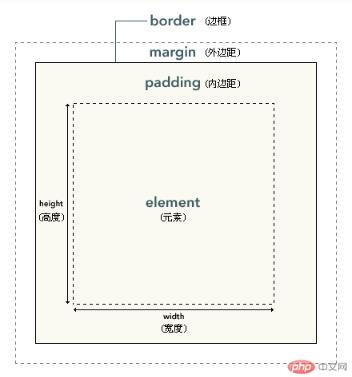
CSS 框模型 (Box Model) 规定了元素框处理元素内容、内边距、边框 和 外边距 的方式。

元素框的最内部分是实际的内容,直接包围内容的是内边距。内边距呈现了元素的背景。内边距的边缘是边框。边框以外是外边距,外边距默认是透明的,因此不会遮挡其后的任何元素。
内边距、边框和外边距都是可选的,默认值是零。
个人认为盒子就是用来承载内容,为内容的呈现圈定一个范围。
属性
内边距(padding)
内边距在边框和内容区之间单边内边距属性
- padding-top
- padding-right
- padding-bottom
- padding-left
边框 (border)
围绕元素内容和内边距的一条或多条线。CSS border 属性可以设置元素边框的样式、宽度和颜色。
border:color width style定义单边样式
- border-top-style
- border-right-style
- border-bottom-style
- border-left-style
- 外边距
围绕在元素边框的空白区域是外边距,设置外边距的最简单的方法就是使用 margin 属性
举例box-sizing
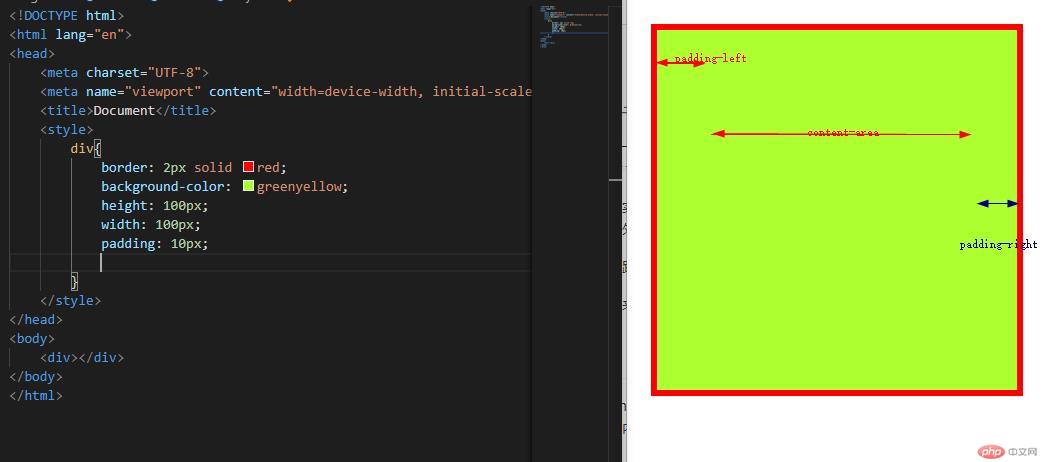
默认情况下 box-sizing为content-box,边界为content-area
设置box-sizing为border-box,边界为border.
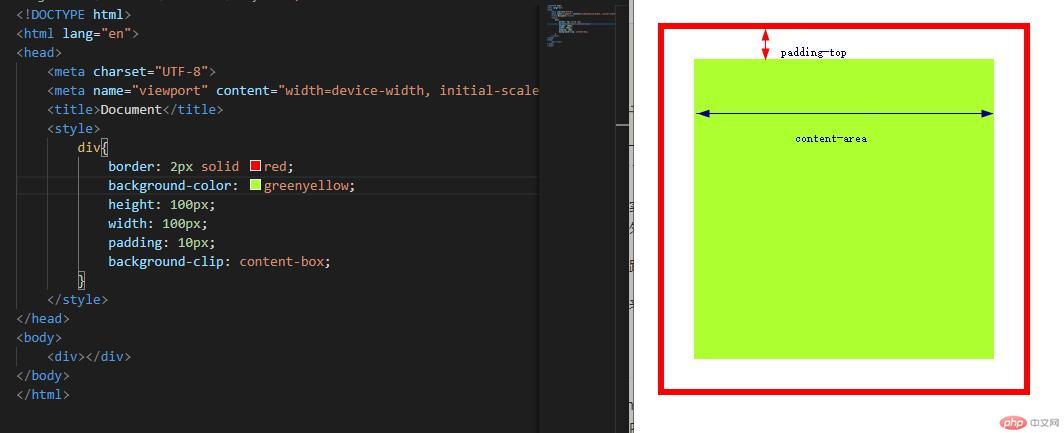
举例background-clip
默认情况下 背景颜色填充至border内边界
设置background-clip颜色填充至content-area边界
元素的居中
水平居中
对元素设置margin: #px auto;
水平垂直居中
开启元素定位,设置元素定位区域(top:0 left:0 right:0 botton:0),margin:auto auto后,元素水平垂直居中
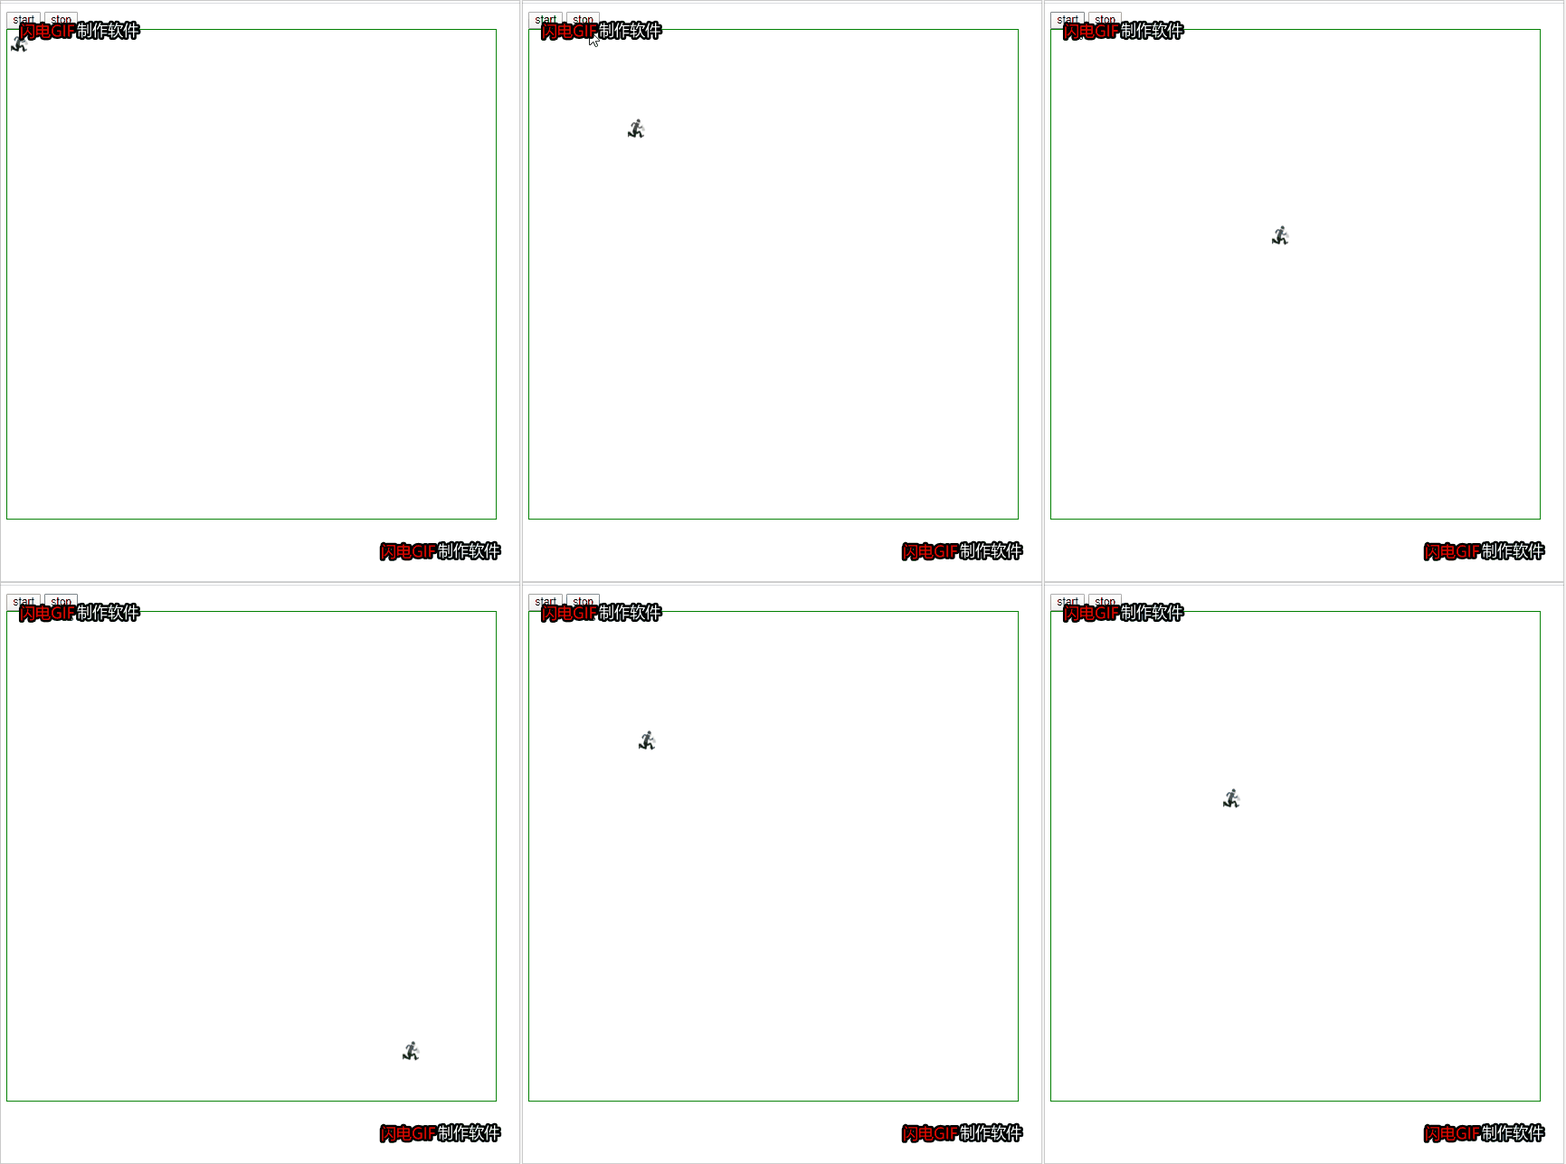
小人快跑
<!DOCTYPE html><html lang="en"><head><meta charset="UTF-8"><meta name="viewport" content="width=device-width, initial-scale=1.0"><title>Document</title><style>img{width: 30px;height: 30px;/* border: 1px solid red; */position: absolute;}div:nth-of-type(2){border: 1px solid green;width: 600px;height: 600px;}</style><script>window.onload = function(){let start = document.querySelector("div > button:nth-of-type(1)");let stop = document.querySelector("div > button:nth-of-type(2)");let img = document.querySelector("img");let frame = document.querySelector("div:nth-of-type(2");start.addEventListener("click",run);stop.addEventListener("click",end);let timer1 = null;function move(){img.style.left = img.offsetLeft + Math.floor(Math.random()*10) + "px";img.style.top = img.offsetTop + Math.floor(Math.random()*10) + "px";if(img.offsetLeft >=frame.clientWidth || img.offsetHeight >=frame.clientHeight) {img.style.left = "0px";img.style.top = "0px"}}function run(){if(!timer1){timer1 = setInterval(move,30)}}function end(){clearInterval(timer1)timer1 = null}}</script></head><body><div><button>start</button><button>stop</button></div><div><img src="thief.png" alt="图片加载失败"></div></body></html>
效果:

