1、CSS选择器包括知识点:元素选择器、选择器分组、类选择器、id选择器、属性选择器、后代选择器(层级选择器)、子元素选择器、相邻兄弟选择器、伪类
1.1 元素选择器
如果设置 HTML 的样式,选择器通常将是某个 HTML 元素,比如 p、h1、em、a,甚至可以是 html 本身。
实例
<!DOCTYPE html>
<html lang="en">
<head>
    <meta charset="UTF-8">
    <title>选择器</title>
    <style>
        /* 标签选择器 */
        ul{
            border: 1px dashed red;
            margin: 0 auto;
            /*ul还有一个左padding-left: 40px*/
            padding-left: 0;
        }
        /* 层级选择器: 选择 ul 的后代元素*/
        ul li{
            list-style:none;
            width: 40px;
            height: 40px;
            background-color:wheat;

            /*设置文本水平重直居中*/
            text-align: center;
            line-height: 40px;

            /*设置圆角度,50%或者宽度的一半都可以*/
            border-radius: 50%;

            /*设置内联块,使多个块元素可以显示在同一行*/
            display: inline-block;

            /*增加左外边距,小球不至于太拥挤*/
            margin-left: 10px;

            /*添加阴影,进一步美化小球的视觉效果*/
            box-shadow: 2px 2px 1px #888;
        }
    </style>
</head>
<body>
<ul>
    <li>1</li>
    <li>2</li>
    <li>3</li>
    <li>4</li>
    <li>5</li>
    <li>6</li>
</ul>
</body>
</html>
运行实例 »
点击 "运行实例" 按钮查看在线实例

1.2 选择器分组、类选择器、id选择器、属性选择器、
实例
<!DOCTYPE html>
<html lang="en">
<head>
    <meta charset="UTF-8">
    <title>选择器</title>
    <style>
        /* 标签选择器 */
        ul{
            border: 1px dashed red;
            margin: 0 auto;
            /*ul还有一个左padding-left: 40px*/
            padding-left: 0;
        }
        /* 层级选择器: 选择 ul 的后代元素*/
        ul li{
            list-style:none;
            width: 40px;
            height: 40px;
            background-color:wheat;

            /*设置文本水平重直居中*/
            text-align: center;
            line-height: 40px;

            /*设置圆角度,50%或者宽度的一半都可以*/
            border-radius: 50%;

            /*设置内联块,使多个块元素可以显示在同一行*/
            display: inline-block;

            /*增加左外边距,小球不至于太拥挤*/
            margin-left: 10px;

            /*添加阴影,进一步美化小球的视觉效果*/
            box-shadow: 2px 2px 1px #888;
        }
        /* id选择器 */
        #bg_red{
            background-color: lightcoral;
        }
        /* 类选择器 */
        .bg_blue{
            background-color: lightblue;
        }
        /* 属性选择器 */
        li[id="bg_red"]{
            border:2px dashed lightgreen;
        }
    </style>
</head>
<body>
<ul>
    <li class="bg_blue">1</li>
    <li id="bg_red">2</li>
    <li>3</li>
    <li>4</li>
    <li>5</li>
    <li class="bg_blue">6</li>
</ul>
</body>
</html>
运行实例 »
点击 "运行实例" 按钮查看在线实例

1.3 子元素选择器
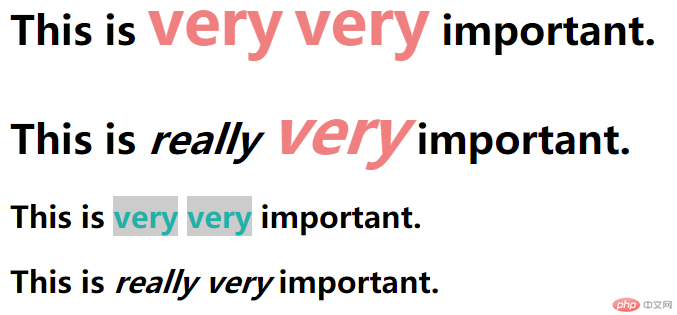
与后代选择器相比,子元素选择器(Child selectors)只能选择作为某元素子元素的元素。如果您不希望选择任意的后代元素,而是希望缩小范围,只选择某个元素的子元素,请使用子元素选择器。
实例
<!DOCTYPE html>
<html lang="en">
<head>
    <meta charset="UTF-8">
    <title>后代选择器、子元素选择器</title>
    <style>
        /*后代选择器*/
        h1 strong{
            color:lightcoral;
            font-size: 50px;
        }
        /*子元素选择器*/
        h2 > strong{
            color:lightseagreen;
            background-color: #ccc;
        }
    </style>
</head>
<body>
<h1>This is <strong>very</strong> <strong>very</strong> important.</h1>
<h1>This is <em>really <strong>very</strong></em> important.</h1>
<h2>This is <strong>very</strong> <strong>very</strong> important.</h2>
<h2>This is <em>really <strong>very</strong></em> important.</h2>
</body>
</html>
运行实例 »
点击 "运行实例" 按钮查看在线实例

1.4 相邻兄弟选择器
如果需要选择紧接在另一个元素后的元素,而且二者有相同的父元素,可以使用相邻兄弟选择器(Adjacent sibling selector)。
实例
<!DOCTYPE html>
<html lang="en">
<head>
    <meta charset="UTF-8">
    <title>选择器</title>
    <style>
        /* 标签选择器 */
        ul{
            border: 1px dashed red;
            margin: 0 auto;
            /*ul还有一个左padding-left: 40px*/
            padding-left: 0;
        }
        /* 层级选择器: 选择 ul 的后代元素*/
        ul li{
            list-style:none;
            width: 40px;
            height: 40px;
            background-color:wheat;

            /*设置文本水平重直居中*/
            text-align: center;
            line-height: 40px;

            /*设置圆角度,50%或者宽度的一半都可以*/
            border-radius: 50%;

            /*设置内联块,使多个块元素可以显示在同一行*/
            display: inline-block;

            /*增加左外边距,小球不至于太拥挤*/
            margin-left: 10px;

            /*添加阴影,进一步美化小球的视觉效果*/
            box-shadow: 2px 2px 1px #888;
        }
        /* id选择器 */
        #bg_red{
            background-color: lightcoral;
        }
        /* 类选择器 */
        .bg_blue{
            background-color: lightblue;
        }
        /* 属性选择器 */
        li[id="bg_red"]{
            border:2px dashed lightgreen;
        }

        /* 第2个小球相邻的是第3个小球,可以用li,也可以用* */
        #bg_red + *{
            background-color: yellow;
        }

        /* 第2个小球后面的所有同级兄弟元素全部选中 */
        #bg_red ~ *{
            border:5px solid red;
        }
    </style>
</head>
<body>
<ul>
    <li class="bg_blue">1</li>
    <li id="bg_red">2</li>
    <li>3</li>
    <li>4</li>
    <li>5</li>
    <li class="bg_blue">6</li>
</ul>
</body>
</html>
运行实例 »
点击 "运行实例" 按钮查看在线实例

1.5 伪类
实例
<!DOCTYPE html>
<html lang="en">
<head>
    <meta charset="UTF-8">
    <title>伪类</title>
    <style>
        a{
            font-size: 25px;
        }
        a:visited{
            color: black;
        }
        a:hover{/*鼠标悬停*/
            color:lightsalmon;
        }
        .box{
            width: 100px;
            height: 200px;
            padding-left: 10px;
            border: 3px dashed black;
        }
        /* 伪类: 子元素选择器;注意ul跟:之间有空格*/
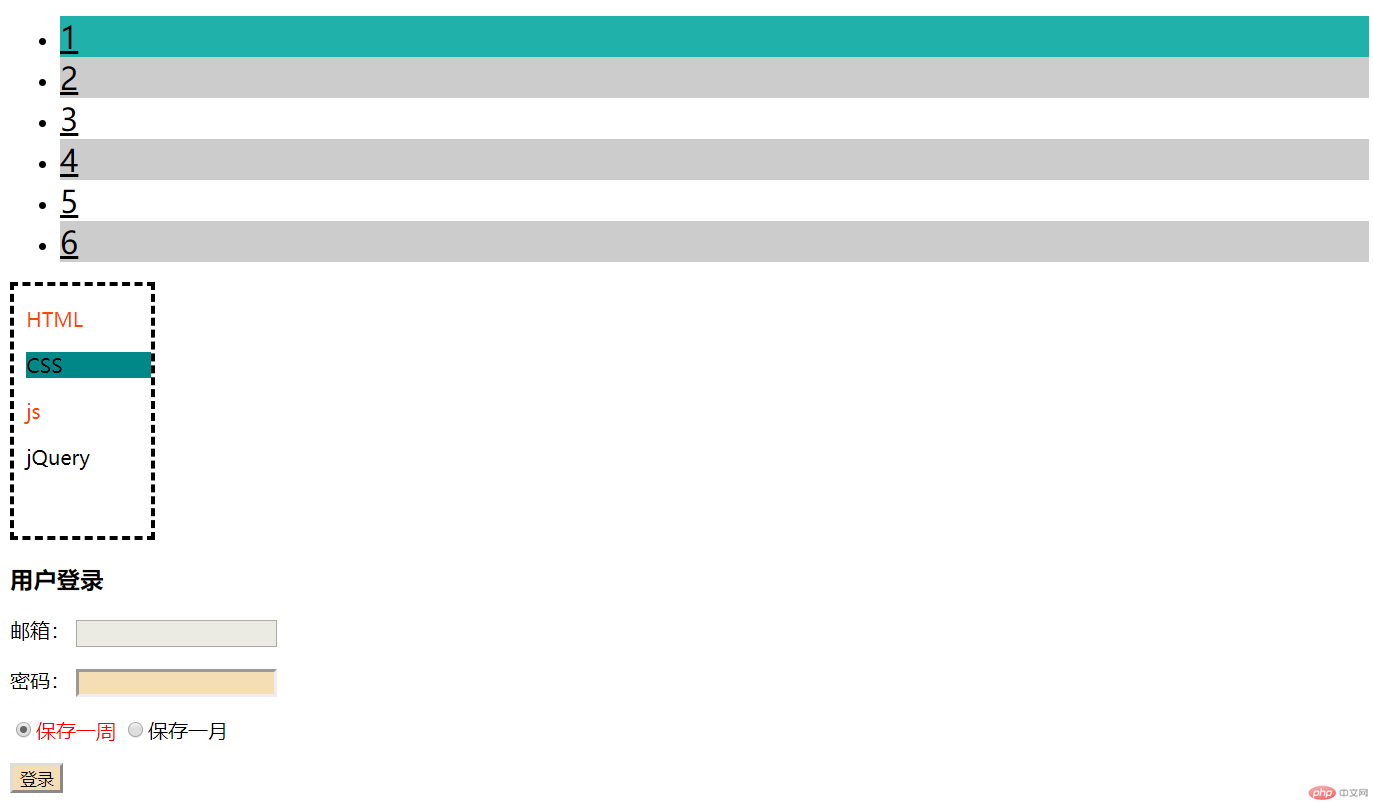
        ul :nth-child(2n){/*偶数项*/
            background-color: #ccc;
        }
        ul li:nth-child(1){
            background-color: lightseagreen;
        }

        /* 伪类: 类型选择器;p跟:之间没有空格 */
        div p:nth-of-type(2n+1){/*奇数项*/
            color:orangered;
        }
        div p:nth-of-type(2){
            background-color: #008888;
        }
        /*:nth-child(m): 关注位置*/
        /*:nth-of-type(n): 除了关注关注位置外, 还需要元素的类型匹配*/
        /*li:nth-child(m): 如果这样写, 那么与 li:nth-of-type(n)功能几乎一样*/

        /* 伪类: 表单控件 */
        form :enabled {
            /*当表单元素可用时,将背景设置成小麦色*/
            background-color: wheat;
        }

        /* 将单选按钮中的文本前景色设置为红色,使用了伪类和相邻选择器 */
        /*选择的过程是: 先获取到当前被选中的按钮, 再获取它的相邻子元素, 其实就是label标签,再将label的文本设置为红色*/

        form :checked + label {     /* 这里不用label , 用 '*' 号也可以 */
            color: red;
        }

        /* 当在控件中输入无效值文本自动变成红色 */
        /*例如邮箱文本框,如果输入的不是一个有效的邮箱格式字符串, 就会实时的用颜色提示用户的*/
        form :invalid {
            color: red;
        }

        /* 设置控件获取到焦点时的样式 */
        /*控件获取到焦点时, 背景变成绿色*/
        form :focus {
            background-color: lightgreen;
        }

        /* 设置鼠标悬停时的样式 */
        button:hover {
            width: 56px;
            height: 28px;
            background-color: black;
            color: white;
        }
    </style>
</head>
<body>
<ul>
    <li><a href="http://www.baidu.com">1</a></li>
    <li><a href="">2</a></li>
    <li><a href="">3</a></li>
    <li><a href="">4</a></li>
    <li><a href="">5</a></li>
    <li><a href="">6</a></li>
</ul>
<div class="box">
    <p>HTML</p>
    <p>CSS</p>
    <p>js</p>
    <p>jQuery</p>
</div>

<!--表单选择器-->
<h3>用户登录</h3>
<form action="">
    <p>
        <label for="email">邮箱:</label>
        <input type="email" name="email" id="email" disabled>
    </p>

    <p>
        <label for="password">密码:</label>
        <input type="password" name="password" id="password">
    </p>

    <p>
        <input type="radio" name="save" id="week" value="7" checked><label for="week">保存一周</label>
        <input type="radio" name="save" id="month" value="30" ><label for="month">保存一月</label>
    </p>

    <p>
        <button type="submit">登录</button>
    </p>
</form>
</body>
</html>
运行实例 »
点击 "运行实例" 按钮查看在线实例

2、背景设置
实例
<!DOCTYPE html>
<html lang="en">
<head>
    <meta charset="UTF-8">
    <title>背景设置——background</title>
    <style>
        .box{
            width: 1000px;
            height: 500px;
            border: 5px dashed black;
            padding:30px;

            /*背景*/
            /*background-color: cyan;*/

            /*background-image: url("../images/bg.jpg");*/

            /*只显示一次*/
            /*background-repeat: no-repeat;*/

            /*背景定位*/
            /*background-position: left center;*/

            /*background-position: 10% 20%;*/
            /*background-position: 30px 50px;*/


            /*是否滚动*/
            /*height: 2000px;*/
            /*background-attachment: scroll;*/
            /*background-attachment: fixed;*/


            /*简写*/
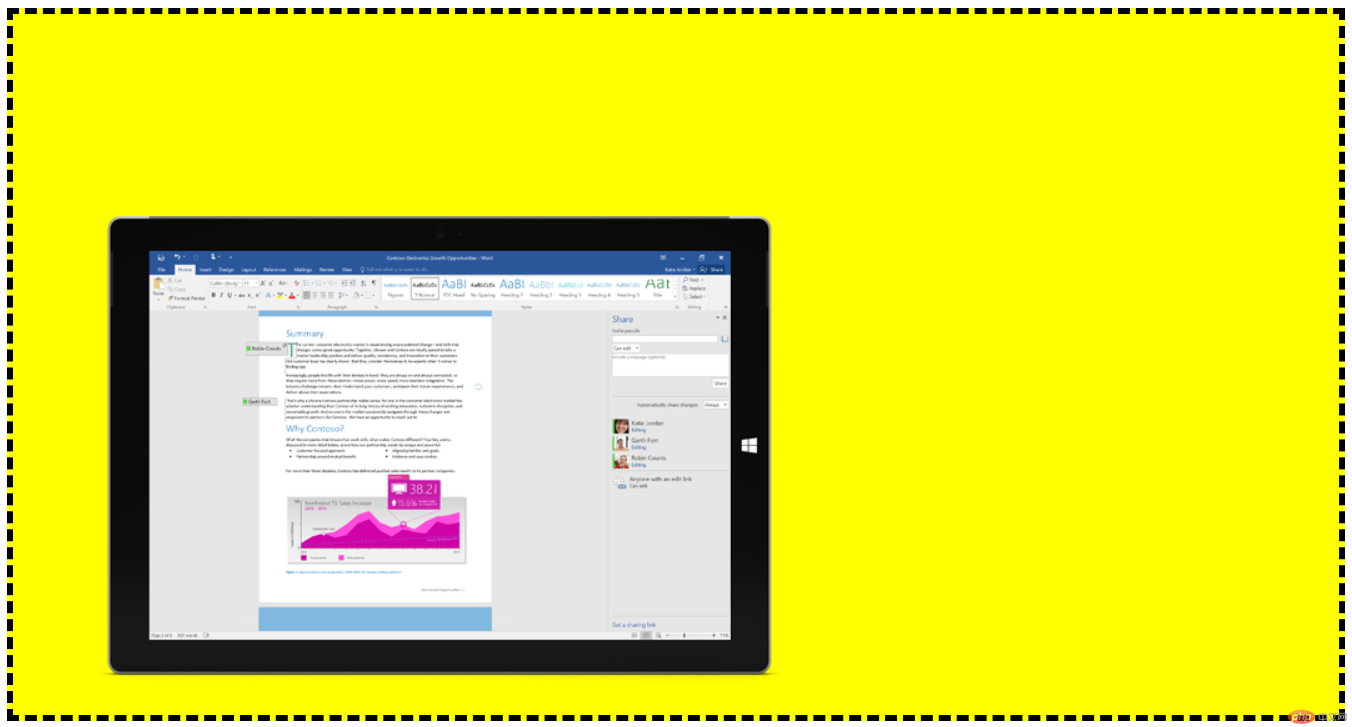
            background: yellow url("https://c.s-microsoft.com/en-in/CMSImages/Image_BuiltForTeamwork_713x374.png?version=d0602c07-bbf5-0fca-e2c0-480f1c746d39") no-repeat left center fixed;


            /*css3中关于背景的新样式
            1、可以同时设置多个背景图片,样式一一对应
            */

            /*background-image: url("../images/bg.jpg"), url("../images/bg1.jpg");*/
            /*background-repeat: no-repeat,no-repeat;*/
            /*background-position: left bottom,right top;*/

            /*background: url("../images/bg.jpg") no-repeat left bottom, url("../images/bg1.jpg") no-repeat right top;*/

            /*2、设置图片尺寸*/
            /*background-image: none;*/
            /*background-image: url("../images/bg.jpg");*/
            /*background-repeat: no-repeat;*/
            /*background-size: 120px 80px;*/
            /*background-size: contain;*/
            /*等比缩放,会进行裁切*/
            /*background-size: cover;*/
            /*百分之百拉伸,不过比例变了*/
            /*background-size: 100% 100%;*/

            /*3、设置背景的绘制区域*/
            /*border: 10px dotted red;*/

            /*background-color: lightblue;*/

            /*background-clip:border-box;*/
            /*background-clip: padding-box;*/

            /*background-clip: initial;!*还原*!*/
        }

    </style>
</head>
<body>
<div class="box">

</div>
</body>
</html>
运行实例 »
点击 "运行实例" 按钮查看在线实例


