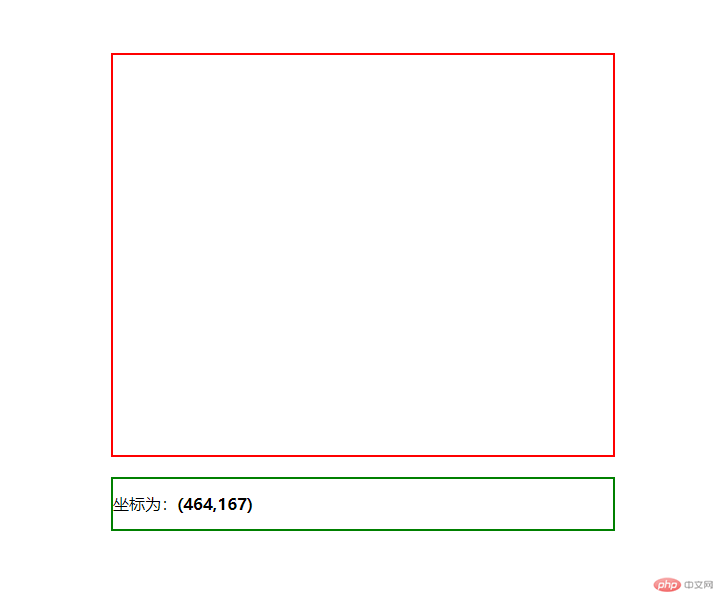
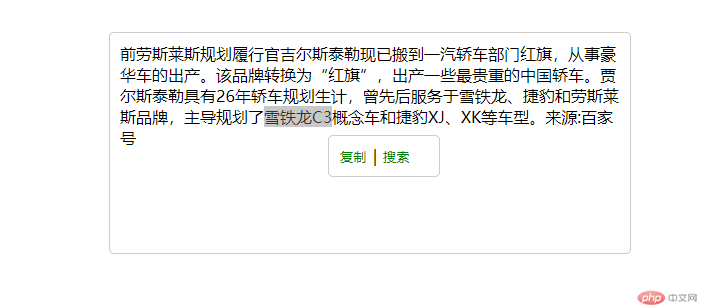
今天我们将基础的知识运用到案例中,练习了实时获取鼠标在div中的坐标、仿百度文库中的文字搜索效果、滚动条下移一定距离显示固定的导航、三级联动,下面是我根据老师课堂上的内容所做的练习:
1.实时获取鼠标在div中的坐标
实例
<!DOCTYPE html>
<html lang="en">
<head>
	<meta charset="UTF-8">
	<title>实时获取鼠标在div中的【相对位置坐标】</title>
	<link rel="icon" type="image/x-icon" href="static/images/favicon.ico">

	<style>
        #main{
        	width:500px;
        	height:400px;
        	margin:100px auto 20px;
        	border:2px solid red;
        }
        p{
        	margin:0 auto;
        	width:500px;
        	height:50px;
        	border:2px solid green;
        	line-height:50px;
        }
	</style>
</head>
<body>
	<div id="main"></div>
	<p>坐标为:<b id="show">(0,0)</b></p>

	<script>
       window.onload=function(){
       	    var divobj=document.getElementById('main');
       	    var showobj=document.getElementById('show');
       	    divobj.onmousemove=function(event){
       	          var e=event || window.event;
       	          var m_x=e.clientX;
       	          var m_y=e.clientY;
       	          var d_x=this.offsetLeft;
       	          var d_y=this.offsetTop;
       	          var x=m_x-d_x;
       	          var y=m_y-d_y;
       	          showobj.innerHTML="("+x+","+y+")";
       	    }

       }
	</script>
</body>
</html>
运行实例 »
点击 "运行实例" 按钮查看在线实例

2.仿百度文库中的文字搜索效果
实例
<!DOCTYPE html>
<html>
<head>
	<title>仿百度文库中的文字搜索效果</title>
	<link rel="icon" type="image/x-icon" href="static/images/favicon.ico">
  <style type="text/css">
    #content {
    width:500px;
    height:200px;
    margin:50px auto;
    border:1px solid #ccc;
    padding:10px;
    border-radius: 5px;
    overflow: auto;
  }
  #nav_menu {
    width:100px;
    height:30px;
    background: #fff;
    line-height: 30px;
    padding:5px;
    border-radius: 5px;
    border:1px solid #ccc;
    display: none;
    position: fixed;
    top:0;
    left:0;
  }
  #nav_menu button {
    background: transparent;
    border:0;
    color:green;
    cursor: pointer;
  }
  #nav_menu button:hover {
    color: red;
  }
  </style>
</head>
<body>
    <div id="content" onmouseup="change(event)">
    前劳斯莱斯规划履行官吉尔斯泰勒现已搬到一汽轿车部门红旗,从事豪华车的出产。该***转换为“红旗”,出产一些最贵重的中国轿车。贾尔斯泰勒具有26年轿车规划生计,曾先后服务于雪铁龙、捷豹和劳斯莱斯***,主导规划了雪铁龙C3概念车和捷豹XJ、XK等车型。来源:百家号
   </div>
  <p id="nav_menu"><button onclick="copyText()">复制</button>|<button onclick="getSearch()">搜索</button></p>
	<script>
     function getSelect(){
        return window.getSelection().toString()
     }
     function change(event){
        var str=getSelect();
        var e=event || window.event;
        if(str.length>0){
          var x=e.clientX;
          var y=e.clientY;
          var menu=document.getElementById('nav_menu');
          menu.style.left=x+'px';
          menu.style.top=y+'px';
          menu.style.display="block";
        }else{
          menu.style.display="none";
        }
     }
     function copyText(){
       document.getElementById('nav_menu').style.display="none";
     }
     function getSearch(){
        if(getSelect()){
          window.location.href="https://www.baidu.com/s?ie=utf-8&f=8&rsv_bp=1&tn=monline_4_dg&wd="+getSelect()
        }
        document.getElementById('nav_menu').style.display="none";
     }

  </script>
</body>
</html>
运行实例 »
点击 "运行实例" 按钮查看在线实例

3.滚动条下移一定距离显示固定的导航
实例
<!DOCTYPE html>
<html>
<head>
	<title>页面滚动条下移一定距离实现【固定的导航】</title>
	<link rel="icon" type="image/x-icon" href="static/images/favicon.ico">
	<style>
	    *{margin:0;padding:0;}
	    #main{
	    	width:100%;
	    	height:70px;
	    	background:#ccc;
	    	line-height:70px;
	    	text-align:center;
	    }
	    #box{
	    	width:100%;
	    	height:50px;
	    	background:red;
	    	line-height:50px;
	    	text-align:center;
	    	position:fixed;top:0;
	    	display:none;
	    }
	    input{
	    	width:700px;
	    	height:40px;
	    	border:0;
	    	border-radius:30px;
	    }
	    .main{
	    	height:1500px;
	    	margin:0 auto;
	    	background:pink;
	    }
	</style>
</head>
<body>
   <div id="main">
       <input type="text" name="">
   </div>
   <div id="box">
       <input type="text" name="">
   </div>
   <div class="main"></div>
<script>
	window.onload=function(){
		document.onscroll=function(){
			if(document.documentElement.scrollTop>300){
				document.getElementById('box').style.display="block";
			}else{
				document.getElementById('box').style.display="none";
			}
		}
	}
</script>
</body>
</html>
运行实例 »
点击 "运行实例" 按钮查看在线实例

4.三级联动
实例
<!DOCTYPE html>
<html>
<head>
	<meta charset="utf-8">
	<title>省/市/区 三级联动</title>
	<link rel="icon" type="image/x-icon" href="static/images/favicon.ico">
	<style type="text/css">

	</style>
</head>
<body>
  <form>
	<select name="sel" id="sheng">
	    <option value="">请选择省会</option>
	    <option value="江西省">江西省</option>
	    <option value="广东省">广东省</option>
	    <option value="安徽省">安徽省</option>
	</select>
	<select name="sel" id="shi">
	    <option value="">请选择城市</option>
	</select>
	<select name="sel" id="qu">
	    <option value="">请选择地区</option>
	</select>
</form>

<script>
	  window.onload=function(){
       function getId(id){
          return document.getElementById(id);
       }
       var sheng=getId('sheng');
       var shi=getId('shi');
       var qu=getId('qu');
       var m;
       var n;
       var p;
       var that;
       var arr=[
                 "江西省",[
                        "南昌市",["东湖区","西湖区","青山湖区"],
                        "景德镇",["东湖区","西湖区","青山湖区"]
                 ],
                 "广东省",[
                        "广州市",["番禺区","天河区","黄埔区"],
                        "深圳市",["宝安区","龙岗区","福田区"],
                        "惠州市",["龙门区","惠城区","惠阳区"]
                ],
                 "安徽省",[
                        "合肥市",["政务区","庐阳区","包河区"],
                        "芜湖市",["经开区","庐阳区","包河区"],
                        "黄山市",["高新区","庐阳区","包河区"]
                ]

       ]

       sheng.onchange=function(){
          that=this;
          for(var i=0;i<arr.length;i+=2){
             if(arr[i]==this.value){
                m=i;
                printShi(m);
                printQu(m,1);
             }
          }
          shi.onchange=function(){
             for(var i=0;i<arr.length;i+=2){
                if(arr[i]==that.value){
                  n=i;
                  for(var j=0,len=arr[n+1].length;j<len;j+=2){
                     if(arr[n+1][j]==this.value){
                       p=j;
                       printQu(n,p+1);
                     }
                  }
                }
             }
          }
       }

       function printShi(x){
          shi.innerHTML="<option value="+arr[x+1][0]+">"+arr[x+1][0]+"</option>";
          for(var j=2,len=arr[x+1].length;j<len;j+=2){
             var shioption=document.createElement("option");
             shioption.setAttribute("value",arr[x+1][j]);
             shioption.innerHTML=arr[x+1][j];
             shi.appendChild(shioption);
          }
       }

       function printQu(x,y){
          qu.innerHTML="<option value="+arr[x+1][y][0]+">"+arr[x+1][y][0]+"</option>";
          for(var j=2,len=arr[x+1].length;j<len;j+=2){
             var quoption=document.createElement("option");
             quoption.setAttribute("value",arr[x+1][y][j]);
             quoption.innerHTML=arr[x+1][y][j];
             qu.appendChild(quoption);
          }
       }
    }
</script>
</body>
</html>
运行实例 »
点击 "运行实例" 按钮查看在线实例

总结:今天的课程比较多,还有点难,但为了有更深入的了解,还是要多加练习,自己现在动手做还是有点难,只能根据老师的步骤一步步跟着敲,多敲几遍,争取能更好的理解,然后再自己动手做。

