WordPress 備份與復原
在本章中,我們將研究如何 Backup & Restore 在WordPress中復原檔案與資料庫。 在WordPress有兩個部分的備份,例如
- ##WordPress Files BackupWordPress Database BackupWordPress Files RestoreWordPress Database Restore
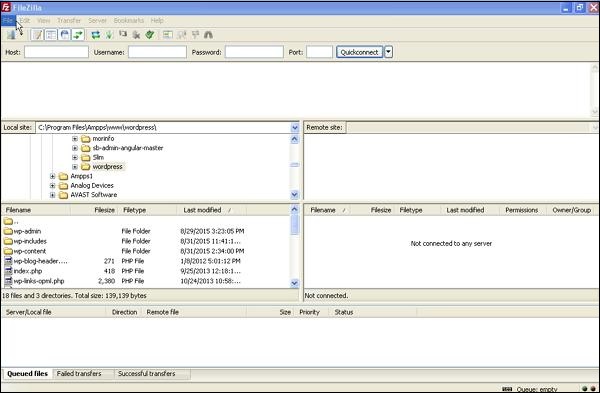
#步驟(1) - 開啟FileZilla用戶端,如下面的螢幕截圖所示。
步驟(2) - 輸入您用於登入cPanel的主機,使用者名,密碼和端口。
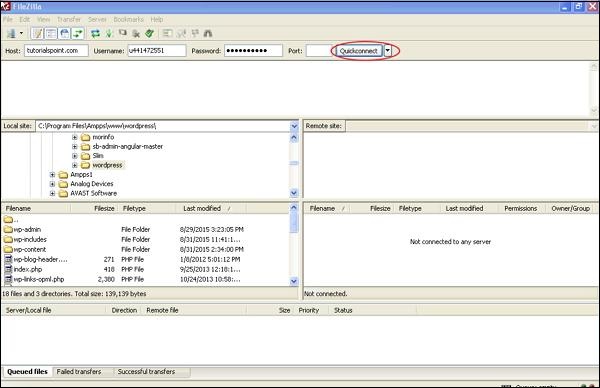
Quickconnect 按鈕。
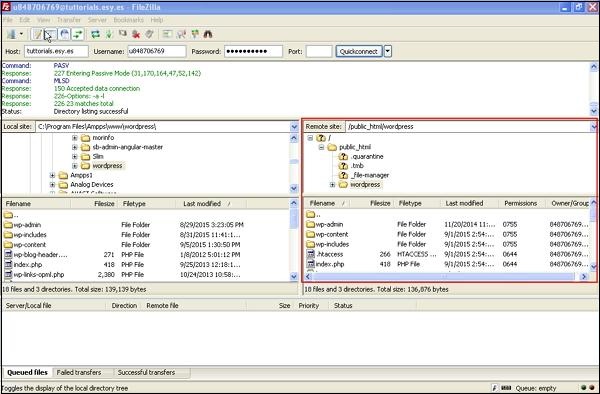
步驟(3) - 您將在右側看到WordPress網站的所有檔案和資料夾,如下面的畫面所示。
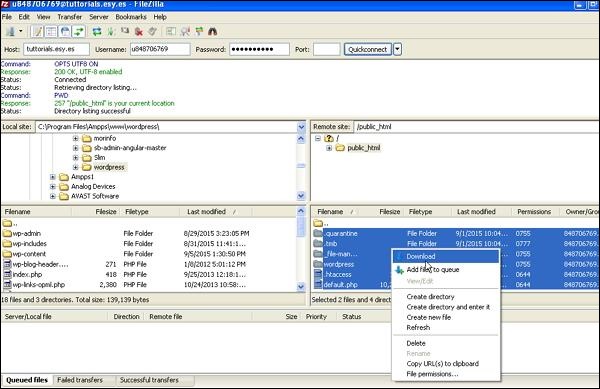
步驟(4) - 選取所有檔案和資料夾,以滑鼠右鍵按一下滑鼠,然後按一下Download。
步驟(1) - 在瀏覽器中輸入路徑 http:// localhost / phpmyadmin 。 您將獲得以下畫面。
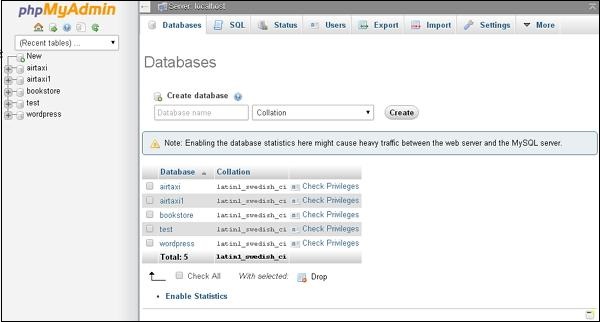
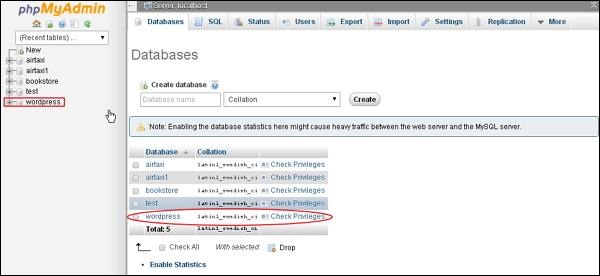
步驟(2) - 點選您為WordPress建立的資料庫名稱「wordpress"。
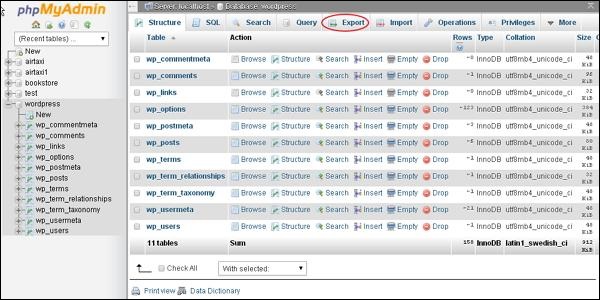
步驟(3) - 點選資料庫 wordpress 後,將開啟下列頁面。 點選Export標籤。
步驟(4) - 您將獲得兩種匯出資料庫的方法,即快速和自訂。 選擇任一方法,然後按一下Go按鈕。
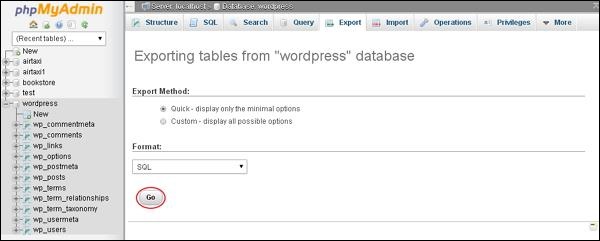
匯出資料庫檔案後,它將保存在您的系統上。
還原WordPress檔案
以下是簡單的步驟,用於還原WordPress中的檔案使用ftp -
步驟(1) - 開啟FileZilla Client,並使用ftp登入您的網站,如下面的畫面所示。
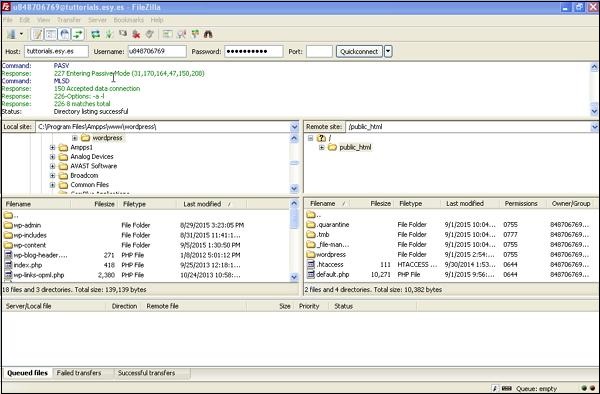
步驟(2) - 在ftp中開啟本機目錄,並將所有WordPress檔案上傳到您的網站,如下所示。
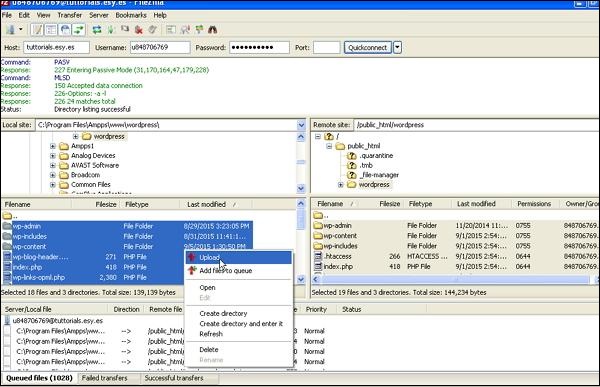
開啟wp-config.php檔案並找到以下程式碼。
define('DB_NAME', 'db_name');將db_name替換為您建立的資料庫名稱。
define('DB_USER', 'db_user');使用您的使用者名稱MySql取代db_user。
define('DB_PASSWORD', 'db_password');使用您的密碼MySql取代db_password。
編輯後儲存您的wp配置文件,並透過ftp上傳到您的WordPress網站。
還原WordPress資料庫
以下是用於在WordPress中還原資料庫的步驟-
步驟(1) - 在瀏覽器中輸入路徑 http:// localhost / phpmyadmin 。 將彈出以下畫面。
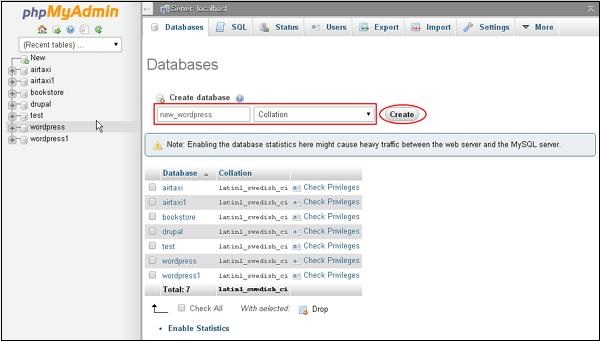
您可以建立新資料庫或在現有資料庫中匯入備份。
在這裡,我們將建立一個新的資料庫名稱,也就是 new_wordpress ,然後點擊new_wordpress#按鈕。
步驟(2) - 您可以檢視您建立的資料庫,如下方的畫面所示。 點選資料庫名稱 new_wordpress 。
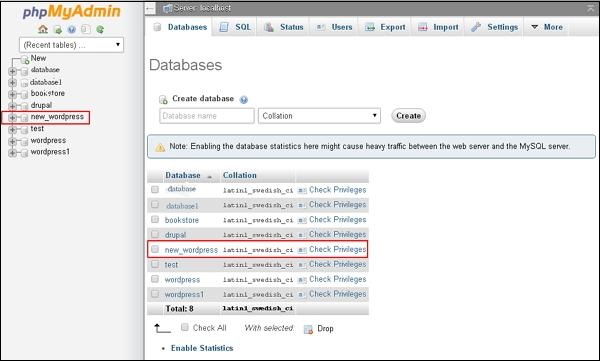
步驟(3) - 點選Import。
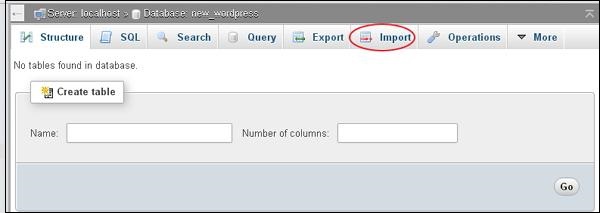
步驟(4) - 點選選擇檔案按鈕從系統中選擇備份檔案。 上傳sql檔案後,選擇格式為 SQL ,如下列畫面所示。
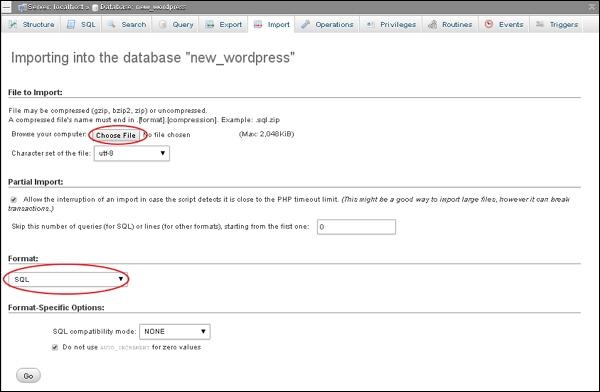
點選Go按鈕。
步驟(5) - 一旦點擊Go,您將在sql檔案上傳成功後收到一則訊息。


