微信小程式標籤的實作方法
- 不言原創
- 2018-06-27 17:32:172339瀏覽
這篇文章主要介紹了微信小程序之選項卡的實現方法的相關資料,希望大家透過本文能實現這樣的功能,需要的朋友可以參考下
微信小程序之選項卡的實作方法
前言:
從事前端的同學一定不會對選項卡陌生,不管是自己原生寫的,還是各個UI框架裡帶的,我想大家都使用過很多選項卡,對選項卡的原理也足夠清楚了,下面我們來在微信小程式裡實現選項卡的功能。
微信小程式裡沒有自備選項卡元件,但是卻有swiper元件,所以,我們便利用swiper來實作選項卡的功能。
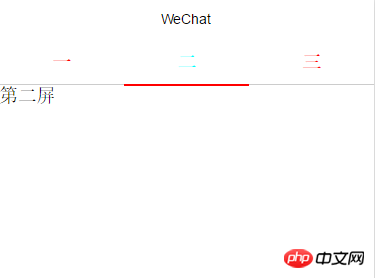
先看效果圖:


#實作程式碼:
頁碼:
<view class="swiper-tab">
<view class="swiper-tab-item {{currentTab==0?'active':''}}" data-current="0" bindtap="clickTab">一</view>
<view class="swiper-tab-item {{currentTab==1?'active':''}}" data-current="1" bindtap="clickTab">二</view>
<view class="swiper-tab-item {{currentTab==2?'active':''}}" data-current="2" bindtap="clickTab">三</view>
</view>
<swiper current="{{currentTab}}" duration="300" bindchange="swiperTab">
<swiper-item><view>第一屏</view></swiper-item>
<swiper-item><view>第二屏</view></swiper-item>
<swiper-item><view>第三屏</view></swiper-item>
</swiper>
js程式碼:
var app=getApp()
Page({
 data:{
  currentTab:0
 },
 onLoad:function(options){
  // 页面初始化 options为页面跳转所带来的参数

 },
 //滑动切换
 swiperTab:function( e ){
  var that=this;
  that.setData({
   currentTba:e.detail.current
  });
 },
 //点击切换
 clickTab: function( e ) {

  var that = this;

  if( this.data.currentTab === e.target.dataset.current ) {
   return false;
  } else {
   that.setData( {
    currentTab: e.target.dataset.current
   })
  }
 }

})
css程式碼:
##
.swiper-tab{
  width: 100%;
  border-bottom: 2rpx solid #ccc;
  text-align: center;
  height: 88rpx;
  line-height: 88rpx;
  font-weight: bold;
}
.swiper-tab-item{
  display: inline-block;
  width: 33.33%;
  color:red;
}
.active{
  color:aqua;
  border-bottom: 4rpx solid red;
}
以上就是本文的全部內容,希望對大家的學習有所幫助,更多相關內容請關注PHP中文網! 相關推薦:
##
以上是微信小程式標籤的實作方法的詳細內容。更多資訊請關注PHP中文網其他相關文章!
陳述:
本文內容由網友自願投稿,版權歸原作者所有。本站不承擔相應的法律責任。如發現涉嫌抄襲或侵權的內容,請聯絡admin@php.cn

