ImageView(image view)
Introduction to this section:
The basic UI control introduced in this section is: ImageView (image view), as the name implies, it is a View or control used to display images! Official API: ImageView; The contents explained in this section are as follows:
The difference between the src attribute and blackground of ImageView;
adjustViewBoundsSets whether the image is scaled according to the aspect ratio
scaleType sets the scaling type
The simplest ImageView to draw a circle
1. The difference between the src attribute and the background attribute:
##1) Write code to verify the difference: Write a simple layout test:In the API document we found that ImageView has two attributes that can set images, namely: src and background
Common sense:
①background usually refers to background, while src refers to content! !
②When using src to fill in the picture, is filled directly according to the size of the picture , and will not be stretched
When using background to fill in pictures, it will be stretched according to the width given by ImageView
xmlns:tools="http://schemas.android.com/tools"
android:id="@+id/LinearLayout1"
android:layout_width="match_parent"
android:layout_height="match_parent"
android:orientation="vertical"
tools:context="com.jay.example.imageviewdemo.MainActivity" >
<ImageView
android:layout_width="wrap_content"
android:layout_height="wrap_content"
android:background="../style/images/pen" />
<ImageView
android:layout_width="200dp"
android:layout_height="wrap_content"
android:background="../style/images/pen" />
<ImageView
android:layout_width="wrap_content"
android:layout_height="wrap_content"
android:src="../style/images/pen" />
<ImageView
android:layout_width="200dp"
android:layout_height="wrap_content"
android:src="../style/images/pen" />
</LinearLayout>
The renderings are as follows:
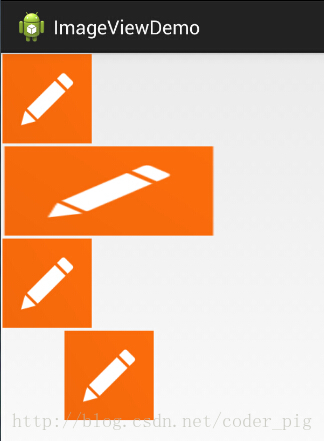
##Result analysis:
Width If the height is wrap_content, it is the same as the original image size. However, when we fix the width or height, The difference is obvious. The blackground completely fills the entire ImageView, but the src is still so large. And it's centered, which involves another attribute of ImageView, scaleType! Another point, here we said only set the width or height! Join us and set up For width and height, the blackground is still filled, but the size of src may change! For example, let’s test the following code:android:layout_height="50dp"
android:src=" ../style/images/pen" />
Running rendering:
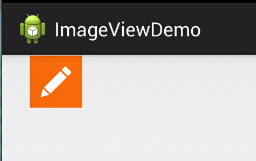 ##PS:scaleType will be discussed below~
We can see it in the second Imageview in the previous rendering Until the picture has been stretched and deformed, The square turned into a rectangle, which is obviously unacceptable for people with slight obsessive-compulsive disorder like me. Is there a way to set it? The answer is definitely yes. The author currently knows the following two methods:
- This is suitable for dynamic loading of ImageView, and the code is also gradual. Just add View, just capitalize it
- ##LinearLayout.LayoutParams layoutParam = new LinearLayout.LayoutParams(48, 48); layoutParam);
In addition to dynamically loading views, more often, we will introduce ImageView through xml layout. The solution is not difficult, it is to complete it through the Bitmap resource file of drawable, and then set the blackground attribute to this file! This xml file is created under the drawable folder. You need to create this folder yourself!!
pen_bg.xml:
xmlns:android="http://schemas.android. com/apk/res/android"
android:id="@id/pen_bg"
android:gravity="top"
android:src="../style/images/pen"
android:tileMode="disabled" >
</bitmap>
The above code is not difficult to understand. I think the most confusing thing for everyone is the titleMode attribute. This attribute is tiled, which is our windows setting. When the background is tiled, multiple small icons cover the entire screen! Remember it! If you don’t remember, you can try it yourself! disabled means disabling it!
is the simple code above. As for the calling method, it is as follows:
Dynamic: ibtnPen.setBacklgroundResource(R.drawable. penbg);
Static: android:background = "@drawable/penbg"
3) The problem of setting transparency
Finished The first two differences, let’s talk about the setAlpha attribute! This is very simple. This attribute is only effective when it is src!!
4) Two The magical combination of the author: A picture on the Internet:
Find a transparent png picture + Set a black background(Of course you can also set the transparency of png to achieve this, but the result may not be as expected There is a discrepancy!) Let’s write a simple example:
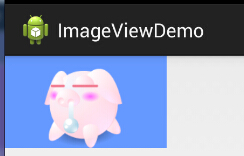

Implementation code:
android:layout_height ="wrap_content"
android:src="@drawable/pig"
android:background="../style/images/android-tutorial-imageview.html" />
PS: Of course you can also use selctor to achieve click effects, and set different pictures under different circumstances to achieve click or touch effects!
5) Set blackground and src attributes in Java code :
Foreground (corresponding to src attribute):setImageDrawable( );
Background (corresponding to background attribute):setBackgroundDrawable( );
2.adjustViewBounds sets whether to save the original image aspect ratio during zooming
ImageView provides us with the adjustViewBounds property, which is used to set whether to save the original image aspect ratio during zooming. Keep the aspect ratio of the original image! Setting it alone does not work and needs to be used together with the maxWidth and maxHeight properties! The latter two properties It also needs adjustViewBounds to be true to take effect~
android:maxHeight: Set the maximum height of ImageView
android:maxWidth: Set ImageView Maximum width
Code example:
xmlns:tools="http://schemas.android.com/tools"
android:layout_width="match_parent"
android:layout_height="match_parent"
android:orientation="vertical"
tools:context=".MainActivity">
< ;!-- Normal picture -->
"
" android:layout_margin="5px"
" android:src="@mipmap/meinv" />
Display the aspect ratio of the image-->
and ’ to ’ s ’ s ’ s ’ ’ to ’s to have been before since
android:layout_margin="5px"
android:adjustViewBounds="true"
android:maxHeight="200px"
android:maxWidth="200px"
android:src="@mipmap /meinv" />
</LinearLayout>
Running rendering:
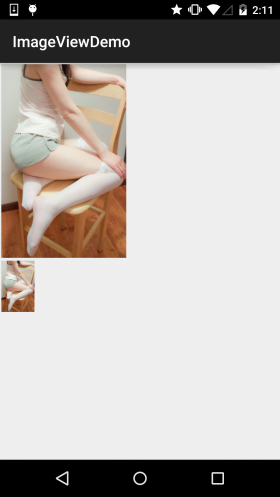
##Result analysis: The big picture does not have any The size of the processed image is: 541374; and for the one below, we pass maxWidth and maxHeight Limit the maximum width and height of ImageView to 200px, which means that it can only display a maximum of 200200 pictures. We also set a adjustViewBounds = "true"Adjust our borders to maintain the aspect ratio of the picture. The width and height of the ImageView at this time is 128*200~
3.scaleType sets the scaling type
android:scaleType is used to set how to scale or move the displayed image. Adapt to size of ImageView In Java code, you can set it through imageView.setScaleType(ImageView.ScaleType.CENTER);~ The optional values are as follows:Next we compare groups:
fitXY: Scale the image horizontally and vertically independently so that the image fully adapts to the ImageView, but the aspect ratio of the image may be different. Changes
fitStart: Scale the image keeping the aspect ratio, knowing that the longer side is equal to the Image's programming, and place the image in the upper left corner of the ImageView after scaling is complete
fitCenter: Same as above, scale it and place it in the middle;
fitEnd: Same as above, Scale it and place it in the lower right corner;
center: Keep the size of the original image and display it in the center of the ImageView. When the size of the original image is larger than the size of ImageView, the excess part will be cropped.
centerCrop: Maintain the aspect ratio of the image when scaling it, until the ImageView is completely covered, the image may not be displayed completely
centerInside: Maintain the aspect ratio of the image until the ImageView can completely display the image
matrix: Default value, do not change the original The size of the image, start drawing the original image from the upper left corner of the ImageView, The part of the original image that exceeds the ImageView is cropped
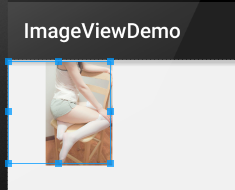
1)1.fitEnd,fitStart ,fitCenterHere is fitEnd as an example, the other two are similar:
Sample code:
##<!-- Keep the picture Scale the aspect ratio, know that the picture can be displayed on the ImageView component, and display the scaled picture in the lower right corner of the imageView -->android:layout_width="300px"
android:layout_height="300px"
android:layout_margin="5px"
android:scaleType="fitEnd"
android:src=" @mipmap/meinv" />
Running rendering:
##2) centerCrop and centerInside
- ##centerCrop: Scale according to the aspect ratio, Directly and completely cover the entire ImageView
- centerInside: Scale according to the aspect ratio so that the ImageView can completely display the image
- Sample code:
android:layout_margin="5px"
android:scaleType="centerCrop"
="5px"
android:scaleType="centerInside"
android:src="@mipmap/meinv" />
##Running rendering:
3)fitXY
does not scale the image proportionally, the goal is to fill the entire View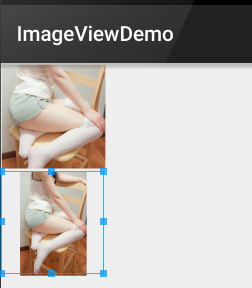 Sample code:
##<ImageView
300px" android:layout_margin="5px" android:scaleType="fixXY"
android:src="@mipmap/meinv" />Running rendering:
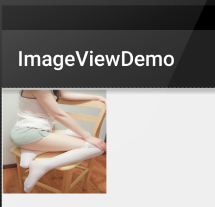
Okay, it’s obviously flat =-=~
4)matrix
Start drawing the original image from the upper left corner of the ImageView, and crop the part of the original image that exceeds the ImageView
Sample code:
android:layout_width="300px"
android:layout_height="300px"
android:layout_margin="5px"
android:scaleType="matrix"
android:src="@mipmap/meinv" />
Running rendering:
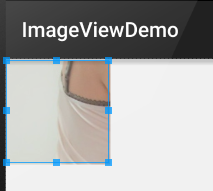
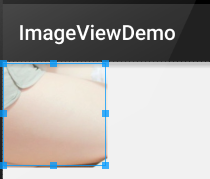
##5)centerKeep the original The size of the image, displayed in the center of the ImageView. When the size of the original image is larger than the size of ImageView, the excess part will be cropped.
Sample code:
##<ImageViewandroid:src="@mipmap/meinv" />
Running renderings:
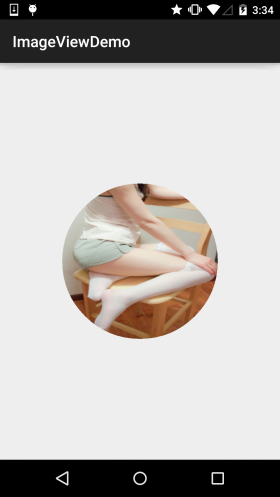
4. The simplest way to draw a circular ImageView
I believe everyone is familiar with circles or rounded corners. Are you familiar with ImageView? Many apps now like round avatars, right~
Let’s simply write a round ImageView. Of course, this is just an example, and performance and anti-aliasing are not taken into consideration. case! ! !
It can be said that I wrote it for fun. For actual projects, you can consider using controls written by talented people on Github, such as the following two:
I have already taught you how to use git~ Clone the project and copy the relevant files to your own project~
RoundedImageView
CircleImageView
Code example:
Running rendering:
Implementation code:
Customized ImageView: **RoundImageView.java
import android.content.Context;
import android.graphics.Bitmap;
import android.graphics.Canvas;
import android.graphics.Paint;
import android.graphics.PaintFlagsDrawFilter;
import android.graphics.Path;
import android.graphics.Rect;
import android.graphics.Region;
import android.util.AttributeSet;
import android.widget.ImageView;
/**
* Created by coder-pig on 2015/7/18 0018.
*/
public class RoundImageView extends ImageView {
private Bitmap mBitmap;
private Rect mRect = new Rect();
private PaintFlagsDrawFilter pdf = new PaintFlagsDrawFilter(0, Paint.ANTI_ALIAS_FLAG);
private Paint mPaint = new Paint();
private Path mPath=new Path();
public RoundImageView(Context context, AttributeSet attrs) {
super(context, attrs);
init();
}
//传入一个Bitmap对象
public void setBitmap(Bitmap bitmap) {
this.mBitmap = bitmap;
}
private void init() {
mPaint.setStyle(Paint.Style.STROKE);
mPaint.setFlags(Paint.ANTI_ALIAS_FLAG);
mPaint.setAntiAlias(true);// 抗锯尺
}
@Override
protected void onDraw(Canvas canvas) {
super.onDraw(canvas);
if(mBitmap == null)
{
return;
}
mRect.set(0,0,getWidth(),getHeight());
canvas.save();
canvas.setDrawFilter(pdf);
mPath.addCircle(getWidth() / 2, getWidth() / 2, getHeight() / 2, Path.Direction.CCW);
canvas.clipPath(mPath, Region.Op.REPLACE);
canvas.drawBitmap(mBitmap, null, mRect, mPaint);
canvas.restore();
}
}
布局代码:activity_main.xml:
android:id="@+id/img_round"
android:layout_width="200dp"
android:layout_height="200dp"
android:layout_margin="5px"/>
MainActivity.java:
import android.graphics.Bitmap;
import android.graphics.BitmapFactory;
import android.os.Bundle;
import android.support.v7.app.AppCompatActivity;
public class MainActivity extends AppCompatActivity {
private RoundImageView img_round;
@Override
protected void onCreate(Bundle savedInstanceState) {
super.onCreate(savedInstanceState);
setContentView(R.layout.activity_main);
img_round = (RoundImageView) findViewById(R.id.img_round);
Bitmap bitmap = BitmapFactory.decodeResource(getResources(),R.mipmap.meinv);
img_round.setBitmap(bitmap);
}
}
本节小结:
本节讲解了ImageView(图像视图),内容看上很多,不过都是一些详述性的东西,知道即可~ 最后的自定义圆形ImageView也是,只是写来玩玩的,实际项目中还是建议使用那两个第三方的自定义控件吧~


