Rumah >Tutorial sistem >Siri Windows >Bagaimana untuk Memulihkan Windows Photo Viewer dalam Windows 10/11
Bagaimana untuk Memulihkan Windows Photo Viewer dalam Windows 10/11
- 王林asal
- 2024-06-14 16:18:10409semak imbas
Microsoft replaced the classic Photo Viewer app in Windows 10 and 11 with Photos, its modern, feature-rich image viewer. However, if you liked the simplicity of Photo Viewer, here's how you can bring it back in Windows 10 and 11.
How to Restore Windows Photo Viewer in Windows 10/11 Using the Registry
You can enable the classic Windows Photo Viewer app using a Windows Registry script. The following Windows Registry script reconfigures and enables the Windows Photo Viewer app.
Modifying your Windows Registry involves risk as incorrect modifications can cause your system to malfunction. If you intend to proceed with the steps below, first create a restore point and back up your Windows Registry. This will help you to recover your system if something goes wrong.
- Press Win + R to open the Run dialog. Input notepad and click OK.
- Copy and paste the following script into the Notepad file. This script activates the Windows Photo Viewer.
<code class="hljs xml">Windows Registry Editor Version 5.00 [HKEY_CLASSES_ROOT\Applications\Windowsphotoviewer.dll\shell\open] "MuiVerb"="@Windowsphotoviewer.dll,-3043" [HKEY_CLASSES_ROOT\Applications\Windowsphotoviewer.dll\shell\open\command] @="\"%SystemRoot%\\System32\\rundll32.exe\" \"%ProgramFiles%\\Windows Photo Viewer\\PhotoViewer.dll\", ImageView_Fullscreen %1" [HKEY_CLASSES_ROOT\Applications\Windowsphotoviewer.dll\shell\open\DropTarget] "Clsid"="{FFE2A43C-56B9-4bf5-9A79-CC6D4285608A}" [HKEY_CLASSES_ROOT\Applications\Windowsphotoviewer.dll\shell\print\command] @="\"%SystemRoot%\\System32\\rundll32.exe\" \"%ProgramFiles%\\Windows Photo Viewer\\PhotoViewer.dll\", ImageView_PrintTo %1" [HKEY_CLASSES_ROOT\Applications\Windowsphotoviewer.dll\shell\print\DropTarget] "Clsid"="{60fd46de-f830-4894-a628-6fa81bc0190d}"</code>
- Press Ctrl + Shift + S to open the Save dialog. Alternatively, go to File > Save As.
- In the Save as dialog, enter ActivateWindowsPhotoViewer.reg as the file name. Click the Save astype drop-down and choose All Files(*.*). Choose a location and Save the file to your drive.

- Next, open File Explorer, browse to the location where you saved the file, double-click ActivateWindowsPhotoViewer.reg, and then click Yes. When a warning prompt appears, click Yes.
- After the script is executed, you'll see a success message. Click OK.
- To apply the changes, press Win + X to open the Windows Powermenu and choose Task Manager.
- In the Process tab, find and right-click on Windows Explorer, then click Restart. Your screen may flash momentarily as Windows Explorer restarts.

Since Windows Photos Viewer doesn't have its own .EXE file, but only a .DLL, you can't open it from the search bar in Windows. Instead, to open pictures in Photo Viewer, right-click on any image in File Explorer, go to Open With > Choose another app, and then scroll down and select Windows Photo Viewer. Choose Just once to open the image. If you select Always, Windows will set Photo Viewer as the default app for that image format.

How to Disable Windows Photo Viewer in Windows 10 and 11
To disable Windows Photo Viewer, you must undo the changes you made earlier to the Windows Registry. It's worth making a backup again before making the changes. Then:
- Press Win + R to open the Run dialog. Input notepad and click OK.
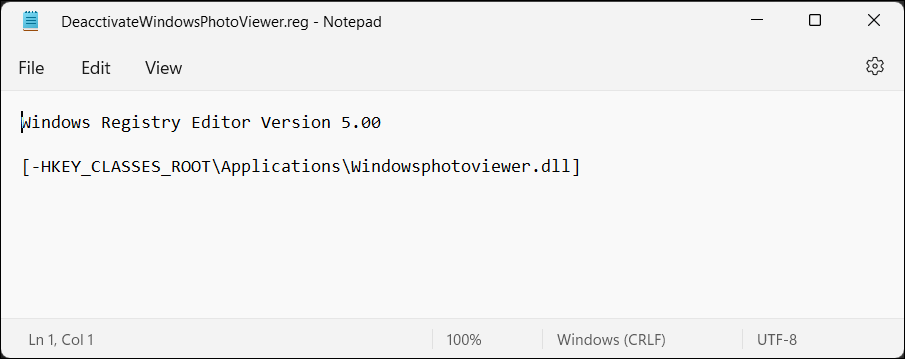
- Copy and paste the following script into the notepad file:
<code class="hljs css">WindowsRegistryEditorVersion 5.00[-HKEY_CLASSES_ROOT\Applications\Windowsphotoviewer.dll]</code>

- Press Ctrl + Shift + S to open the Save dialog.
- Type DeactivateWindowsPhotoViewer.reg as the file name. Click the Save as type drop-down, choose All files (*.*), then click Save.

- Double-click DeactivateWindowsPhotoViewer.reg to execute the script and follow the on-screen instructions.
Once done, restart Windows Explorer, and the Photo Viewer app will be disabled.
Use One Photo Viewer

One Photo Viewer is an excellent Windows Photo Viewer and Windows Photos alternative. It's fast, free, and offers a clean interface by placing all the controls in the context menu, decluttering the toolbar area. Right-click the app interface to view the menu and access all the tools and settings.
One Photo Viewer offers all the bells and whistles you expect of an image viewer, plus more. You can scroll through the images using the arrow keys or the dedicated buttons, zoom in and out, rotate, crop, resize, or adjust colors.
Ia juga menyokong format RAW, termasuk animasi HEIC dan WEBP, tayangan slaid daripada folder atau imej yang dimuatkan, pintasan papan kekunci tersuai dan alat pembetulan warna untuk membuat peningkatan pantas. Anda juga boleh memilih versi $3 Pro untuk mendapatkan dua ciri tambahan: bar alat untuk fungsi yang dipertingkatkan dan lakaran kecil untuk navigasi yang lebih mudah.
Muat Turun: One Photo Viewer (Percuma, versi premium tersedia)
Jadi, jika anda lebih suka menggunakan pilihan asli, berikan apl Windows Photos terbina dalam sekali lagi. Ia tidak seteruk yang anda fikirkan pada penggunaan pertama.
Atas ialah kandungan terperinci Bagaimana untuk Memulihkan Windows Photo Viewer dalam Windows 10/11. Untuk maklumat lanjut, sila ikut artikel berkaitan lain di laman web China PHP!
Artikel berkaitan
Lihat lagi- Bagaimana untuk menyelesaikan masalah desktop Windows 7 berputar 90 darjah
- Bagaimana untuk menamatkan proses berjalan secara paksa dalam Win7
- Versi pratonton Win11 Build 25336.1010 dikeluarkan hari ini: digunakan terutamanya untuk menguji saluran paip operasi dan penyelenggaraan
- Pratonton Win11 Beta Bina 22621.1610/22624.1610 dikeluarkan hari ini (termasuk kemas kini KB5025299)
- Pengecaman cap jari tidak boleh digunakan pada komputer ASUS Bagaimana untuk menambah cap jari? Petua untuk menambah cap jari pada komputer ASUS

