Angular+rxjs가 드래그 앤 드롭 기능을 구현하는 방법에 대한 간략한 분석은 무엇입니까?
- 青灯夜游앞으로
- 2022-04-30 10:00:173309검색
Angular+rxjs로 드래그 앤 드롭 기능을 구현하는 방법은 무엇입니까? 다음 글에서는 Angular가 rxjs를 결합하여 드래그 앤 드롭을 구현하는 방법을 소개하겠습니다. 도움이 되길 바랍니다.

이전 기사에서 Angular의 사용자 정의 비디오 작업에 대해 배웠습니다. 경험하지 못한 독자라면 먼저 배울 수 있습니다.
이제 이런 수요가 있는데 어떻게 실현하시겠습니까?
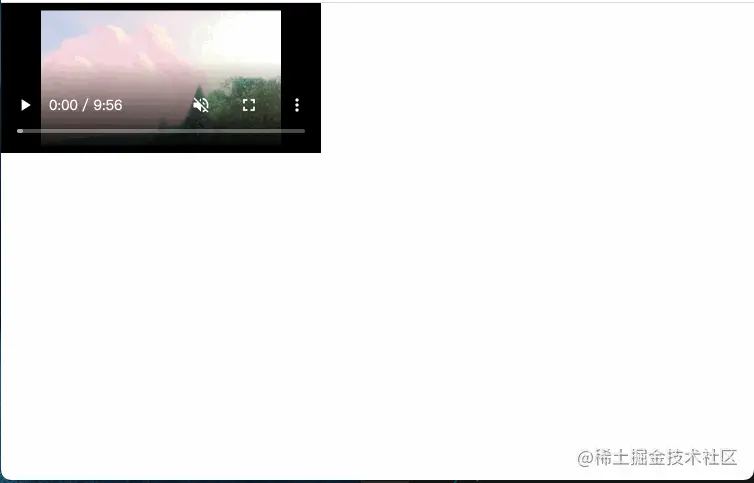
페이지의 동영상 태그에서 스크롤 높이가 해당 위치를 초과할 경우 보이는 영역에서 자유롭게 드래그할 수 있도록 설정합니다.
좋은 아이디어입니다. Angular의 @angular/cdk/drag-drop을 사용하면 쉽게 구현할 수 있지만 우리는 여기에는 없습니다. 도구를 사용하세요. [관련 튜토리얼 권장 사항: "Idea,如果你使用 Angular 的 @angular/cdk/drag-drop 可以轻松实现,但是我们这里不使用工具。【相关教程推荐:《angular教程》】
好吧,我们来分析下实现的思路:
- 页面滚动高度大于视频所在的位置:那么就是视频的
bottom值相对可视窗口的值要小于0,我们需要设定一个包裹video标签的div方便计算,其高度是原设定video的高度。即元素脱离原文档布局 -
video元素可以拖拽,那么其定位需要被改变为fixed -
video元素在可视区内自由拖动,那么需要对其top,left值进行限定
所以我们设定下面的 demo 布局:
<div id="anchor" #anchor>
  <div class="video" id="video" #video>
    <div class="masker"></div>
    <video width="100%" height="100%" controls poster="assets/poster.png">
      <source src="../assets/demo.mp4" type="video/mp4" />
      Your browser does not support.
    </video>
  </div>
</div>
有下面这些预定的样式:
<!-- styles.scss -->
<!-- 这部分需要放在全局样式中 -->
html, body {
  height: 6000px;
  background-color: #fff;
}
<!-- demo.component.scss -->
#anchor {
height: 360px;
width: 100%;
background-color: #F0F0F0;
}
.video {
width: 640px;
height: 360px;
margin: 0 auto;
background-color: black;
<!-- video fixed 布局的样式,默认布局中是没有的 -->
&.video-fixed {
position: fixed;
top: 10px;
left: 10px;
width: 320px;
height: 150px;
cursor: all-scroll;
.masker {
display: none;
}
&:hover {
.masker {
display: block;
position: absolute;
width: 100%;
height: 100%;
background-color: rgba(0, 0, 0, 0.8);
z-index: 2;
}
}
}
}这里还引入了 rxjs 来操作。
元素脱离原文档布局
刚才已经分析了 video 元素脱离文档的临界调节了:
video 的外 div,即 #anchor 元素的相对视图的 bottom 。所以我们有:
@ViewChild('anchor', { static: false })
public anchor!: ElementRef;
@ViewChild('video', { static: false })
public video!: ElementRef;
public scroll!: any;
ngAfterViewInit(): void {
this.scroll = fromEvent(document, 'scroll');
this.scrollFn();
}
// 页面滚动
public scrollFn() {
this.scroll
.pipe(
debounceTime(50), // 防抖
map(() => this.anchor.nativeElement.getBoundindClientRect().bottom < 0)
)
.subscribe((flag: boolean) => {
// 添加和移除样式
if(flag) {
this.video.nativeElement.classList.add('video-fixed');
} else {
this.video.nativeElement.classList.remove('video-fixed');
}
})
}
先获取 anchor 元素对象,监听页面对象 document 滚动(我们这里加入了防抖函数优化),当 bottom 的时候,将相关的样式 <code>video-fixed 添加给 video 。
元素拖拽
接下来就是实现 video 元素的拖拽。这里我们要监听 video 元素的三个事件,分别是鼠标按下 mousedown,鼠标移动 mousemove 和鼠标抬起 mouseup。
// demo.component.ts

public mouseDown!: any;
public mouseUp!: any;
public mouseMove!: any;

ngAfterViewInit(): void {
  this.mouseDown = fromEvent(this.video.nativeElement, 'mousedown'); // 目标元素按下,即 video
  this.mouseMove = fromEvent(document, 'mousemove'); // 元素在文档内移动
  this.mouseUp = fromEvent(document, 'mouseup'); // 鼠标抬起

  this.moveFn()
}

// 目标元素移动
public moveFn() {
  this.mouseDown
    .pipe(
      filter(() => this.video.nativeElement.classList.contains('video-fixed')),
      map(() => this.mouseMove.pipe(
        throttleTime(50), // 节流
        takeUntil(this.mouseUp)
      )),
      // concatAll 顺序接受上游抛出的各个数据流作为它的数据, 若前面的数据流不能同步的完结,它会暂存后续数据流,当前数据流完成后它才会订阅后一个暂存的数据流
      concatAll(),
      withLatestFrom(this.mouseDown, (move:any, down:any) => {
        return {
          x: this.validValue(move.clientX - down.offsetX, window.innerWidth - this.video.nativeElement.offsetWidth, 0),
          y: this.validValue(move.clientY - down.offsetY, window.innerHeight - this.video.nativeElement.offsetHeight, 0)
        }
      })
    )
    .subscribe((position: {
      x: number,
      y: number
    }) => {
      this.video.nativeElement.style.top = position.y + 'px';
      this.video.nativeElement.style.left = position.x + 'px';
    })
}

// 校验边界值
public validValue = (value:number, max:number, min: number) => {
  return Math.min(Math.max(value, min), max)
}
我们监听目标元素(filter 函数)被鼠标按下,然后鼠标可以在 document 范围内移动(这里用节流函数优化了下),直到监听到鼠标抬起。在移动的过程中,计算目标元素的相对可视窗口左侧和顶部的距离,将值赋予到 left 和 top。
这里的计算 move.clientX - down.offsetX, window.innerWidth - this.video.nativeElement.offsetWidthangular tutorial
- 페이지의 스크롤 높이가 비디오의 위치보다 큽니다. 그러면 하단 값은 시각적 창의 값을 기준으로 0보다 작아야 합니다.
video태그를 래핑하는div를 설정해야 합니다. 쉽게 계산할 수 있도록 높이는동영상 높이의 원래 설정입니다. 즉, 요소가 원본 문서 레이아웃을 벗어났습니다. -
video요소를 드래그 앤 드롭할 수 있으므로 위치를고정)으로 변경해야 합니다. > -
video요소는 시각적 영역 내에서 자유롭게 드래그할 수 있으며, 해당top,left값이 필요합니다. 제한됨
 그래서 우리는 다음과 같은
 demo 레이아웃을 설정했습니다. rrreee에는 다음과 같은 미리 결정된 스타일이 있습니다.
rrreeerrreee 요소가 원본 문서 레이아웃을 벗어났습니다.🎜🎜🎜방금video 요소의 중요한 조정을 분석했습니다. 문서 외부: 🎜🎜 🎜video🎜의 외부 div는 #anchor 요소의 상대 보기의 하단 입니다. . 따라서 다음과 같습니다: 🎜rrreee🎜<img src="https://img.php.cn/upload/image/901/440/141/165120212997344Angular+rxjs%EA%B0%80%20%EB%93%9C%EB%9E%98%EA%B7%B8%20%EC%95%A4%20%EB%93%9C%EB%A1%AD%20%EA%B8%B0%EB%8A%A5%EC%9D%84%20%EA%B5%AC%ED%98%84%ED%95%98%EB%8A%94%20%EB%B0%A9%EB%B2%95%EC%97%90%20%EB%8C%80%ED%95%9C%20%EA%B0%84%EB%9E%B5%ED%95%9C%20%EB%B6%84%EC%84%9D%EC%9D%80%20%EB%AC%B4%EC%97%87%EC%9E%85%EB%8B%88%EA%B9%8C?" title="165120212997344Angular+rxjs가 드래그 앤 드롭 기능을 구현하는 방법에 대한 간략한 분석은 무엇입니까?" alt="Angular+rxjs가 드래그 앤 드롭 기능을 구현하는 방법에 대한 간략한 분석은 무엇입니까?">🎜🎜먼저 <code>anchor 요소 개체를 가져오고 페이지 개체 document의 스크롤을 모니터링합니다(여기서 bottom일 때 흔들림 방지 기능 최적화를 추가했습니다). , 관련 스타일 <code>video-fixed를 video에 추가하세요. 🎜🎜🎜요소 드래그🎜🎜🎜다음 단계는 video 요소의 드래그를 구현하는 것입니다. 여기서는 video 요소의 세 가지 이벤트, 즉 마우스 다운 mousedown, 마우스 이동 mousemove 및 마우스 업 mouseup . 🎜rrreee🎜마우스가 누르는 대상 요소(필터 기능)를 듣고, 마우스가 올라갈 때까지 마우스가 <code>문서 범위(여기서 조절 기능으로 최적화됨) 내에서 이동할 수 있습니다. 이동 중에 시각적 창을 기준으로 대상 요소의 왼쪽 및 위쪽까지의 거리가 계산되고 해당 값이 왼쪽 및 상단에 할당됩니다. 🎜🎜여기서의 계산은 move.clientX - down.offsetX, window.innerWidth - this.video.nativeElement.offsetWidth입니다. 관련 개념이 명확하지 않을 수도 있지만 중요하지 않습니다. .위 내용을 이해해주세요. 관련 지식 포인트는 다음 기사에서 소개됩니다. 🎜🎜마지막으로 우리가 얻은 효과는 다음과 같습니다🎜🎜🎜🎜🎜【끝】🎜🎜더 많은 프로그래밍 관련 지식을 보려면 🎜프로그래밍 비디오🎜를 방문하세요! ! 🎜위 내용은 Angular+rxjs가 드래그 앤 드롭 기능을 구현하는 방법에 대한 간략한 분석은 무엇입니까?의 상세 내용입니다. 자세한 내용은 PHP 중국어 웹사이트의 기타 관련 기사를 참조하세요!

