Angular 루트 모듈 및 기능 모듈에 대한 자세한 설명
- 青灯夜游앞으로
- 2021-03-24 11:19:541768검색
이 기사에서는 Angular의 기능 템플릿과 루트 템플릿을 안내합니다. 도움이 필요한 친구들이 모두 참고할 수 있기를 바랍니다.

Angular cli가 설치되어 있다는 것이 전제입니다. 다음 파일 생성의 대부분은 cliAngular cli,以下的大部分文件创建都是依赖于cli提供的指令
<span style="font-size: 20px;">Angular</span>中的特性模板和根模板(<span style="font-size: 20px;">AppModule</span>)
区别在于特性模板可以把应用划分,个人理解类似于组件化
1、特性模板创建的指令ng g module article ,这里使用的是ng g module article --routing,可以生成一个article-routing.module.ts路由文件
2、此时CLI会在app文件夹下再创建一个文件夹article,article文件夹下包含两个文件article.module.ts和article-routing.module.ts
3、使用ng g component 生成两个组件,指定模板为article,指定的模板会自动导入到article.modules.ts中,并且注册到declarations数组,注意:不要删除declarations中注册的组件,不然会导致组件中部分指定无法使用
- ng g component 说明
-
ng g component article/article-list -m=article,在article文件夹下生成article-list文件夹组件 ng g component article/article-create -m=article,在article文件夹下生成article-create文件夹组件
4、article.module.ts 在 CLI 生成的特性模块中,在文件顶部有两个 JavaScript 的导入语句:第一个导入了 NgModule,它像根模块中一样让你能使用 @NgModule 装饰器;第二个导入了 CommonModule,它提供了很多像 ngIf 和 ngFor 这样的常用指令。 特性模块导入 CommonModule,而不是 BrowserModule,后者只应该在根模块中导入一次。 CommonModule 只包含常用指令的信息,比如 ngIf 和 ngFor,它们在大多数模板中都要用到,而 BrowserModule 为浏览器所做的应用配置只会使用一次。
import { NgModule } from '@angular/core';
import { CommonModule } from '@angular/common';

import { ArticleRoutingModule } from './article-routing.module';
import { ArticleListComponent } from './article-list/article-list.component';
import { ArticleCreateComponent } from './article-create/article-create.component';


@NgModule({
  declarations: [ArticleListComponent, ArticleCreateComponent],
  imports: [
    CommonModule,
    ArticleRoutingModule
  ]
})
export class ArticleModule { }相关推荐:《angular教程》
5、article-routing.module.ts ,路由地址嵌套配置,这里的地址设置是因为在app-routing.module根路由模块中已经设置了当前模块的路由前缀为article,因此下面的路由都只用直接设置即可,访问时带上根路由设置的路由前缀。
- 例如,根路由设置的是
article,这里设置的是list,访问地址需要使用article/list
import { NgModule } from '@angular/core'
import { Routes, RouterModule } from '@angular/router'

import { ArticleListComponent } from './article-list/article-list.component'
import { ArticleCreateComponent } from './article-create/article-create.component'
const routes: Routes = [
    {
        path: '',
        children: [
            {
                path: '',
                pathMatch:'full',
                redirectTo: '/article/list'
            },
            {
                path: 'list',
                component: ArticleListComponent
            },
            {
                path: 'create',
                component: ArticleCreateComponent
            }
        ]
    }
]
@NgModule({
    imports: [RouterModule.forChild(routes)],
    exports: [RouterModule]
})
export class ArticleRoutingModule {}
6、根模块app.mudles.ts,导入app-routing.module文件,可以配置全局的路由
import { HttpClientModule } from '@angular/common/http';
import { NgModule } from '@angular/core';
import { FormsModule } from '@angular/forms';
import { BrowserModule } from '@angular/platform-browser';
import { AppRoutingModule } from './app-routing.module'

import { AppComponent } from './app.component';
@NgModule({
  declarations: [
    AppComponent
  ],
  imports: [
    BrowserModule,
    FormsModule,
    HttpClientModule,
    AppRoutingModule
  ],
  providers: [],
  bootstrap: [AppComponent]
})
export class AppModule { }
7、根模块的路由app-routing.module.ts loadChildren是使用了惰性加载特性模块 默认情况下,NgModule都是急性加载的,也就是说它会在应用加载时尽快加载,所有模块都是如此,无论是否立即要用。对于带有很多路由的大型应用,考虑使用惰性加载 —— 一种按需加载 NgModule的模式。惰性加载可以减小初始包的尺寸,从而减少加载时间。
import { NgModule } from '@angular/core'
import { Routes, RouterModule } from '@angular/router'
import { LoginComponent } from './login/login.component'
const routes: Routes = [
    { path: 'login', component: LoginComponent },
    {
        path: 'article',
        loadChildren: () => import('./article/article.module').then((m) => m.ArticleModule)
    }
]

@NgModule({
    imports: [RouterModule.forRoot(routes)],
    exports: [RouterModule]
})
export class AppRoutingModule {}
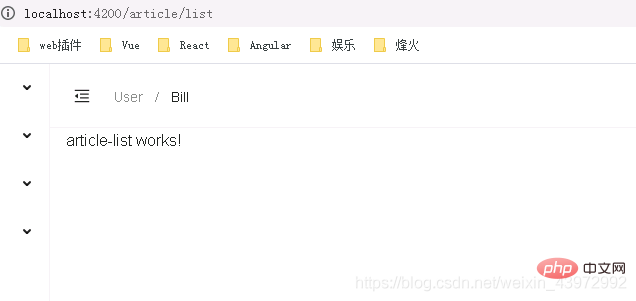
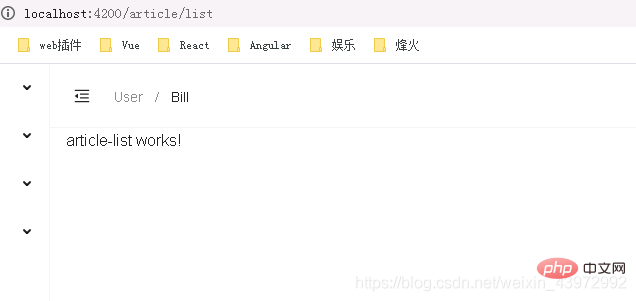
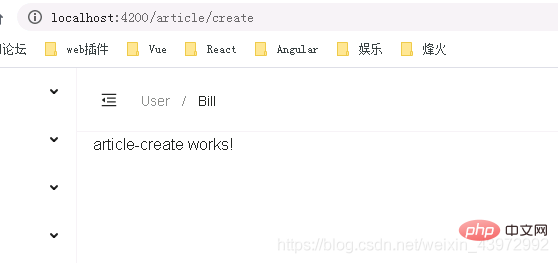
8、最后如果想要访问article下面的list和create路由在浏览器输入地址article/list
-
article/list
-
或者
article/create에서 제공하는 지침에 의존합니다. code ><span style="font-size: 20px;">Angular</span>속성 템플릿 및 루트 템플릿(
<span style="font-size: 20px;">AppModule</span>) 차이점은 기능 템플릿은 애플리케이션을 나눌 수 있습니다. 제 개인적인 이해는 구성 요소화와 유사합니다
1. 기능 템플릿을 만드는 방법은 ng g 모듈 기사입니다. -routing을 사용하면 article-routing.module.ts 라우팅 파일2을 생성할 수 있습니다. 이때 CLI는 app 폴더 아래에 article 폴더를 하나 더 만듭니다. article 폴더에는 article.module.ts 및 두 파일이 포함되어 있습니다. Article- Routing.module.ts
ng g 컴포넌트를 사용하여 두 개의 컴포넌트를 생성하고 템플릿을 article로 지정하면 지정된 템플릿이 됩니다. 자동으로 article.modules.ts로 가져와 선언 배열에 등록합니다. 🎜참고: 선언에 등록된 구성 요소를 삭제하지 마세요. 그렇지 않으면 구성 요소에서 부분 지정이 발생합니다. Unable to use🎜- ng g 구성 요소 Description🎜
-
ng g 구성 요소 기사/기사-목록 -m=article,article폴더 아래에article-list폴더 구성 요소 🎜 - 🎜
ng 구성 요소 기사/article-create -m=article생성 ,article에서 🎜🎜🎜🎜4 폴더 아래에article-create폴더 구성 요소를 생성합니다.article.module.ts에 의해 생성된 기능 모듈에서 CLI에는 파일 상단에 두 개의 JavaScript import 문이 있습니다. 첫 번째는NgModule을 가져옵니다. 이를 통해 루트 모듈에서와 마찬가지로@NgModule데코레이터를 사용할 수 있습니다. 두 번째는ngIf및ngFor와 같은 많은 공통 지시어를 제공하는CommonModule을 가져옵니다. 기능 모듈은 루트 모듈에서 한 번만 가져와야 하는BrowserModule이 아닌CommonModule을 가져옵니다.CommonModule에는 대부분의 템플릿에서 사용되는ngIf및ngFor와 같이 일반적으로 사용되는 지시문에 대한 정보만 포함되어 있는 반면,BrowserModulecode> 브라우저용으로 작성된 애플리케이션 구성은 한 번만 사용됩니다. 🎜rrreee🎜관련 추천: "Angular tutorial🎜"🎜🎜5.article-routing.module.ts, 라우팅 주소 중첩 구성, 여기서 주소 설정은 현재 모듈이app-routing.module루트 라우팅 모듈에 설정되어 있기 때문입니다. 경로 접두사는 article이므로 다음 경로는 모두 직접 설정할 수 있습니다. 액세스 시 루트 경로에서 설정한 경로 접두사를 가져옵니다. 🎜- 예를 들어 루트 경로는
article로 설정되어 있고, 여기서 설정은list로 해당 주소에 접근하려면를 사용해야 합니다. >기사/목록 🎜 🎜rrreee🎜6. 루트 모듈
 app.mudles.ts,app-routing.module파일을 가져와 글로벌 라우팅🎜rrreee🎜7을 구성합니다. app-routing.module .tsloadChildren은 지연 로딩 기능을 사용하는 모듈입니다. 기본적으로NgModule은 즉시 로드됩니다. 즉, 로드됩니다. 애플리케이션이 로드될 때 가능한 한 빨리, 이는 즉시 필요하든 아니든 모든 모듈에 적용됩니다. 경로가 많은 대규모 애플리케이션의 경우 요청 시NgModule을 로드하는 패턴인 지연 로딩을 사용하는 것이 좋습니다. 지연 로딩은 초기 번들 크기를 줄여 로드 시간을 단축합니다. 🎜rrreee🎜8. 마지막으로article아래의list및create경로에 액세스하려면article/list 주소를 입력하세요. 🎜<ul> <li>🎜<code>article/list🎜🎜 🎜🎜
🎜🎜 - 🎜또는
article/create🎜🎜🎜🎜🎜🎜🎜더 많은 프로그래밍 관련 지식을 원하시면 방문: 🎜프로그래밍 비디오 🎜! ! 🎜
- 예를 들어 루트 경로는
위 내용은 Angular 루트 모듈 및 기능 모듈에 대한 자세한 설명의 상세 내용입니다. 자세한 내용은 PHP 중국어 웹사이트의 기타 관련 기사를 참조하세요!

