ホームページ >ウェブフロントエンド >Vue.js >vue3 で setup() 関数と reactive() 関数を使用する方法
vue3 で setup() 関数と reactive() 関数を使用する方法
- PHPz転載
- 2023-05-19 16:25:261294ブラウズ
1. 結合 API 比較 vue2 プロジェクト構造
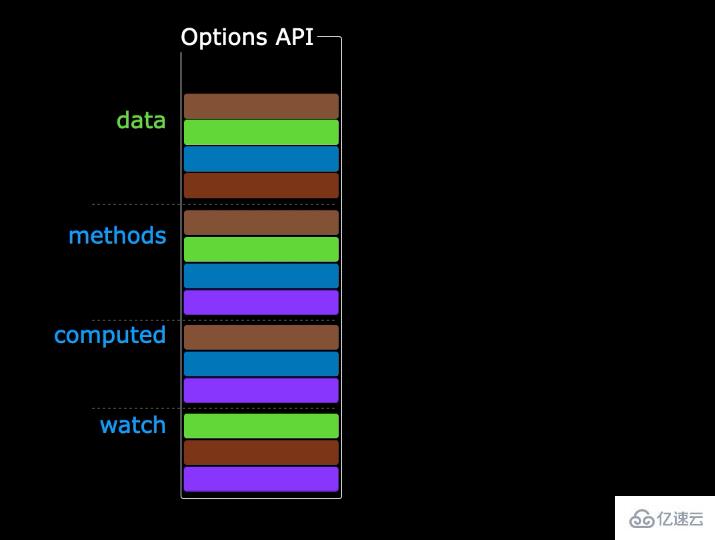
vue2 内
1利点: 学習と使用が簡単で、コードを記述する場所が合意されています。
2. 欠点: 大規模なプロジェクトの場合、コードの再利用、管理、メンテナンスが難しくなります。
3. 説明: 同じ関数のデータとビジネス ロジックが同じファイル内の N か所に分散されており、ビジネスの複雑さが増すにつれて、データに類似したデータを頻繁に使用する必要があります。 () メソッド内での前後の処理
##vue3
- #1. 利点: 同じデータ機能をビジネス ロジックと一緒に整理して、再利用とメンテナンスを容易にすることができます。
- 2. 欠点: 適切なコード構成と分割機能が必要であり、Vue2 ほど簡単に始めることはできません。
- 3. 説明: 注: 誰もが Vue3.0 バージョンにより適切に移行できるようにするために、現在、Vue2.x オプション API の記述方法がサポートされています。

#2.1 Setup() 関数の基本概念
Vue3 の setup() は、Vue3 の新しいコンポーネント構成項目であり、Vue2 の data()、methods()、computed() およびその他の構成項目を置き換えるために使用されます。 setup() はより簡潔な記述方法を提供し、Vue3 が提供する Comboposition API をより適切に活用できます。 setup() 関数は、props と context という 2 つのパラメータを取ります。コンポーネントが受け取ったプロパティ値は props に格納され、一部のコンポーネント構成情報は context に含まれます。
- 1. 概要: setup は Vue3 の新しいコンポーネント設定項目であり、組み合わせ API のエントリ関数として機能します。
- 2. 実行タイミング: インスタンスの作成前 (Vue2 の beforeCreate よりもさらに前) に呼び出されます。
- 3. 注: セットアップ実行時にインスタンスが作成されていないため、data およびメソッド内のデータをセットアップで直接使用することはできません。そのため、Vue3 セットアップのこれもバインドされています。未定義。
- Vue2 のデータとメソッドの設定項目は Vue3 でも使用できますが、推奨されません。データとメソッドを setup 関数に記述して渡すことを推奨します
を使用できます (通常、セットアップを非同期関数にすることはできません)。
2.2.setup() 初めての体験App.vue
<template>
<h2 @click="say()">{{ msg }}</h2>
</template>
<script>
export default {
setup() {
const msg = 'Hello Vue3'
const say = () => {
console.log(msg)
}
return { msg, say }
},
}
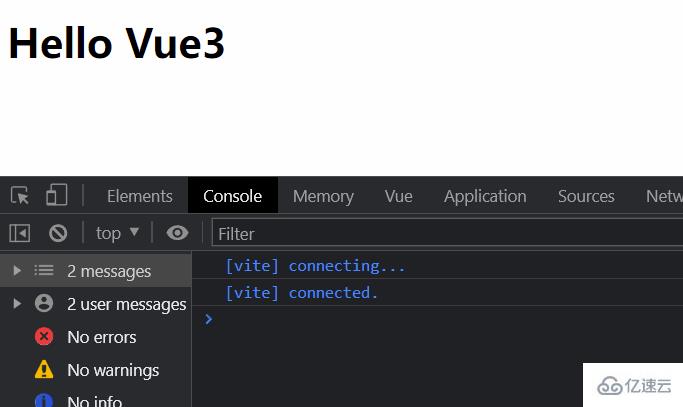
</script>エフェクト ビュー:
 注: vue2 の data() およびメソッドと同様に、これらは結果として呼び出す前に、戻り値として書き込む必要があります。
[インタビューのちょっとした質問の補足] セットアップで返されるオブジェクトは 1 つだけでなければなりませんか? (セットアップはレンダリング関数を返すこともできます)
App.vue
<script>
import { h } from 'vue'
export default {
name: 'App',
setup() {
return () => h('h3', 'Hello Vue3')
},
}
</script>コンソールは h3 タグを含む Hello Vue3 を出力します。
2.3.reactive() 関数reactive 関数を使用して、配列を応答性の高いデータにラップします。 reactive は、通常のオブジェクト/配列を reactive データにラップして使用するために使用される関数ですが、基本的なデータ型を直接処理することはできません (Proxy に基づいており、Proxy はオブジェクトをプロキシすることしかできないため)。
たとえば、「クリックして現在の行情報を削除する」という要件がある場合、App.vue
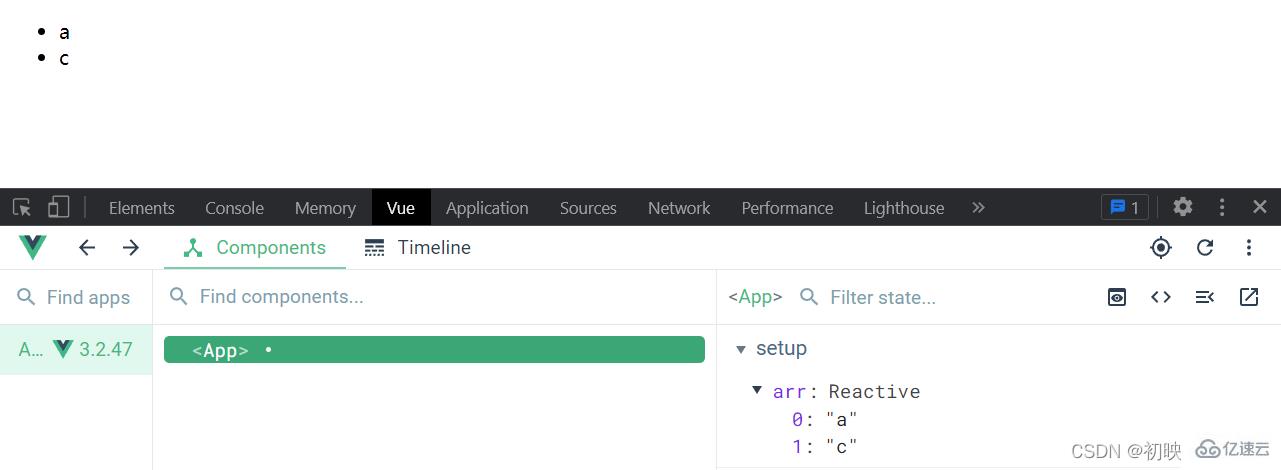
<template> <ul> <li v-for="(item, index) in arr" :key="item" @click="removeItem(index)">{{ item }}</li> </ul> </template> <script> export default { name: 'App', setup() { const arr = ['a', 'b', 'c'] const removeItem = (index) => { arr.splice(index, 1) } return { arr, removeItem, } }, } </script>vueTools で表示すると、データはその後削除されます。クリックします。しかし、ページ上には実際のレンダリングはありません。
この時点で、reactive() を使用して配列をラップし、応答性の高いデータにします。インポートすることを忘れないでください
<template>
<ul>
<li v-for="(item, index) in arr" :key="item" @click="removeItem(index)">{{ item }}</li>
</ul>
</template>
<script>
import { reactive } from 'vue'
export default {
name: 'App',
setup() {
const arr = reactive(['a', 'b', 'c'])
const removeItem = (index) => {
arr.splice(index, 1)
}
return {
arr,
removeItem,
}
},
}
</script> 現在、ページは応答性があり、クリックされると削除され、ページも応答性になります 
同様に、reactive() を使用してオブジェクトをラップして使用します
<template>
<form @submit.prevent="handleSubmit">
<input type="text" v-model="user.id" />
<input type="text" v-model="user.name" />
<input type="submit" />
</form>
<ul>
<li v-for="(item, index) in state.arr" :key="item.id" @click="removeItem(index)">{{ item.name }}</li>
</ul>
</template>
<script>
import { reactive } from 'vue'
export default {
name: 'App',
setup() {
const state = reactive({
arr: [
{
id: 0,
name: 'ifer',
},
{
id: 1,
name: 'elser',
},
{
id: 2,
name: 'xxx',
},
],
})
const removeItem = (index) => {
// 默认是递归监听的,对象里面任何一个数据的变化都是响应式的
state.arr.splice(index, 1)
}
const user = reactive({
id: '',
name: '',
})
const handleSubmit = () => {
state.arr.push({
id: user.id,
name: user.name,
})
user.id = ''
user.name = ''
}
return {
state,
removeItem,
user,
handleSubmit,
}
},
}
</script>

v-model を通じて入力ボックスとイベントの削除と追加の操作を定義しました双方向バインディング データを押して、データの追加と削除を完了します。
最適化: 同じ関数のデータとビジネス ロジックを 1 つの関数に抽出し、コードをより読みやすく簡単にします。使用を再現します。
<template>
<form @submit.prevent="handleSubmit">
<input type="text" v-model="user.id" />
<input type="text" v-model="user.name" />
<input type="submit" />
</form>
<ul>
<li v-for="(item, index) in state.arr" :key="item.id" @click="removeItem(index)">{{ item.name }}</li>
</ul>
</template>
<script>
import { reactive } from 'vue'
function useRemoveItem() {
const state = reactive({
arr: [
{
id: 0,
name: 'ifer',
},
{
id: 1,
name: 'elser',
},
{
id: 2,
name: 'xxx',
},
],
})
const removeItem = (index) => {
state.arr.splice(index, 1)
}
return { state, removeItem }
}
function useAddItem(state) {
const user = reactive({
id: '',
name: '',
})
const handleSubmit = () => {
state.arr.push({
id: user.id,
name: user.name,
})
user.id = ''
user.name = ''
}
return {
user,
handleSubmit,
}
}
export default {
name: 'App',
setup() {
const { state, removeItem } = useRemoveItem()
const { user, handleSubmit } = useAddItem(state)
return {
state,
removeItem,
user,
handleSubmit,
}
},
}
</script>インポートと同様の方法でメソッドを抽出し、
データとメソッドをまとめて統合管理を容易にします。2.3.2reactive()再进行进一步文件拆分并且引入

App.vue
<template>
<form >
<input type="text" v-model="user.id" />
<input type="text" v-model="user.name" />
<button type="submit" @click.prevent="submit">提交</button>
</form>
<ul>
<li v-for="(item, index) in state.arr" :key="item.id" @click="removeItem(index)">{{ item.name }}</li>
</ul>
</template>
<script>
import {useRemoveItem,handleSubmit} from './hooks'
export default {
name: 'App',
setup() {
const { state, removeItem } = useRemoveItem()
const { user, submit } = handleSubmit(state)
return {
state,removeItem,user,submit
}
},
}
</script>hooks/index.js
import { reactive } from 'vue'
export const useRemoveItem=()=> {
  const state= reactive( {
          arr: [
                    {
                        id: 0,
                        name: 'ifer',
                    },
                    {
                        id: 1,
                        name: 'elser',
                    },
                    {
                        id: 2,
                        name: 'xxx',
                    },
                ]
              })
  const removeItem=(index)=>{
      state.arr.splice(index,1)
            console.log(state.arr);
          }
      return { state, removeItem }
}
export const handleSubmit=(state)=>{
  const user = reactive({
                id: '',
                name: '',
            })
            console.log(1);
  const submit = () => {
       state.arr.push({
        ...user
       })
       user.id = ''
       user.name = ''
            }
      return { user, submit }
}
以上がvue3 で setup() 関数と reactive() 関数を使用する方法の詳細内容です。詳細については、PHP 中国語 Web サイトの他の関連記事を参照してください。

