ホームページ >WeChat アプレット >ミニプログラム開発 >WeChat ミニプログラム 実践プロジェクト リッチテキストエディターの実装
WeChat ミニプログラム 実践プロジェクト リッチテキストエディターの実装
- WBOYWBOYWBOYWBOYWBOYWBOYWBOYWBOYWBOYWBOYWBOYWBOYWB転載
- 2022-10-08 17:51:343539ブラウズ
この記事では、WeChat ミニ プログラム に関する関連知識を提供し、公開ページの作成、基本レイアウトの実装、編集の実装など、主にリッチ テキスト エディターの実践例を紹介します。エリア操作バーの機能やその他の内容について、皆様のお役に立てれば幸いです。
[関連する学習の推奨事項: 小さなプログラム学習チュートリアル]
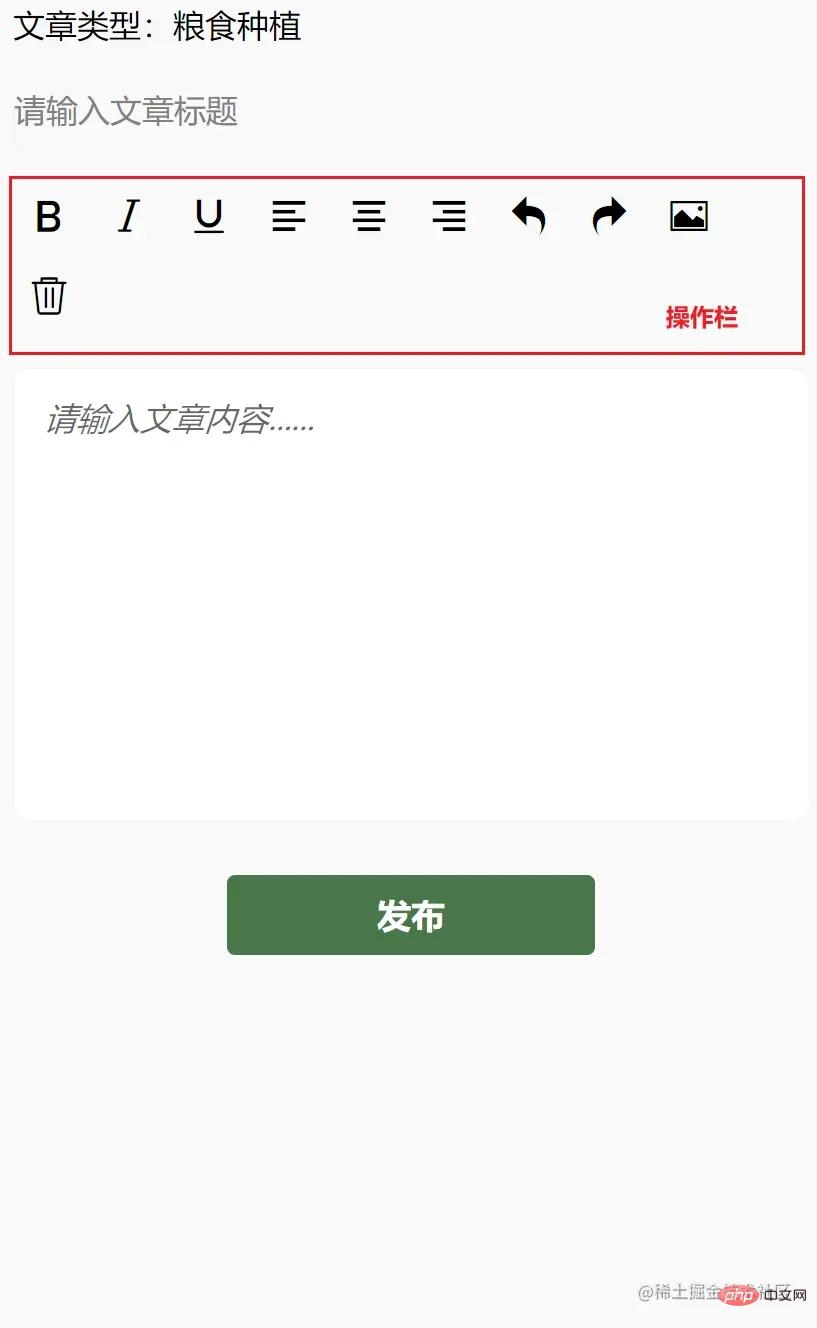
1. 効果を達成する
効果以下に示すように達成されました:

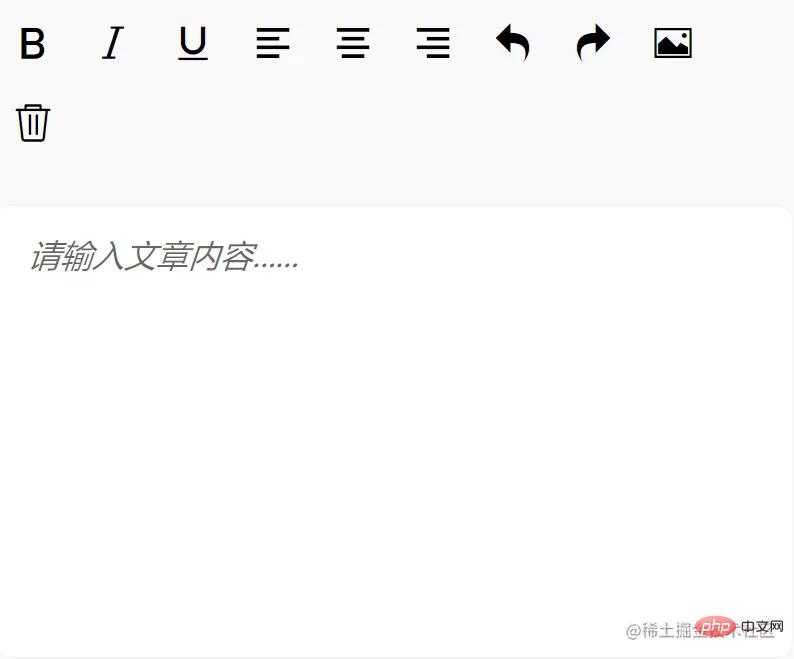
- 元に戻す、復元、画像の挿入、削除機能。
- 2. 公開ページを作成し、基本レイアウトを実装する
最初に公開ページ
article を作成し、app.json の構成を通じて生成します。 ページ。 "pages": [
"pages/article/article"
]
に構造を記述します: <view>
<!-- 文章类型 -->
<view>
<picker bindchange="bindPickerChange" model:value="{{index}}" range="{{array}}">
<view class="picker">
文章类型:{{objectArray[index].name}}
</view>
</picker>
</view>
<!-- 文章标题 -->
<view>
<input name="title" class="title" placeholder="请输入文章标题" maxlength="18" model:value="{{title}}"></input>
</view>
<!-- 编辑区 -->
<view class="container">
<view class="page-body">
<view class='wrapper'>
<!-- 操作栏 -->
<view class='toolbar' bindtap="format">
<i class="iconfont icon-zitijiacu"></i>
<i class="iconfont icon-zitixieti"></i>
<i class="iconfont icon-zitixiahuaxian"></i>
<i class="iconfont icon-zuoduiqi"></i>
<i class="iconfont icon-juzhongduiqi"></i>
<i class="iconfont icon-youduiqi"></i>
<i class="iconfont icon-undo"></i>
<i class="iconfont icon-redo"></i>
<i class="iconfont icon-charutupian"></i>
<i class="iconfont icon-shanchu"></i>
</view>
<!-- 文章内容区,富文本编辑器 -->
<editor id="editor" class="ql-container" placeholder="{{placeholder}}" showImgSize showImgToolbar showImgResize>
</editor>
<!-- 发布按钮 -->
<view class="button" bindtap="formSubmit">发布</view>
</view>
</view>
</view>
</view>
に基本スタイルを記述します: page{
width: 740rpx;
margin: 0 auto;
background-color: #f9f9f9;
}
.title {
border: 1rpx solid #f2f2f2;
margin: 10rpx;
height: 70rpx;
line-height: 70rpx;
border-radius: 10rpx;
}
.picker{
padding: 10rpx;
}
.wrapper {
padding: 5px;
}
.iconfont {
display: inline-block;
padding: 8px 8px;
width: 24px;
height: 24px;
cursor: pointer;
font-size: 20px;
}
.toolbar {
box-sizing: border-box;
border-bottom: 0;
font-family: 'Helvetica Neue', 'Helvetica', 'Arial', sans-serif;
}
.ql-container {
box-sizing: border-box;
padding: 12px 15px;
width: 100%;
min-height: 30vh;
height: auto;
background: #fff;
margin-top: 20px;
font-size: 16px;
line-height: 1.5;
border: 1rpx solid #f2f2f2;
border-radius: 15rpx;
}
.button{
width: 360rpx;
height: 80rpx;
line-height: 80rpx;
text-align: center;
margin: auto;
margin-top: 50rpx;
border-radius: 8rpx;
font-size: 32rpx;
color: white;
background-color: #497749!important;
}この時点では真ん中の操作バーアイコンが表示されていないので、
のヘッダーにiconfont.wxssフォントアイコンを導入する必要があります。 iconfont.wxss ファイル取得アドレス@import "./assets/iconfont.wxss";
3. 編集エリアに操作バーの機能を実現する
本記事は操作バーの機能を実装し、リッチテキスト編集を実現するだけです。記事タイプは自分で実装してください。難しいことはありません。
 まず、リッチ テキスト エディター インスタンス
を取得する必要があります。wx.createSelectorQuery を通じて取得します。ページ Page 関数で、インスタンスを取得するための onEditorReady 関数を作成します。 onEditorReady() {
const that = this
wx.createSelectorQuery().select('#editor').context(function (res) {
that.editorCtx = res.context
}).exec()
}次に、このメソッドをリッチ テキストの
にバインドします。 editor 属性では、リッチ テキスト エディターの初期化が完了した後にトリガーされ、インスタンスを取得します。 <editor id="editor"
class="ql-container"
placeholder="{{placeholder}}"
showImgSize
showImgToolbar
showImgResize
bindstatuschange="onStatusChange"
read-only="{{readOnly}}"
bindready="onEditorReady">3.1. テキストの太字、斜体、テキストの下線、左揃え、中央揃え、右揃えの実装
 テキストのスタイルを変更するにはどうすればよいですか?
- EditorContext
- インスタンスによって提供される API を通じてスタイルを変更します: EditorContext.format(string name, string value)。
- : CSS 属性;
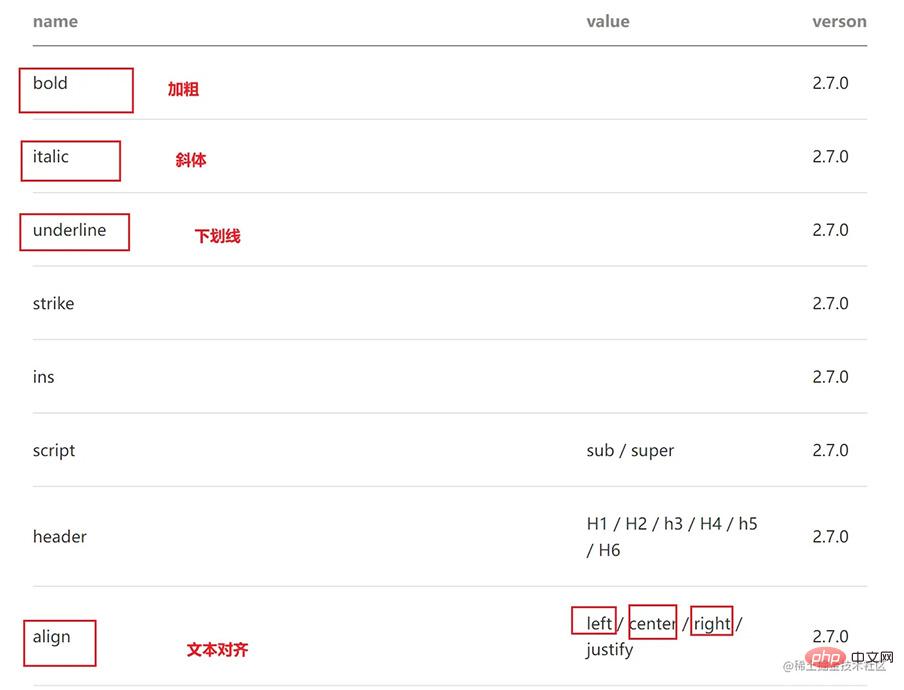
value: 値。 WeChat アプレット開発ドキュメントを参照すると、上記の機能を実現するには、
と value の値を使用する必要があることがわかります。必要なのは:

まず、
- name
- 属性と
value属性をアイコン5a8028ccc7a7e27417bff9f05adf5932ラベルにバインドし、 icon 上の図のnameとvalueに相当します。valueがない場合は、空白のままにしておきます。次に、イベントformat - を親タグにバインドし、イベント関数を使用して、EditorContext.format
APIを使用してスタイルを変更します。<view class='toolbar' bindtap="format"> <i class="iconfont icon-zitijiacu data-name="bold"></i> <i class="iconfont icon-zitixieti data-name="italic"></i> <i class="iconfont icon-zitixiahuaxian data-name="underline"></i> <i class="iconfont icon-zuoduiqi data-name="align" data-value="left"></i> <i class="iconfont icon-juzhongduiqi data-name="align" data-value="center"></i> <i class="iconfont icon-youduiqi data-name="align" data-value="right"></i> </view>
format 関数内 関数: format(e) {
let {
name,
value
} = e.target.dataset
if (!name) return
this.editorCtx.format(name, value)
},
現時点では、アイコンをクリックした後に色を変更するなど、フォント アイコンのスタイルを動的に変更する必要があります。
WeChat アプレット開発に関連するドキュメントを参照した後、Context## を渡すと、bindstatuschange 属性バインディング メソッドが表示されます。このメソッドは、エディターでスタイルを変更するときにトリガーされ、選択範囲に設定されているスタイルを返します。 次に、data
にformats オブジェクトを追加して、クリック後のスタイル属性を保存します。次に、アイコン ボタンをクリックすると、設定されたスタイルが取得され、bindstatuschange バインディング メソッドを通じて formats に保存され、テンプレートがレンダリングされるときに 5a8028ccc7a7e27417bff9f05adf5932# に保存されます。 ##class 属性に、 具体实现 首先在 撤销 undo 调用 EditorContext API 即可 恢复 redo 同理 插入图片 insertImage 同理 清空 clear 同理 【相关学习推荐:小程序学习教程】{{formats.align === 'right' ? 'ql-active' : ''}} (右側のテキストなど) を追加します。このアイコンをクリックすると、formats にこの属性があり、動的クラス名 ql-active を追加してアイコンの色を変更します。 <editor id="editor"
class="ql-container"
placeholder="{{placeholder}}"
showImgSize showImgToolbar showImgResize
bindstatuschange="onStatusChange"
read-only="{{readOnly}}"
bindready="onEditorReady"> onStatusChange(e) {
const formats = e.detail
this.setData({
formats
})
}5a8028ccc7a7e27417bff9f05adf5932 标签上,添加{{formats.align === 'right' ? 'ql-active' : ''}}
<i class="iconfont icon-zitijiacu {{formats.bold ? 'ql-active' : ''}}" data-name="bold"></i>
<i class="iconfont icon-zitixieti {{formats.italic ? 'ql-active' : ''}}" data-name="italic"></i>
<i class="iconfont icon-zitixiahuaxian {{formats.underline ? 'ql-active' : ''}}" data-name="underline"></i>
<i class="iconfont icon-zuoduiqi {{formats.align === 'left' ? 'ql-active' : ''}}" data-name="align" data-value="left"></i>
<i class="iconfont icon-juzhongduiqi {{formats.align === 'center' ? 'ql-active' : ''}}" data-name="align" data-value="center"></i>
<i class="iconfont icon-youduiqi {{formats.align === 'right' ? 'ql-active' : ''}}" data-name="align" data-value="right"></i>.ql-active {
color: #497749;
}3.2. 实现撤销、恢复、插入图片、删除操作

5a8028ccc7a7e27417bff9f05adf5932 标签上绑定相应的事件: <i class="iconfont icon-undo" bindtap="undo"></i>
<i class="iconfont icon-redo" bindtap="redo"></i>
<i class="iconfont icon-charutupian" bindtap="insertImage"></i>
<i class="iconfont icon-shanchu" bindtap="clear"></i> undo() {
this.editorCtx.undo()
} redo() {
this.editorCtx.redo()
} insertImage() {
const that = this
wx.chooseImage({
count: 1,
success: function (res) {
wx.showLoading({
title: '正在上传图片',
})
wx.cloud.uploadFile({
cloudPath: `news/upload/${time.formatTime(new Date)}/${Math.floor(Math.random() * 100000000)}.png`, // 上传至云端的路径
filePath: res.tempFilePaths[0],
success: cover => {
that.editorCtx.insertImage({
src: cover.fileID,
data: {
id: cover.fileID,
role: 'god'
},
success: function () {
wx.hideLoading()
}
})
}
})
}
})
} clear() {
this.editorCtx.clear({
success: function (res) {
console.log("clear success")
}
})
}
以上がWeChat ミニプログラム 実践プロジェクト リッチテキストエディターの実装の詳細内容です。詳細については、PHP 中国語 Web サイトの他の関連記事を参照してください。


