
Maison >interface Web >js tutoriel >composant intégré de sélection personnalisée vue
composant intégré de sélection personnalisée vue

- 不言original
- 2018-04-10 14:55:432750parcourir
Cet article présente principalement les connaissances pertinentes sur la sélection de composants intégrés personnalisés de vue. Maintenant, je vais le partager avec vous. Pour des exemples de codes spécifiques, veuillez vous référer à cet article
1. -plug-in jQuery de fête (select2)
<!DOCTYPE html>
<html>
<head>
<meta charset="UTF-8">
<title></title>
<link rel="stylesheet" href="js/select2/select2.min.css" />
<style>
html, body {
font: 13px/18px sans-serif;
}
select {
min-width: 300px;
}
</style>
</head>
<body>
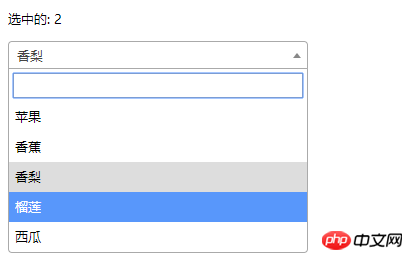
<p id="el">
<p>选中的: {{ selected }}</p>
<select2 :options="options" v-model="selected"></select2>
</p>
<script src="js/jQuery-2.1.4.min.js"></script>
<script src="js/select2/select2.min.js"></script>
<script src="http://cdnjs.cloudflare.com/ajax/libs/vue/2.1.3/vue.js"></script>
<script>
Vue.component('select2', {
props: ['options', 'value'],
template: '<select><slot></slot></select>',
mounted: function () {
var vm = this;// init select2
$(this.$el).select2({ data: this.options }).val(this.value).trigger('change').on('change', function () {
// emit event on change.
vm.$emit('input', this.value)
})
},
watch: {
value: function (value) {
// update value
$(this.$el).val(value).trigger('change')
},
options: function (options) {
// update options
$(this.$el).empty().select2({ data: options })
}
},
destroyed: function () {
$(this.$el).off().select2('destroy')
}
})
var vm = new Vue({
el: '#el',
data: {
selected: 2,
options: [
{ id: 0, text: '苹果' },
{ id: 1, text: '香蕉' },
{ id: 2, text: '香梨' },
{ id: 3, text: '榴莲' },
{ id: 4, text: '西瓜' }
]
}
})
</script>
</body>
</html>
2. 🎜>

<!DOCTYPE html>
<html lang="en">
<head>
<meta charset="utf-8">
<style>
*{
padding: 0;
margin: 0;
}
ul,li {
list-style: none;
}
li {
line-height: 2em;
}
li:hover {
background-color: #f9f9f9;
border-radius:5px;
cursor: pointer;
}
input{
cursor:pointer;
outline:none;
}
#app {
margin-top: 20px;
}
#app h2 {
text-align: center;
}
.wrap {
background-color: rgba(56, 170, 214, 0.45);
border-radius: 20px;
width: 300px;
margin: 40px;
padding: 20px;
}
input[type="button"] {
font-size:14px;
margin-left:2px;
padding:2px 5px;
background-color:rgb(228, 33, 33);
color:white;
border:1px solid rgb(228, 33, 33);
border-radius:5px;
}
.clearFix {
padding-left:
}
input.keyWord {
border: 1px solid #777777;
border-radius: 10px;
height: 30px;
width: 80%;
padding-left: 10px;
font-size: 16px;
}
ul.list {
margin: 20px 0;
}
ul.list li {
padding: 10px 0 0 10px;
}
</style>
</head>
<body>
<p id="app">
<p style="float: left;">
<h2>自定义下拉框</h2>
<custom-select btn-value="查询" v-bind:list="list1"></custom-select>
</p>
<p style="float: left;">
<h2>自定义下拉框2</h2>
<custom-select btn-value="搜索" v-bind:list="list2"></custom-select>
</p>
</p>
<p id="app1">
<custom-select></custom-select>
</p>
<script src="http://cdnjs.cloudflare.com/ajax/libs/vue/2.1.3/vue.js"></script>
<script>
Vue.component("custom-select",{
data(){
return {
selectShow:false,
val:""
}
},
props:["btnValue","list"],
template:`<section class="wrap">
<p class="searchIpt clearFix">
<p class="clearFix">
<input type="text" class="keyWord" :value="val" @click="selectShow = !selectShow" />
<input type="button" :value="btnValue" />
<span></span>
</p>
<custom-list
v-show="selectShow"
:list="list"
v-on:receive="changeValueHandle"
>
</custom-list>
</p>
</section>`,
methods:{
changeValueHandle(value){
this.val = value;
}
}
});
Vue.component("custom-list",{
props:["list"],
template:`<ul class="list">
<li v-for="item in list" @click="selectValueHandle(item)">{{item}}
</li>
</ul>`,
methods:{
selectValueHandle:function(item){
this.$emit("receive",item)
}
}
})
new Vue({
el:"#app",
data:{
list1:['北京','上海','广州','杭州'],
list2:['17-01-11','17-02-11','17-03-11','17-04-11'],
}
})
</script>
</body>
</html>Référence : 1. 🎜>Recommandations associées :
Utiliser et désactiver le code d'implémentation du composant Vue Select
Le composant unique Vue implémente la sélection multiple de niveau illimité fonction menu
Ce qui précède est le contenu détaillé de. pour plus d'informations, suivez d'autres articles connexes sur le site Web de PHP en chinois!
Déclaration:
Le contenu de cet article est volontairement contribué par les internautes et les droits d'auteur appartiennent à l'auteur original. Ce site n'assume aucune responsabilité légale correspondante. Si vous trouvez un contenu suspecté de plagiat ou de contrefaçon, veuillez contacter admin@php.cn
Article précédent:Code d'implémentation pour utiliser et désactiver le composant vue selectArticle suivant:Code d'implémentation pour utiliser et désactiver le composant vue select
Articles Liés
Voir plus- Une analyse approfondie du composant de groupe de liste Bootstrap
- Explication détaillée du currying de la fonction JavaScript
- Exemple complet de génération de mot de passe JS et de détection de force (avec téléchargement du code source de démonstration)
- Angularjs intègre l'interface utilisateur WeChat (weui)
- Comment basculer rapidement entre le chinois traditionnel et le chinois simplifié avec JavaScript et l'astuce permettant aux sites Web de prendre en charge le basculement entre les compétences en chinois simplifié et traditionnel_javascript