


Motherboard plug installation tutorial illustration
Method 1 Find the largest plug in the power cord, as shown in the picture. There is a large card slot next to the memory card on the motherboard, which is only suitable for this plug, just plug it in directly. Pay attention to the buckle, it snaps outward. Method 2 The power cord required for the graphics card is 6 holes or 8 holes, depending on the graphics card.
Motherboard power supply interface On the motherboard, we can see a rectangular slot, which is the slot where the power supply provides power to the motherboard (as shown below).
The most important thing for the motherboard cable is to connect the power button and reset button on the outside. The corresponding socket on the motherboard is as shown in the picture. Corresponding instructions will be marked next to these sockets, such as "HDD_LED" is the hard disk indicator light, RESET is the reset button, "PWR_SW" is the power button, etc.
Illustration of the motherboard plug-in installation tutorial: During the installation process, it is recommended to follow the computer installation tutorial step by step. Most interfaces have fool-proof designs, but fool-proof is not stupid-proof. Great efforts will always produce miracles. , you must be careful during the process. It is recommended to read all the installation processes before trying to install the hardware following the computer assembly tutorial.
Taking into account everyone’s better understanding, we have made a schematic diagram of the motherboard jumper installation for POWER SW, RESET SW, POWER LED, and HDD LED. We find the motherboard jumper positions and insert them accordingly. The motherboard jumper connection diagram is shown in the figure below.
First of all, most of the current motherboard power supplies have 24pin interfaces, and the power supplies also have 24pin interfaces that can be plugged in accordingly. After the mainboard power connection is completed, connect the installed CPU power 4Pin interface to the corresponding slot location. Insert the 4Pin interface in the power supply into the corresponding CPU power slot above, and then follow the hard drive power supply.
How to plug in the cable between the motherboard and the chassis, how to plug the USB cable
1. Steps: The switch wire on the front panel of the chassis, as shown below: In the above picture (red arrow) is marked POWER SW One set of wires is the power switch.
2. Arrange all the wires together. According to the above markings, first clarify the definition of each wire: find the position of each pin on the motherboard. After all cables are plugged in, check that all hardware is installed correctly and is secure. Also check that all connections are correct and secure.
3. First of all, the USB cables of the chassis should be neatly arranged. The lines include the USB interface of the chassis and the button cable of the switch. You can find the interface for connecting USB on the motherboard, and a USB letter will appear next to the interface: Plug the USB cable of the chassis into the USB port of the motherboard, and the connection is successful.
4. First of all, the USB cable of the chassis should be neatly arranged, including the USB interface of the chassis and the button cable of the switch; you can find the interface for connecting USB on the motherboard, and there will be a USB letter next to the interface: The USB cable of the chassis is plugged into the USB port of the motherboard and the connection is successful.
5. First, arrange the USB cable of the chassis smoothly. The neutral line includes the USB interface of the chassis and the button line of the switch. On the motherboard, you can find the interface for connecting USB, and the letters USB will appear next to the interface. Plug the USB cable of the chassis into the USB port of the motherboard and the connection is successful.
How to plug the few wires into the motherboard when the computer is turned on
1. Arrange all the wires together. According to the above labels, first clarify the definition of each wire: a. Power switch : POWER SW, POWER, POWER SWITCH, ONOFF, POWER SETUP, PWR, etc. Function definition: Reset button on the front of the chassis.
2. The motherboard generally has four sets of switch indicator lines and POWER SW power switch. POWER LED power indicator light. RESET SW reset switch. H.D.D LED keyboard status indicator. Pay attention to the positive and negative poles when connecting. Usually, colored lines such as red, green, and yellow represent the positive pole, and white and black represent the negative pole. Pay attention to the distinction.
3. First, the motherboard supplies power. Currently, most motherboards have 24PIN interfaces. There are also 24PIN interfaces in the power supply, which can be plugged in accordingly. After the motherboard power supply connection is completed, connect the installed CPU power supply 4PIN interface to the corresponding slot position.
4. The computer chassis has a bunch of wires with plugs. These plugs are marked with power on, reset, speak and other characters. Power on is the plug corresponding to the switch wire, and reset is the plug corresponding to the reset button.
5. Find the plug with the POWER (PWR) mark on the chassis panel, then find the corresponding marked pin on the motherboard and insert it. Often, the chassis wiring will have English letters or English abbreviations identifying each person's identity, just like the model number of the monitor. Players can easily distinguish them through such logos.
6. First connect the power cord from the chassis, one of which is wider, as shown by the arrow in the picture below. If it's labeled USB, it's the cable that connects to the USB slot on the case panel. Find the USB pin on the edge of the motherboard and plug it in.
How to plug in the power cord on the motherboard
1. When plugging and unplugging, just follow the normal direction. The CPU power supply interface is generally located in the upper left corner of the motherboard. It is very similar to the graphics card power supply. For identification, the CPU power supply is 4 4 formed into 8, and the graphics card power supply interface is 6 2 formed into 8.
2. Find the two-pin plug marked "power sw" from the chassis panel connection line, and plug it into the pin marked "pwr sw" or "PWR" on the motherboard.
3. The power supply has a 24-pin main power plug and a CPU auxiliary power plug (4-pin or 8-pin). The motherboard also has a corresponding 24-pin main power socket and a CPU auxiliary power socket (4-pin or 8-pin). Just plug in the power plug accordingly. There is a fool-proof card to prevent you from inserting it incorrectly.
4. Put all the cables together. Find the location of each pin on the motherboard. After all cables are plugged in, check whether all hardware is installed correctly and is secure. Also check that all connections are correct and secure.
5. Find the power plug: First find the three wires of the power plug. Generally speaking, one of them is the ground wire and the other two are power wires. Find the power socket: Insert the power plug into the power socket, being careful not to plug the ground wire and power wire in reverse.
6. The power supply has a 24-pin main power plug and a CPU auxiliary power plug (4-pin or 8-pin).
The above is the detailed content of How to plug in the computer motherboard. For more information, please follow other related articles on the PHP Chinese website!

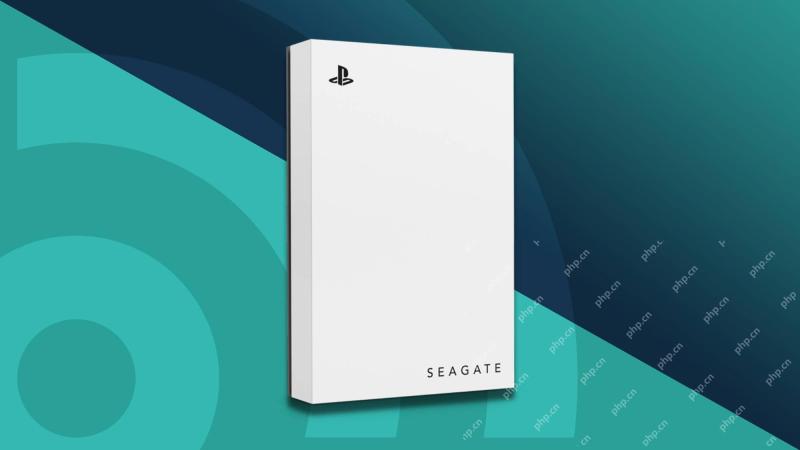 Best PS5 external hard drives in 2025: top picks to easily expand your PlayStation's storageApr 23, 2025 am 09:22 AM
The best PS5 external hard drives should be on your radar if you own Sony's latest system. They're not for everyone, but do fill an important niche in the console ecosystem.Compared to the best SSDs for PS5, they often offer significantly more storag
 7 sustainability-themed games to celebrate Earth DayApr 23, 2025 am 09:16 AM
When you think of educational games, you may have flashbacks to designated computer time in school, playing Jump Start and Math Blasters on an old CRT. But games and technology have come a long way since then, and we can now learn about everything fr
 iPhone 14 vs. iPhone 16e Buyer's Guide: Should You Upgrade?Apr 23, 2025 am 03:01 AM
Upon the launch of the iPhone 16e, Apple discontinued the iPhone 14 and iPhone 14 Plus. Despite arriving two and a half years apart, the iPhone 16e actually borrows a large number of features from the iPhone 14. Many iPhone 14 users may now be consid
 Use This 3-Finger Trick to Quickly Share Photos on Apple DevicesApr 23, 2025 am 01:12 AM
Apple devices support a relatively unknown three-finger gesture that lets you share a photo across your devices in super-quick time. It's a neat trick to fall back on if AirDrop is playing up or your iCloud Photos are taking ages to sync. Universal C
 The Elder Scrolls 6 - everything we know so farApr 19, 2025 am 11:43 AM
The Elder Scrolls 6's release date is still a mystery in 2025, given that we've not received a substantial update on the highly-anticipated fantasy RPG in over six years (it'll be seven in June). Given the pedigree of its predecessor, however, it's e
 Underrated Switch games 2025: the best titles you might have overlookedApr 19, 2025 am 09:03 AM
With how many games there are available on the Nintendo Switch, there are probably a few underrated Switch games that have slipped past your radar. Frankly, it comes as no surprise - especially with how many big-ticket first-party releases the system
 Show or Hide File Extensions on Mac, iPhone, and iPadApr 18, 2025 pm 09:01 PM
On computers and mobile devices, file extensions are the suffixes that apps append to filenames. When you see an item like "document.docx" for example, the .docx extension tells the computer and the user what the file is and what to open it
 Best PS5 exclusives 2025 - the top games made for the PlayStation 5Apr 18, 2025 am 11:37 AM
The best PS5 exclusives are those games that are or were, made exclusively for Sony's latest console. Exclusive games can set the tone and scene for a machine's offering compared to others. This is often the case for PlayStation consoles, with each g


Hot AI Tools

Undresser.AI Undress
AI-powered app for creating realistic nude photos

AI Clothes Remover
Online AI tool for removing clothes from photos.

Undress AI Tool
Undress images for free

Clothoff.io
AI clothes remover

Video Face Swap
Swap faces in any video effortlessly with our completely free AI face swap tool!

Hot Article
Hot Tools

MinGW - Minimalist GNU for Windows
This project is in the process of being migrated to osdn.net/projects/mingw, you can continue to follow us there. MinGW: A native Windows port of the GNU Compiler Collection (GCC), freely distributable import libraries and header files for building native Windows applications; includes extensions to the MSVC runtime to support C99 functionality. All MinGW software can run on 64-bit Windows platforms.

VSCode Windows 64-bit Download
A free and powerful IDE editor launched by Microsoft

Safe Exam Browser
Safe Exam Browser is a secure browser environment for taking online exams securely. This software turns any computer into a secure workstation. It controls access to any utility and prevents students from using unauthorized resources.

Zend Studio 13.0.1
Powerful PHP integrated development environment

SublimeText3 English version
Recommended: Win version, supports code prompts!

