Home >Software Tutorial >Computer Software >How to determine CorelDRAW auxiliary lines to the specified position_Tutorial on setting precise auxiliary lines
How to determine CorelDRAW auxiliary lines to the specified position_Tutorial on setting precise auxiliary lines
- WBOYWBOYWBOYWBOYWBOYWBOYWBOYWBOYWBOYWBOYWBOYWBOYWBforward
- 2024-04-22 14:52:43936browse
When using CorelDRAW to draw graphics, auxiliary lines can help us quickly align elements, but how to accurately position the auxiliary lines is a problem. This tutorial brought by PHP editor Yuzai will introduce in detail how to use the precise auxiliary line tool to help you easily move the auxiliary line to the specified position, making your drawing process more efficient.
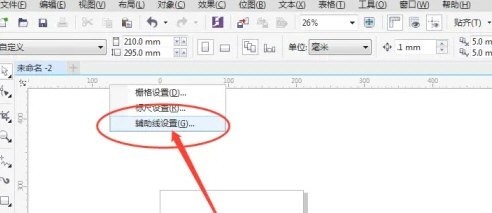
1. Open the CorelDRAW software and click on the ruler above to open the auxiliary line

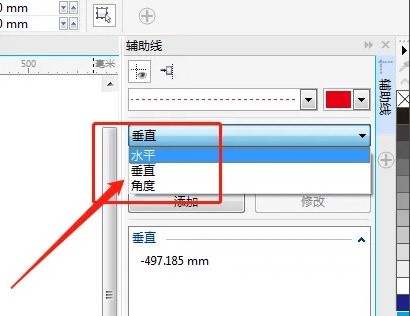
2. Select the type of auxiliary line in the settings window on the right

3. Select the vertical line and enter the X coordinate to set

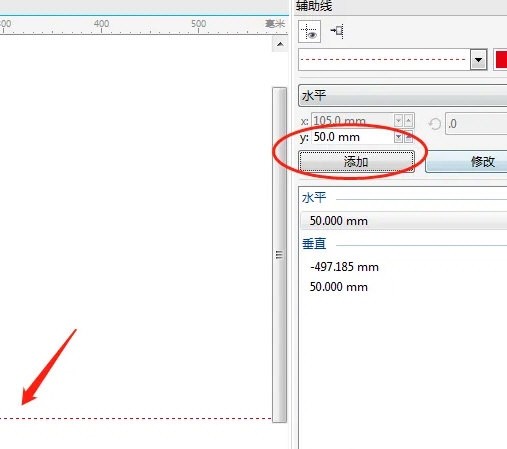
4. Use the same method to create the horizontal auxiliary line. Enter the Y coordinate; just enter the angle parameter for the angle auxiliary line

The above is the detailed content of How to determine CorelDRAW auxiliary lines to the specified position_Tutorial on setting precise auxiliary lines. For more information, please follow other related articles on the PHP Chinese website!

