教程的重点是类似棕叶纹理的制作,这里用到了纤维和径向模糊滤镜,得到初步的纹理后,把这纹理应用到扇子里面,调整好颜色即可
教程的重点是类似棕叶纹理的制作,这里用到了纤维和径向模糊滤镜,得到初步的纹理后,把这纹理应用到扇子里面,调整好颜色即可。
最终效果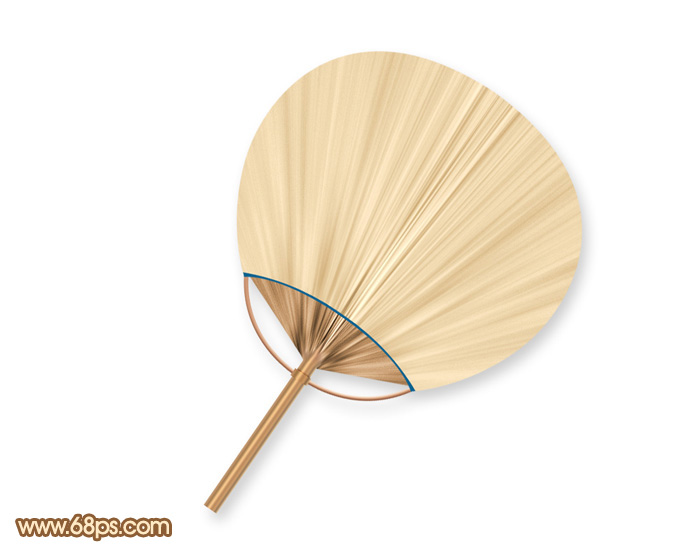
1、新建一个1000 * 800 像素,分辨率为72的画布,背景选择白色,确定后新建一个组,在组里新建一个图层填充黑色,如下图。 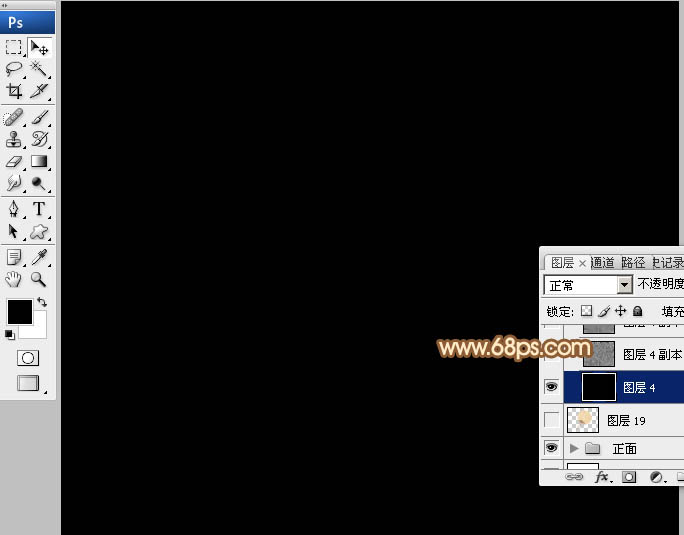
<图1>
2、选择菜单:滤镜 > 渲染 > 纤维,参数及效果如下图。 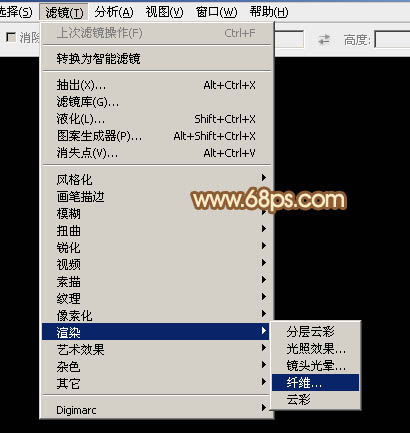
<图2> 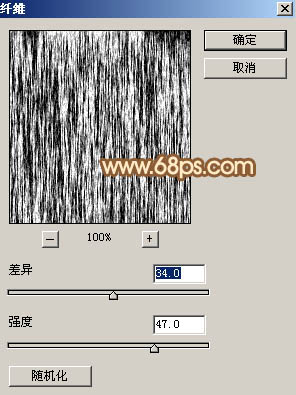
<图3> 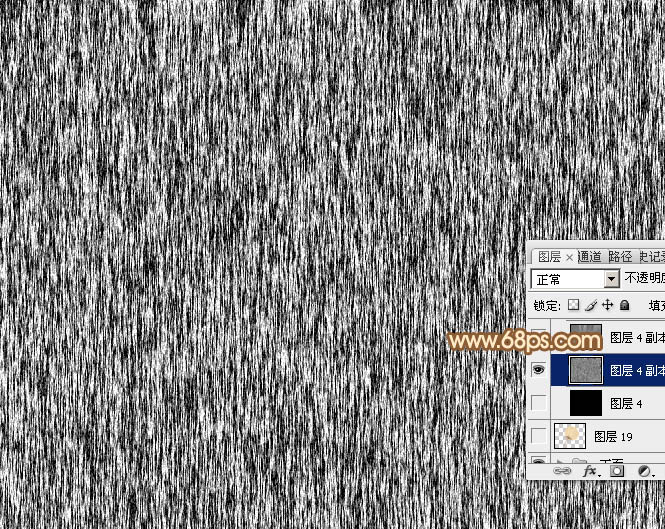
<图4>
3、选择菜单:滤镜 > 模糊 > 径向模糊。 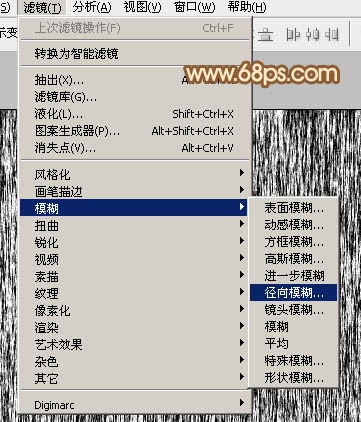
<图5>
数量为最大,模糊方法为“缩放”,在中心模糊位置,把中心移到底部中间位置,如下图。 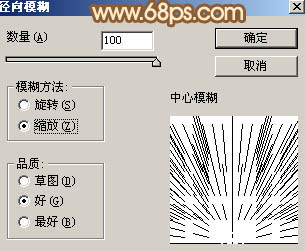
<图6>
确定后得到下图所示的效果。 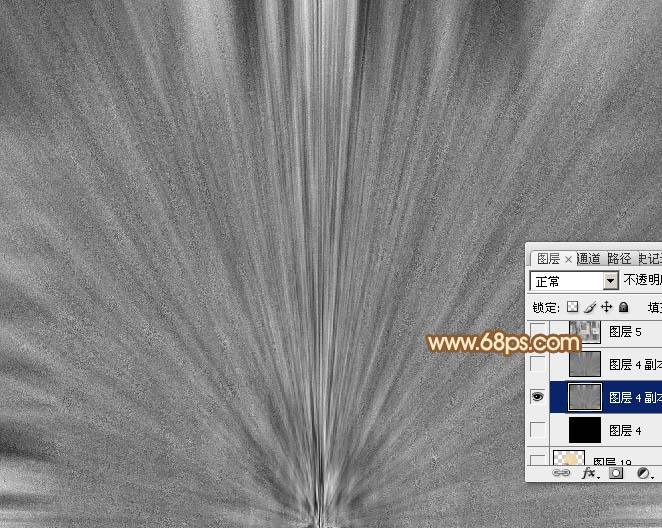
<图7>
4、按Ctrl + F加强一下滤镜效果,得到下图所示的纹理效果,然后暂时隐藏图层。 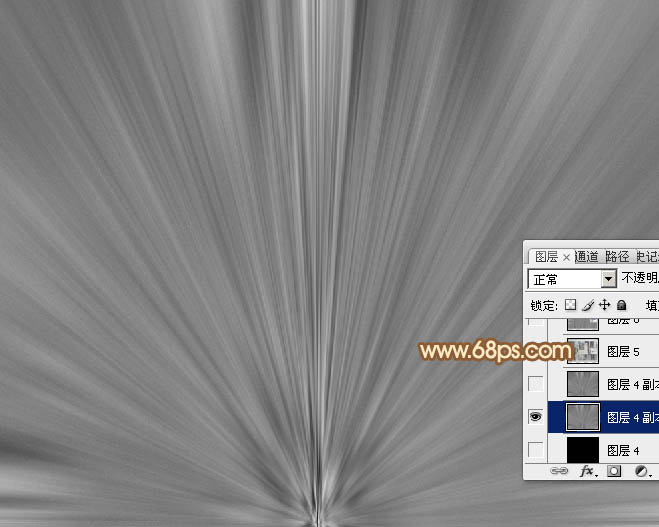
<图8>
5、保存图9,文件为PNG格式,用PS打开后拖进来,并放好位置,如图10。 
<图9> 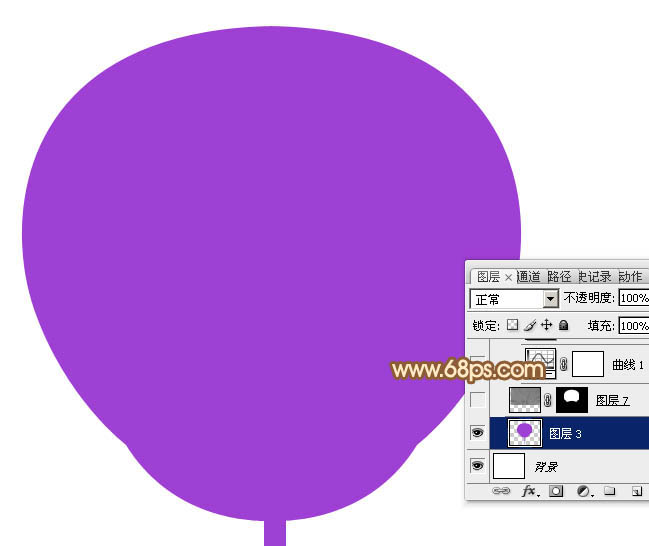
<图10>
6、用钢笔先选出下图所示的扇子部分,并复制到新的图层。 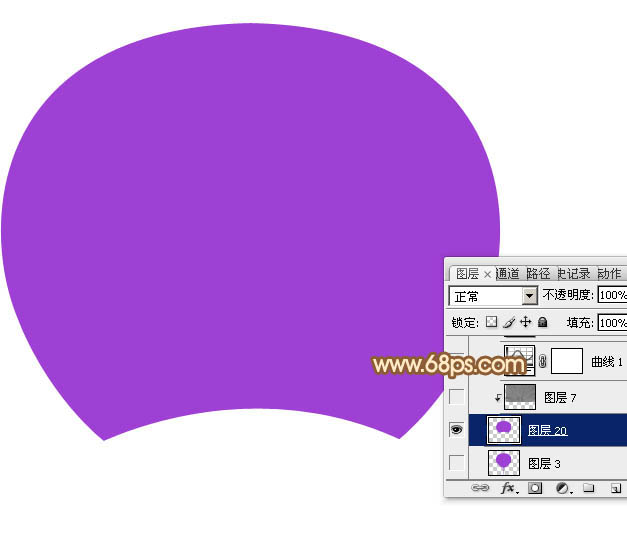
<图11>
7、把纹理图层复制一层,移到刚才的图形上面,按Ctrl + Alt + G 创建剪切蒙版,调整好位置,如下图。 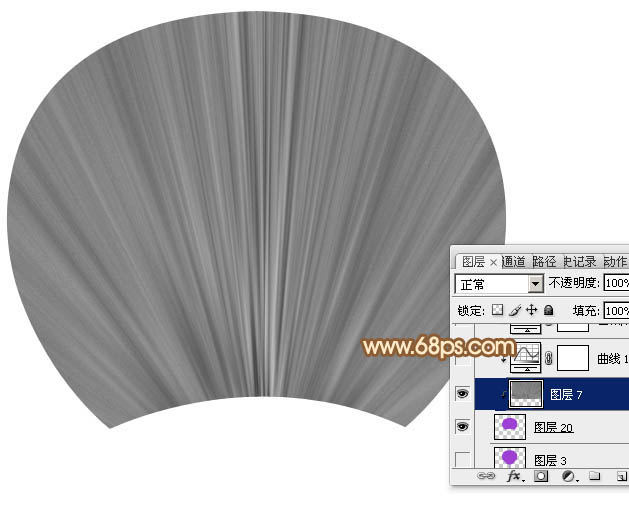
<图12>
8、创建曲线调整图层,把整体调亮一点,参数设置如图13,确定后按Ctrl + Alt + G创建剪切蒙版,效果如图14。 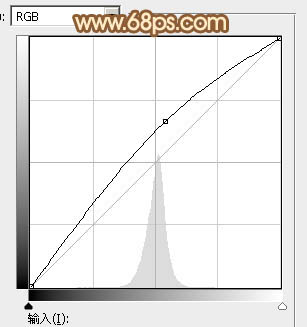
<图13> 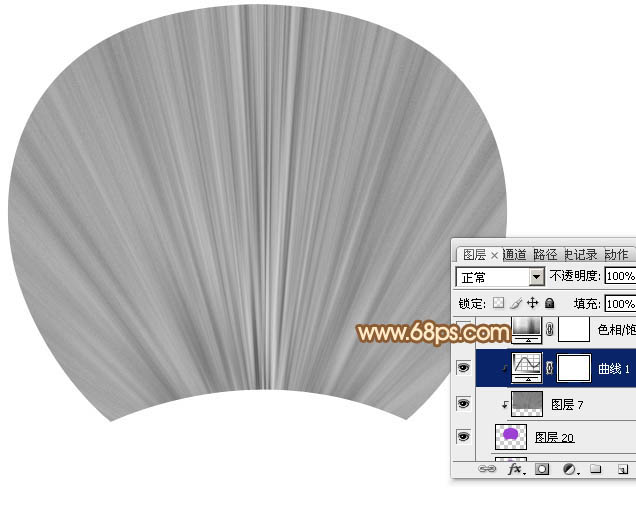
<图14>
9、创建色相/饱和度调整图层,对全图进行调整,勾选“着色”选项,确定后同上的方法创建剪切蒙版,效果如图16。 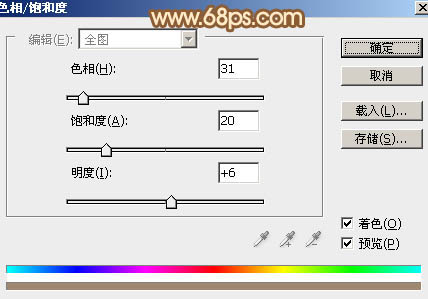
<图15> 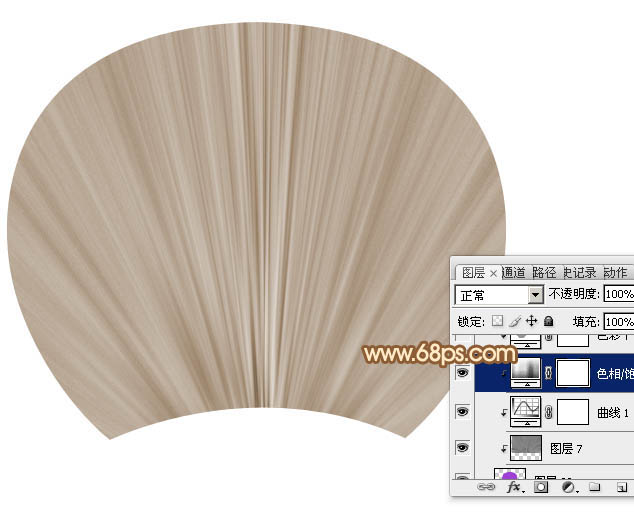
<图16>
10、创建色彩平衡调整图层,对高光进行调整,参数设置如图17,确定后同上的方法创建剪切蒙版,效果如图18。 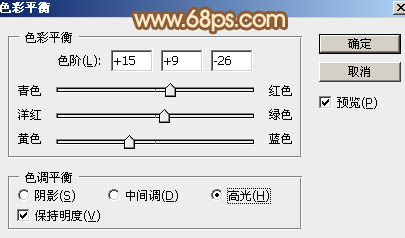
<图17> 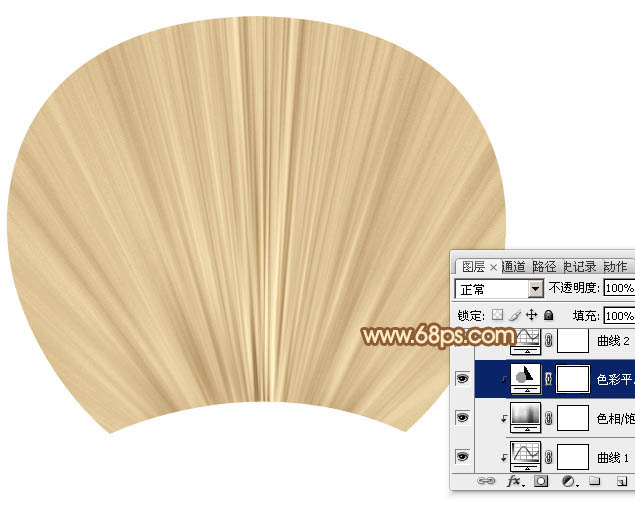
<图18>
11、创建曲线调整图层,对RGB,红色通道进行调整,参数设置如图19,确定后同上的方法创建剪切蒙版,效果如图20。 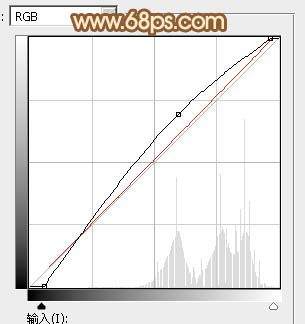
<图19> 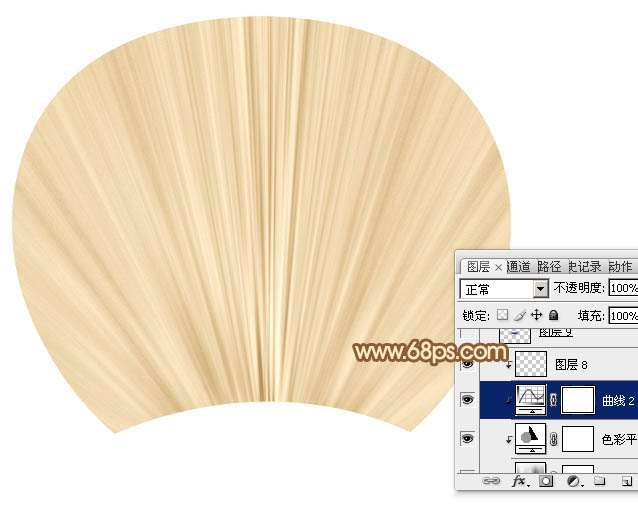
<图20>
12、新建一个图层,用钢笔勾出下图所示的选区,填充暗青色:#0C6290。 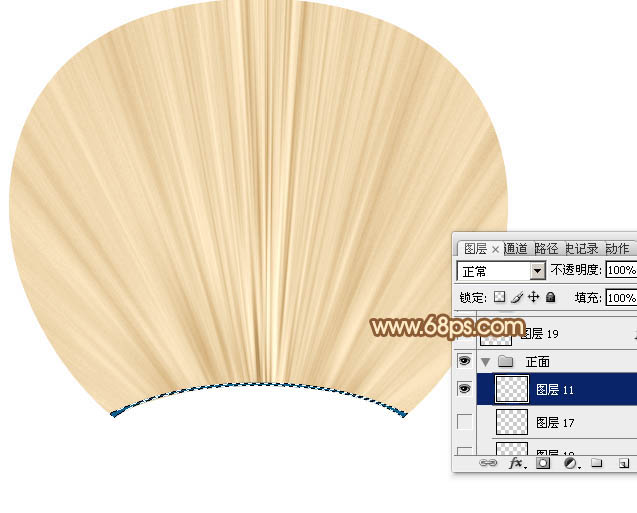
<图21>
13、在当前图层下面新建一个图层,用钢笔勾出下图所示的选区,填充黑色。 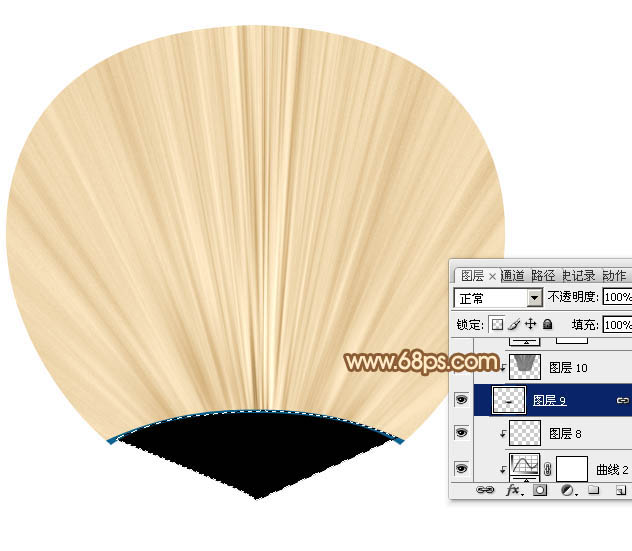
<图22>
14、把纹理图层复制一层,移到刚才的色块图层上面,并创建剪切蒙版。再按Ctrl + T 稍微变形处理,如下图。 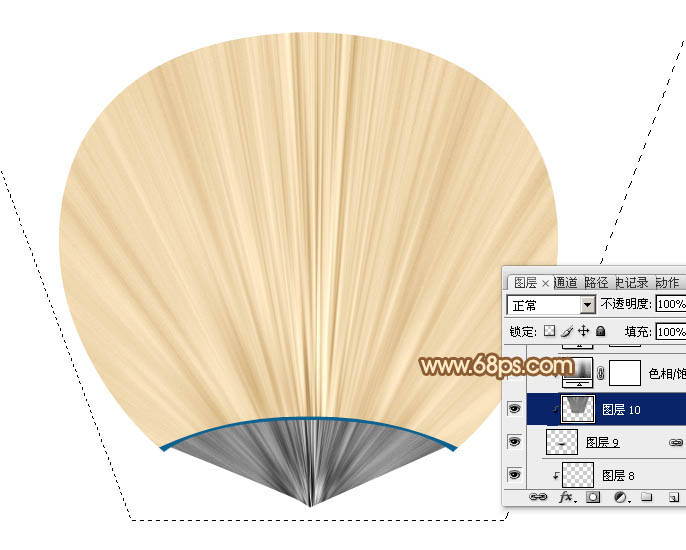
<图23>
15、创建色相/饱和度调整图层,参数设置如图24,勾选“着色”选项,确定后创建剪切蒙版。 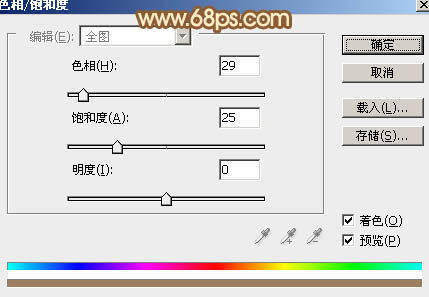
<图24>
16、创建亮度/对比度调整图层,适当增加亮度及对比度,参数设置如图25,确定后创建剪切蒙版,效果如图26。 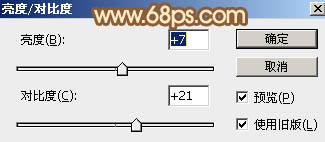
<图25> 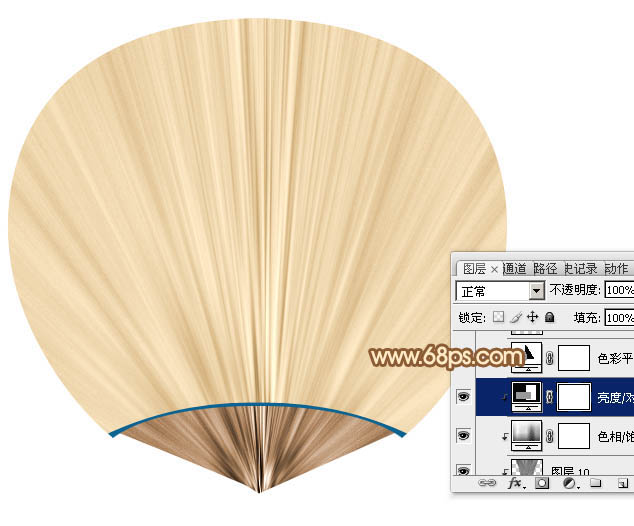
<图26>
17、创建色彩平衡调整图层,对高光进行调整,参数设置如图27,确定后创建剪切蒙版,效果如图28。 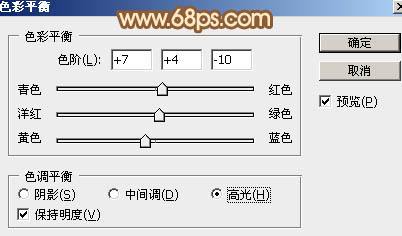
<图27> 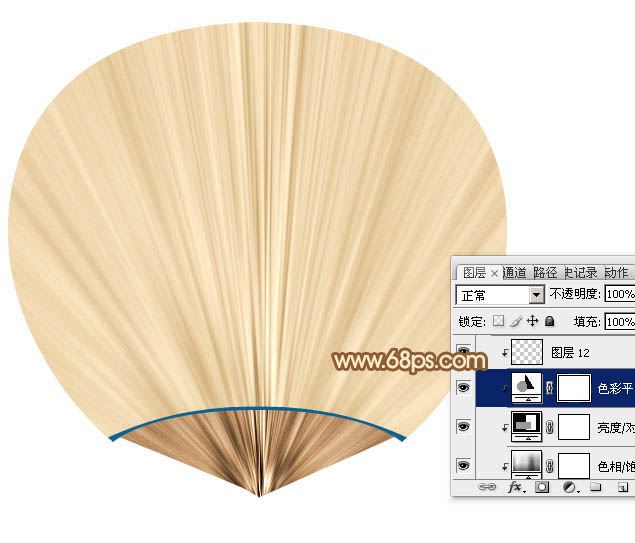
<图28>
18、新建一个图层,用矩形选框工具拉出下图所示的矩形选区,然后加上图30所示的线性渐变。 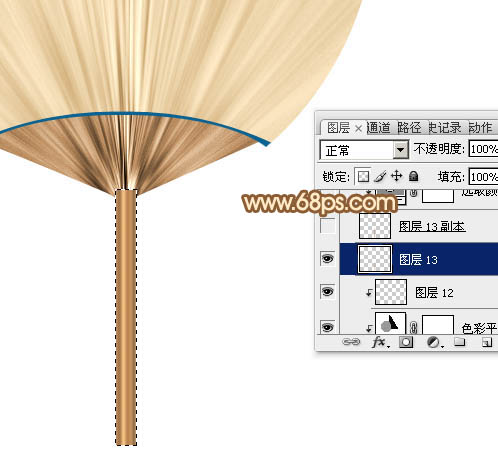
<图29> 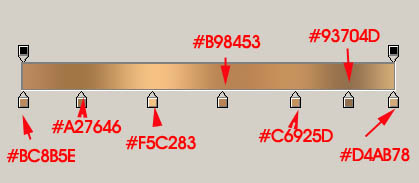
<图30>
19、取消选区后选择涂抹工具,强度为20%左右,大小自定,把顶部区域稍微涂抹一下,跟扇子衔接起来,如图32。 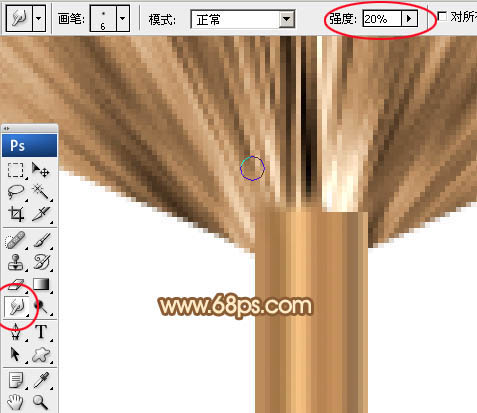
<图31> 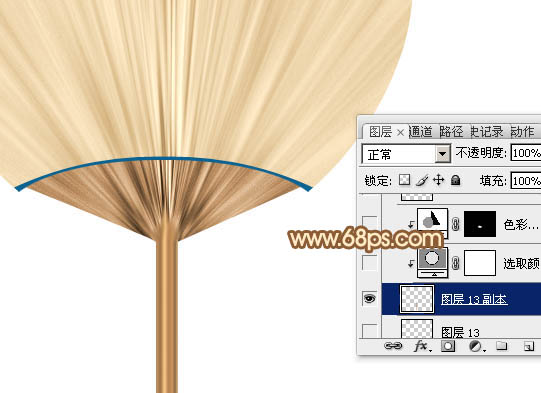
<图32>
20、微调一下手柄颜色,效果如下图。 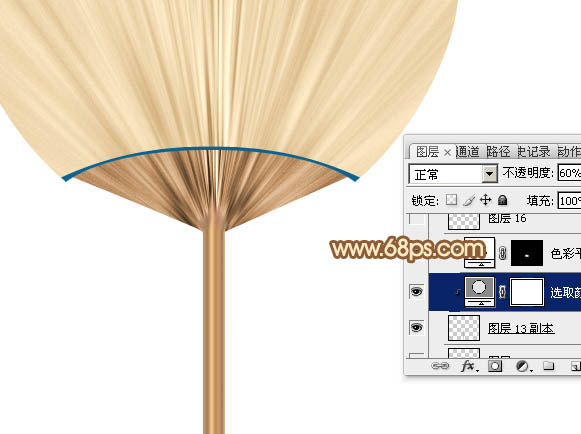
<图33>
21、新建一个图层,用钢笔勾出下图所示的选区,填充黄褐色:#D09976。 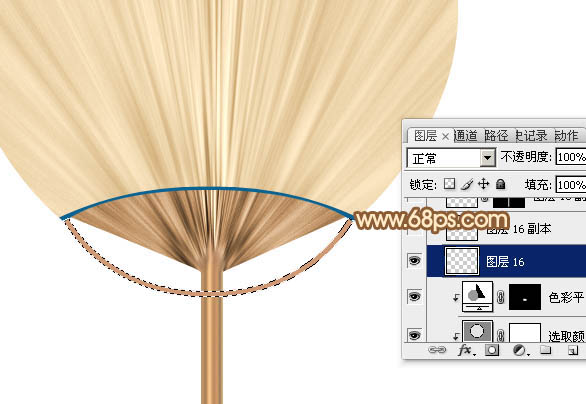
<图34>
22、给当前图层添加图层样式,设置斜面和浮雕,参数及效果如下图。 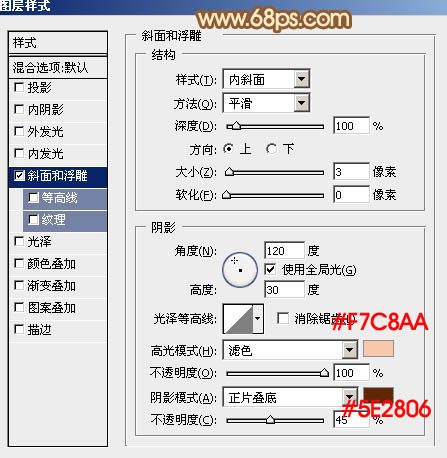
<图35> 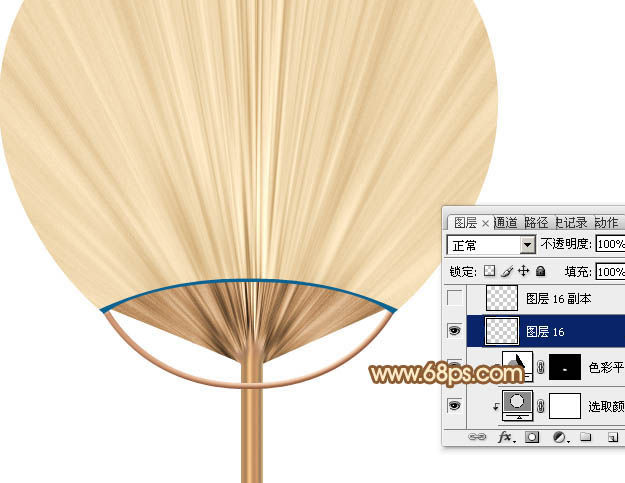
<图36>
23、新建一个图层,用矩形选框工具拉出下图所示的选区,并拉上同手柄同样的渐变色。 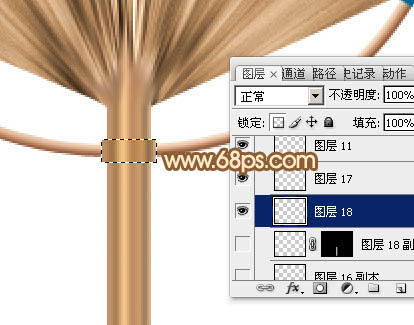
<图37>
24、局部增加一点投影,效果如下图。 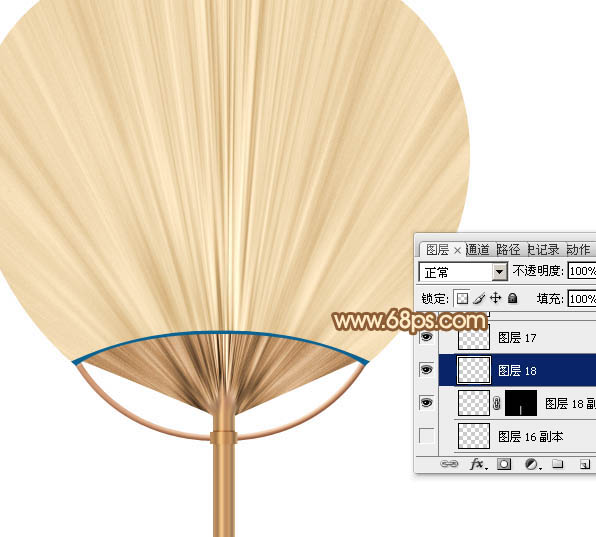
<图38>
最后把做好的扇子旋转一点角度,再添加简单的投影效果,完成最终效果。 
 Accessing Photoshop: Methods and AvailabilityApr 24, 2025 am 12:07 AM
Photoshop can be obtained by purchasing a permanent license or subscribing to CreativeCloud. 1. Purchase a permanent license for long-term use, no monthly payment, but no latest updates are available. 2. Subscribe to CreativeCloud to access the latest version and other Adobe software, and you need to pay a monthly or annual fee. The choice should be based on frequency of use and requirements.
 What Photoshop Does Best: Common Tasks and ProjectsApr 23, 2025 am 12:06 AM
Photoshop is specialized in image editing, layering and masking, digital painting and a variety of design applications. 1) Image editing and repair: remove defects and adjust color and brightness. 2) Layers and masks: non-destructive editing and creation. 3) Digital paintings and illustrations: create art works. 4) Practical applications: graphic design, web design and digital art creation.
 Using Photoshop: Creative Possibilities and Practical UsesApr 22, 2025 am 12:09 AM
Photoshop is very practical and creative in practical applications. 1) It provides basic editing, repairing and synthesis functions, suitable for beginners and professionals. 2) Advanced features such as content recognition fill and layer style can improve image effects. 3) Mastering shortcut keys and optimizing layer structure can improve work efficiency.
 Photoshop: Advanced Techniques and ToolsApr 21, 2025 am 12:08 AM
Advanced features of Adobe Photoshop include advanced selection tools, layer blending modes, and actions and scripts. 1) Advanced selection tools such as the Quick Selection Tool and the Color Range Selection Tool can accurately select image areas. 2) Layer blending mode such as "overlapping" mode can create unique visual effects. 3) Actions and scripts can automate repetition of tasks and improve work efficiency.
 Photoshop's Main Feature: Retouching and EnhancementApr 20, 2025 am 12:07 AM
Photoshop's powerful functions in photo editing and enhancement include: 1. Use the "Repair Brush Tool" to remove acne, 2. Use the "Liquefaction Tool" to slim face, 3. Use the "Frequency Separation" technology to accurately retouch images. These functions are implemented through algorithms and image processing technology to optimize image processing effects.
 Photoshop's Key Features: A Deep DiveApr 19, 2025 am 12:08 AM
Key features of Photoshop include layers and masks, adjustment tools, filters and effects. 1. Layers and masks allow independent editing of image parts. 2. Adjust tools such as brightness/contrast can modify image tone and brightness. 3. Filters and effects can quickly add visual effects. Mastering these features can help creative professionals achieve their creative vision.
 Photoshop and Digital Art: Painting, Illustration, and CompositingApr 18, 2025 am 12:01 AM
Photoshop's applications in digital art include painting, illustration and image synthesis. 1) Painting: Using brushes, pencils and mixing tools, the artist can create realistic effects. 2) Illustration: With vector and shape tools, artists can accurately draw complex graphics and add effects. 3) Synthesis: Using mask and layer blending mode, artists can seamlessly blend different image elements.
 Advanced Photoshop Tutorial: Master Retouching & CompositingApr 17, 2025 am 12:10 AM
Photoshop's advanced photo editing and synthesis technologies include: 1. Use layers, masks and adjustment layers for basic operations; 2. Use image pixel values to achieve photo editing effects; 3. Use multiple layers and masks for complex synthesis; 4. Use "liquefaction" tools to adjust facial features; 5. Use "frequency separation" technology to perform delicate photo editing, these technologies can improve image processing level and achieve professional-level effects.


Hot AI Tools

Undresser.AI Undress
AI-powered app for creating realistic nude photos

AI Clothes Remover
Online AI tool for removing clothes from photos.

Undress AI Tool
Undress images for free

Clothoff.io
AI clothes remover

Video Face Swap
Swap faces in any video effortlessly with our completely free AI face swap tool!

Hot Article

Hot Tools

VSCode Windows 64-bit Download
A free and powerful IDE editor launched by Microsoft

ZendStudio 13.5.1 Mac
Powerful PHP integrated development environment

MantisBT
Mantis is an easy-to-deploy web-based defect tracking tool designed to aid in product defect tracking. It requires PHP, MySQL and a web server. Check out our demo and hosting services.

Notepad++7.3.1
Easy-to-use and free code editor

mPDF
mPDF is a PHP library that can generate PDF files from UTF-8 encoded HTML. The original author, Ian Back, wrote mPDF to output PDF files "on the fly" from his website and handle different languages. It is slower than original scripts like HTML2FPDF and produces larger files when using Unicode fonts, but supports CSS styles etc. and has a lot of enhancements. Supports almost all languages, including RTL (Arabic and Hebrew) and CJK (Chinese, Japanese and Korean). Supports nested block-level elements (such as P, DIV),


