Home >Software Tutorial >Computer Software >Introduction to the method of designing low-poly Ao textures in maya software
Introduction to the method of designing low-poly Ao textures in maya software
- 王林forward
- 2024-04-12 11:16:22685browse
php editor Baicao today introduces you to a simple and easy-to-learn method that can help you design beautiful low-poly Ao textures in Maya software, making your works more vivid! With the guidance in this article, you can easily master this technique and add more highlights and layers to your designs. Follow our steps now and improve your design skills!
1. First split the uv on the model. And give the model a simple shader. Component the smooth components of the model. Create a ground as a source of projection of time and light.
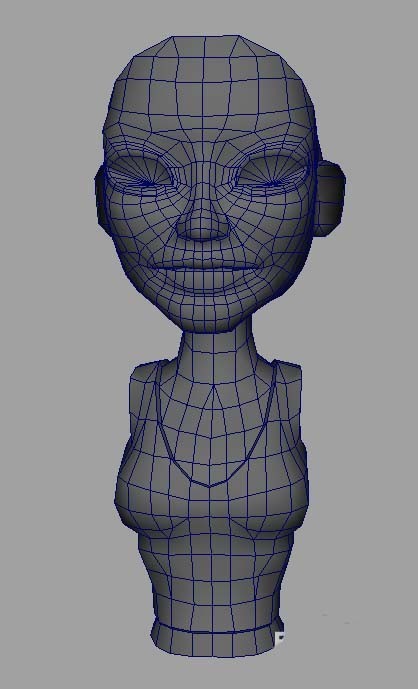
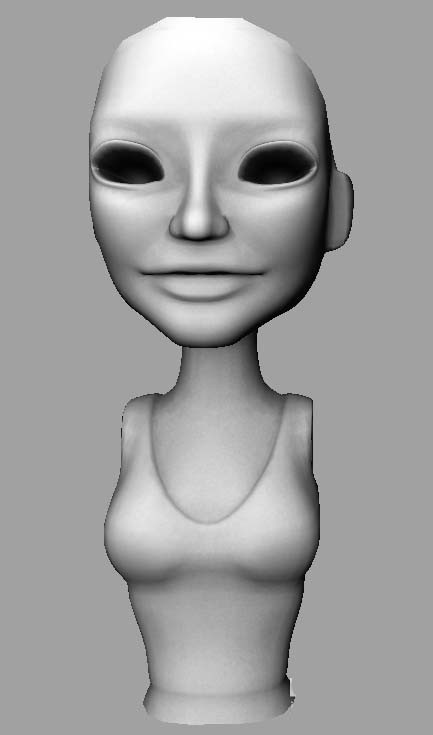
(This is the body of the character model, so the floor cannot be seen now)
2. Open the Rendering section-----Lighting/Shading--batch Bake (mental ray), click on the small window at the back to start setting parameters. As shown in the picture:
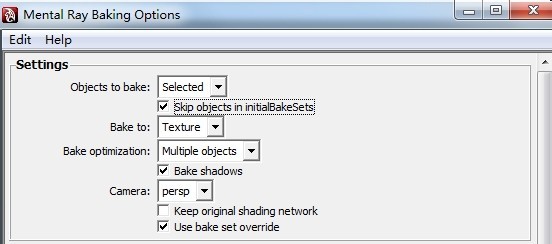
3. To check skip objects in initialbakesets and use bake set override, check Bake shadows (Baked Shadows), also change the options below.

4. Change the Coloe mode option to Occlusion. Next, change the value of Occlusion rays (occlusion light) to a higher value to make the light more obvious. You can set it to 128. Next, set the Normal direction to Surface front (ground front, that is, constrained by the floor).
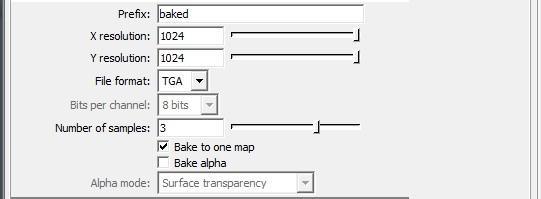
5. Set the prefix to baked, and set the x/y resolution (map size) to the size you want. The following is the file storage format. Set the value of Number of samples to 3, or as appropriate, and check Bake to one map.

6. Basically, there is no need to adjust these data. You can adjust the final gather reflect to make it larger.

7. Finally, set the Fill texture seams value to a larger value to make the time and shadow map better wrap the texture. After setting ok, click Convert directly to start baking. The baking speed is a bit slow, so be patient. After baking, the texture will be directly attached to the model. When setting ao textures, you cannot select the texture storage location. Generally, they exist in the default maya folder: C:Users*******DocumentsmayaprojectsdefaultrenderDatamentalraylightMap.
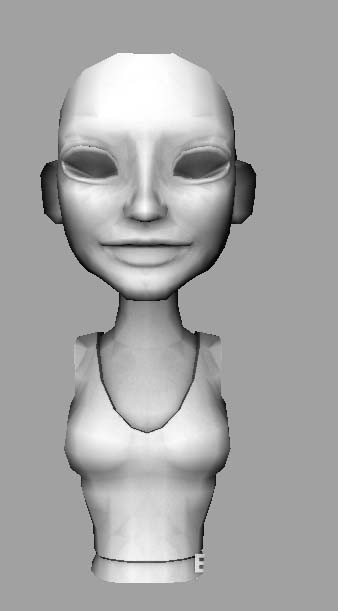
8. This is the effect produced directly by low-mode baking. You can see that the above effect is somewhat diamond-shaped, which is not very good. You can directly smooth the model and bake it again. The effect is as follows.
The above is the detailed content of Introduction to the method of designing low-poly Ao textures in maya software. For more information, please follow other related articles on the PHP Chinese website!

