
Home >Computer Tutorials >Computer Knowledge >ASUS video tutorial on replacing the hard drive and installing the system
ASUS video tutorial on replacing the hard drive and installing the system

- WBOYWBOYWBOYWBOYWBOYWBOYWBOYWBOYWBOYWBOYWBOYWBOYWBforward
- 2024-03-18 22:10:161429browse
php editor Banana brings you a video tutorial on how to replace the hard drive and install the system on ASUS. When using a computer, the hard disk is one of the crucial components. When the hard disk has problems or needs to be upgraded, it is a common operation to replace the hard disk and reinstall the system. This video tutorial will explain in detail the steps and precautions for replacing the hard drive and reinstalling the system on your ASUS computer, helping you to complete the operation easily and make your computer look brand new.
Turn on the computer and enter the ASUS BIOS utility-ez mode interface directly:
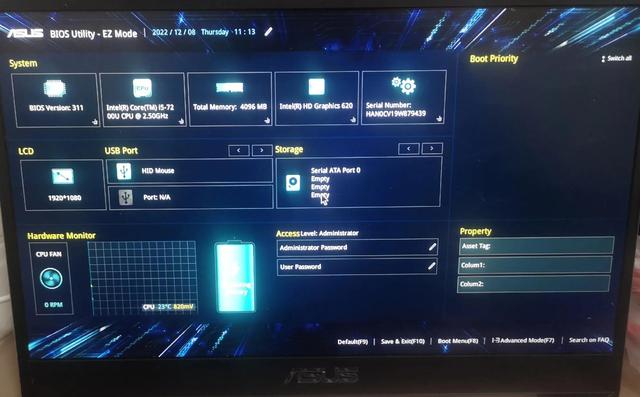
ASUS ASUS U4000U notebook
cannot boot normally and cannot recognize the hard disk normally.
Basic configuration: CPU I5-7200U 2.5G Hz
4G memory, HD 620 core display, 940MX independent display.
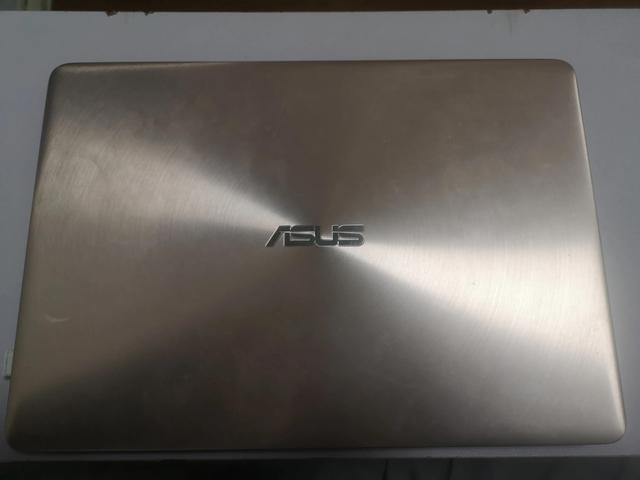
Notebook Side A
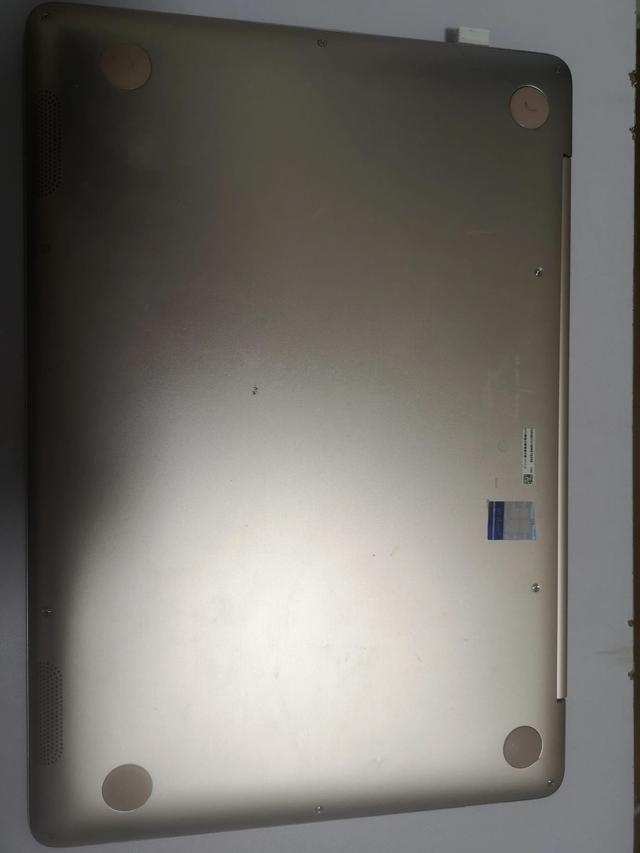 ##Notebook Side DTeardown Disassembly tools must be prepared before use. The screws on the D side cannot be disassembled without special disassembly tools. The hexalobular flower screws (hexagon socket socket screws) used in this notebook: Hexalobular flower screws
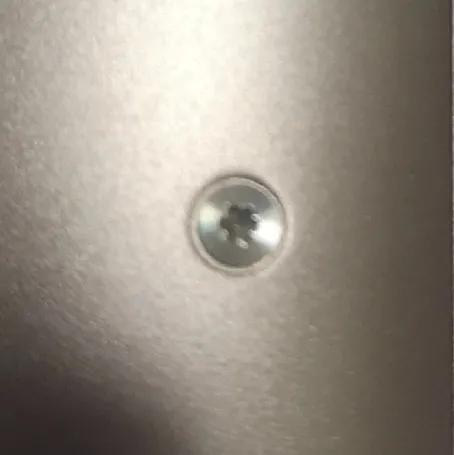 Hexalobular flower screws used Tools are very cheap online for a few yuan a set, but of course they cost thirty or forty yuan in offline stores:
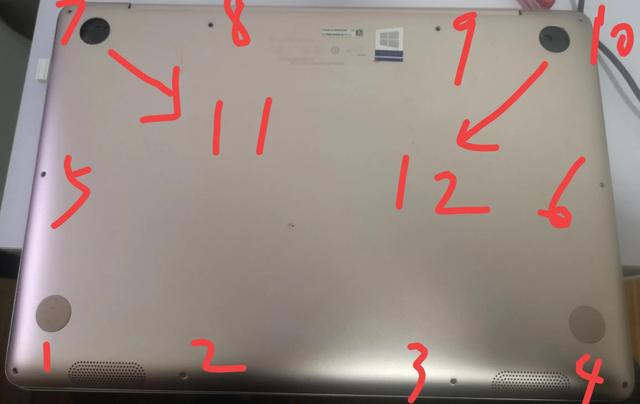
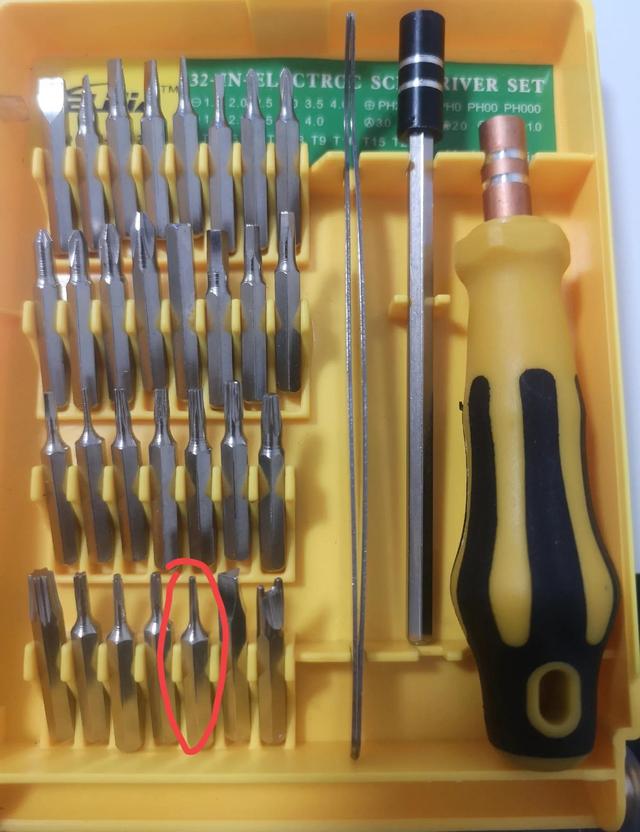 Disassembly Tool Set The screws are distributed, except for 10 pieces In addition to the hexagonal flower screws, it should be noted that two normal screws are hidden when the foot pad is uncovered, as marked in Figures 11 and 12:
 Screw distributionAfter removing the screws, use The D-side shell can be removed by gently scraping the gap with your fingernail. After disassembly, the original SSD position can be seen:
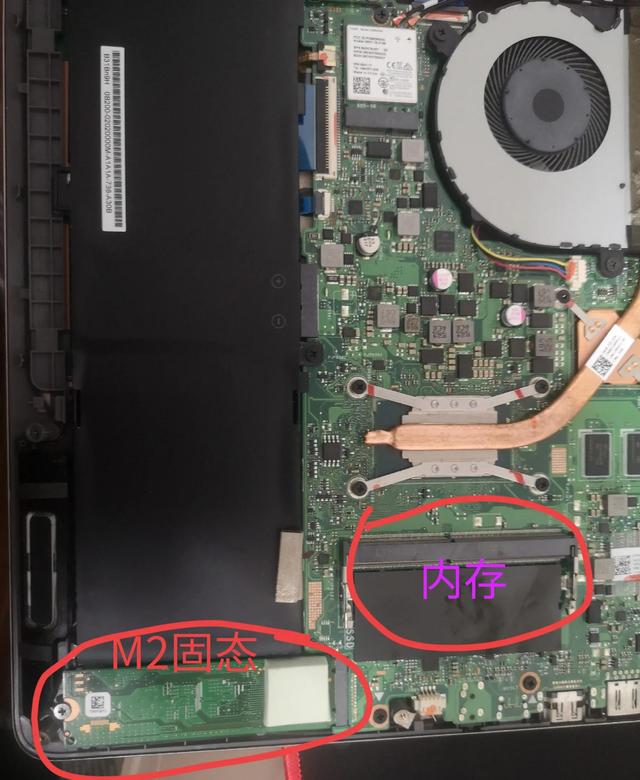 Original SSD positionI just took it apart and did not see the memory in the memory location. I thought the memory was stolen. In fact, if you peel off the black plastic sticker, you will find the soldered memory underneath. The memory of this notebook is soldered to the motherboard. The extra memory slot above the sticker is used to facilitate self-added memory upgrades. I don’t know whether the m2 solid state is broken or the corresponding m2 solid state slot is broken. I’m too lazy to try. In line with the principle of simplicity and saving money for old notebooks, instead of buying the more expensive M2 interface solid state, directly buy the SATA3 solid state. Fortunately, this notebook provides additional SATA hard drive slots: Integrate the new SATA solid state drive Insert the position in the picture below. This is the replaced one.
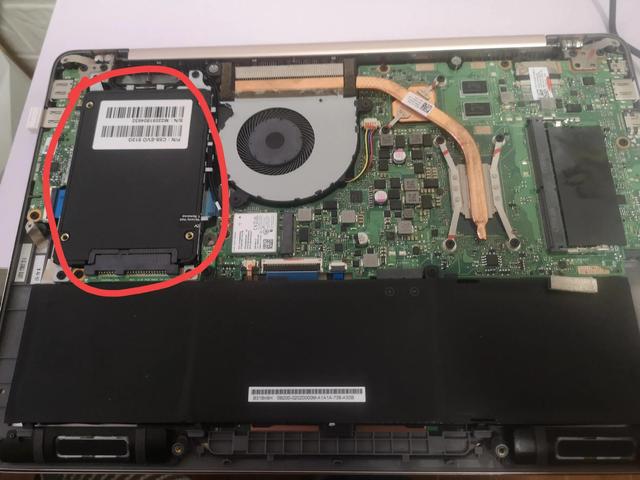 Replace the new hard driveReinstall the back cover and reinstall the system.
 The above is the detailed content of ASUS video tutorial on replacing the hard drive and installing the system. For more information, please follow other related articles on the PHP Chinese website!
Related articles
See more- What should I do if the solid state drive is not displayed when entering pe?
- How to distinguish between shingled hard drive and vertical hard drive?
- ASUS computer win10 to win7bios settings tutorial
- ASUS U disk boot BIOS settings method: Detailed explanation of how to boot an ASUS computer through a U disk and enter BIOS settings
- How to enter safe mode on Asus?