

How to install Telnet on CentOS/RHEL Linux 6 & 7

Telnet is a protocol used to log in to computers remotely over a TCP/IP network. Once a connection is established with the remote computer, it becomes a virtual terminal and allows you to communicate with the remote computer. In this article, we will show you how to install Telnet and how to access remote systems through Telnet.

Open a terminal and enter the following command to install telnet:
yum install telnet telnet-server -y
Now telnet has been installed on your server. Next edit the file /etc/xinetd.d/telnet:
vi /etc/xinetd.d/telnet
Set disable = no:
# default: on
# description: The telnet server serves telnet sessions; it uses \
#       unencrypted username/password pairs for authentication.
service telnet
{
        flags           = REUSE
        socket_type     = stream
        wait            = no
        user            = root
        server          = /usr/sbin/in.telnetd
        log_on_failure  += USERID
        disable         = no
}
Save and exit the file. Remember we don’t have to do this step on CentOS 7.
Next use the following command to restart the telnet service:
In CentOS 6.x systems:
service xinetd start
Let this service start every time you restart:
On CentOS 6:
chkconfig telnet on
chkconfig xinetd on
On CentOS 7:
systemctl start telnet.socket
systemctl enable telnet.socket
Let telnet's default port 23 pass through firewalls and routers. To allow the telnet port to pass through the firewall, edit the following file in the CentOS 6.x system:
vi /etc/sysconfig/iptables
Add the following line "-A INPUT -p tcp -m state --state NEW --dport 23 -j ACCEPT":
# Firewall configuration written by system-config-firewall
# Manual customization of this file is not recommended.
*filter
:INPUT ACCEPT [0:0]
:FORWARD ACCEPT [0:0]
:OUTPUT ACCEPT [0:0]
-A INPUT -m state --state ESTABLISHED,RELATED -j ACCEPT
-A INPUT -p icmp -j ACCEPT
-A INPUT -i lo -j ACCEPT
-A INPUT -p tcp -m state --state NEW --dport 23 -j ACCEPT
-A INPUT -m state --state NEW -m tcp -p tcp --dport 22 -j ACCEPT
-A INPUT -j REJECT --reject-with icmp-host-prohibited
-A FORWARD -j REJECT --reject-with icmp-host-prohibited
COMMIT
Save and exit the file. Restart iptables service:
service iptables restart
In CentOS 7, run the following command to allow the telnet service to pass the firewall.
firewall-cmd --permanent --add-port=23/tcp
firewall-cmd --reload
That's it. Now the telnet service can be used.
Create a test user, for example, the username is "sk" and the password is "centos":
useradd sk
passwd sk
Install telnet package:
yum install telnet
In DEB based systems:
sudo apt-get install telnet
Now, open a terminal and try to access your server (remote host).
If your client is a Linux system, open a terminal and enter the following command to connect to the telnet server.
telnet 192.168.1.150
Enter the username and password created on the server:
Example output:
Trying 192.168.1.150...
Connected to 192.168.1.150.
Escape character is '^]'.

Kernel 3.10.0-123.13.2.el7.x86_64 on an x86_64
server1 login: sk
Password:
[sk@server1 ~]$
As you can see, the remote host has been successfully accessed locally.
If your system is Windows, go to Start -> Run -> Command Prompt.
In the command prompt, enter the command:
telnet 192.168.1.150
192.168.1.150 is the remote host IP address.
Now you can connect to your server. That's it.
The above is the detailed content of How to install Telnet on CentOS/RHEL Linux 6 & 7. For more information, please follow other related articles on the PHP Chinese website!

 How does performance differ between Linux and Windows for various tasks?May 14, 2025 am 12:03 AM
Linux performs well in servers and development environments, while Windows performs better in desktop and gaming. 1) Linux's file system performs well when dealing with large numbers of small files. 2) Linux performs excellently in high concurrency and high throughput network scenarios. 3) Linux memory management has more advantages in server environments. 4) Linux is efficient when executing command line and script tasks, while Windows performs better on graphical interfaces and multimedia applications.
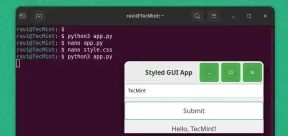 How to Create GUI Applications In Linux Using PyGObjectMay 13, 2025 am 11:09 AM
Creating graphical user interface (GUI) applications is a fantastic way to bring your ideas to life and make your programs more user-friendly. PyGObject is a Python library that allows developers to create GUI applications on Linux desktops using the
 How to Install LAMP Stack with PhpMyAdmin in Arch LinuxMay 13, 2025 am 11:01 AM
Arch Linux provides a flexible cutting-edge system environment and is a powerfully suited solution for developing web applications on small non-critical systems because is a completely open source and provides the latest up-to-date releases on kernel
 How to Install LEMP (Nginx, PHP, MariaDB) on Arch LinuxMay 13, 2025 am 10:43 AM
Due to its Rolling Release model which embraces cutting-edge software Arch Linux was not designed and developed to run as a server to provide reliable network services because it requires extra time for maintenance, constant upgrades, and sensible fi
![12 Must-Have Linux Console [Terminal] File Managers](https://img.php.cn/upload/article/001/242/473/174710245395762.png?x-oss-process=image/resize,p_40) 12 Must-Have Linux Console [Terminal] File ManagersMay 13, 2025 am 10:14 AM
12 Must-Have Linux Console [Terminal] File ManagersMay 13, 2025 am 10:14 AMLinux console file managers can be very helpful in day-to-day tasks, when managing files on a local machine, or when connected to a remote one. The visual console representation of the directory helps us quickly perform file/folder operations and sav
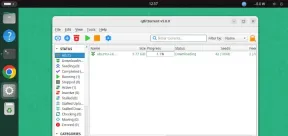 qBittorrent: A Powerful Open-Source BitTorrent ClientMay 13, 2025 am 10:12 AM
qBittorrent is a popular open-source BitTorrent client that allows users to download and share files over the internet. The latest version, qBittorrent 5.0, was released recently and comes packed with new features and improvements. This article will
 Setup Nginx Virtual Hosts, phpMyAdmin, and SSL on Arch LinuxMay 13, 2025 am 10:03 AM
The previous Arch Linux LEMP article just covered basic stuff, from installing network services (Nginx, PHP, MySQL, and PhpMyAdmin) and configuring minimal security required for MySQL server and PhpMyadmin. This topic is strictly related to the forme
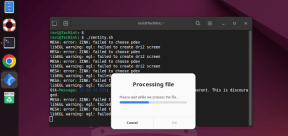 Zenity: Building GTK Dialogs in Shell ScriptsMay 13, 2025 am 09:38 AM
Zenity is a tool that allows you to create graphical dialog boxes in Linux using the command line. It uses GTK , a toolkit for creating graphical user interfaces (GUIs), making it easy to add visual elements to your scripts. Zenity can be extremely u


Hot AI Tools

Undresser.AI Undress
AI-powered app for creating realistic nude photos

AI Clothes Remover
Online AI tool for removing clothes from photos.

Undress AI Tool
Undress images for free

Clothoff.io
AI clothes remover

Video Face Swap
Swap faces in any video effortlessly with our completely free AI face swap tool!

Hot Article
Hot Tools

mPDF
mPDF is a PHP library that can generate PDF files from UTF-8 encoded HTML. The original author, Ian Back, wrote mPDF to output PDF files "on the fly" from his website and handle different languages. It is slower than original scripts like HTML2FPDF and produces larger files when using Unicode fonts, but supports CSS styles etc. and has a lot of enhancements. Supports almost all languages, including RTL (Arabic and Hebrew) and CJK (Chinese, Japanese and Korean). Supports nested block-level elements (such as P, DIV),

SublimeText3 Chinese version
Chinese version, very easy to use

WebStorm Mac version
Useful JavaScript development tools

Zend Studio 13.0.1
Powerful PHP integrated development environment

Dreamweaver Mac version
Visual web development tools

