


The previous Arch Linux LEMP article just covered basic stuff, from installing network services (Nginx, PHP, MySQL, and PhpMyAdmin) and configuring minimal security required for MySQL server and PhpMyadmin.
This topic is strictly related to the former installation of LEMP on Arch Linux and will guide you through setting more complex configurations for the LEMP stack, especially Nginx web server configurations, like creating Virtual Hosts, using Protected Directories, creating and configuring HTTP Secure Sockets Layer, and HTTP insecure redirects to HTTPS.
We will also present you with some useful Bash scripts that will ease the job of activating Virtual Hosts and generating SSL Certificates and Keys.
Step 1: Enable Virtual Hosts on Nginx
One of the simplest methods to enable Nginx Virtual Hosts is by using include statements on the main Nginx configuration file, which makes the job of further configurations more simpler and efficient because you can create simple files for every new host and keep the main configuration file cleaner.
This approach works the same way as on Apache Web Server, the first thing you need to do is specify the new URI path where Nginx should read file directives.
1. So, open nginx.conf main configuration file located on /etc/nginx/ system path and at the bottom, before the last curly bracket “}” add the path where future Virtual Host configuration files will reside.
sudo nano /etc/nginx/nginx.conf
At the bottom add the following statement.
include /etc/nginx/sites-enabled/*.conf;

This directive tells Nginx it should read all files that are found in /etc/nginx/sites-enabled/ that ends with a .conf extension.
2. The next step is to create sites-enabled directory and another one, called sites-available, where you store all your Virtual Hosts configuration files.
sudo mkdir /etc/nginx/sites-available /etc/nginx/sites-enabled
3. Now it’s time to create a new configuration file for “tecmint.com” in the /etc/nginx/sites-available directory.
sudo nano /etc/nginx/sites-available/tecmint.com.conf
Add the following content.
server {
    listen 80;
    server_name tecmint.com www.tecmint.com;

    root /srv/www/tecmint.com;
    index index.html;

    access_log /var/log/nginx/tecmint.com.access.log;
    error_log /var/log/nginx/tecmint.com.error.log;

    location / {
        try_files $uri $uri/ =404;
    }

    location /phpMyAdmin {
        alias /usr/share/webapps/phpMyAdmin;
        index index.php;
        try_files $uri $uri/ =404;
    }

    location ~ \.php$ {
        include fastcgi_params;
        fastcgi_pass unix:/run/php-fpm/php-fpm.sock;
        fastcgi_index index.php;
        fastcgi_param SCRIPT_FILENAME $document_root$fastcgi_script_name;
    }
}

The directive that activates Virtual Host is server_name statement under the listening port. Also, another important directive here is root statement that points to the Nginx Virtual Host to serve file content from /srv/www/tecmint.com system path.
4. The last step is to create /srv/www/tecmint.com directory and make tecmint.com.conf file configuration available for Nginx reading (using a symbolic link).
sudo mkdir -p /srv/www/tecmint.com
sudo ln -s /etc/nginx/sites-available/tecmint.com.conf /etc/nginx/sites-enabled/
5. Create a simple HTML file to serve as your website’s homepage.
sudo nano /srv/www/tecmint.com/index.html
Add the following content:
    <meta charset="UTF-8">
    <meta name="viewport" content="width=device-width, initial-scale=1.0">
    <title>Welcome to TecMint</title>


    <h1 id="Welcome-to-TecMint">Welcome to TecMint</h1>
    <p>This is a sample website hosted on Nginx.</p>
6. Next, test the Nginx configuration for syntax errors and restart Nginx to apply the changes.
sudo nginx -t
sudo systemctl restart nginx
7. To verify it, open a web browser and navigate to https://tecmint.com. You should see the sample HTML page you created.

Step 2: Enable SSL with Virtual Hosts on Nginx
8. SSL (Secure Sockets Layer) is a protocol designed to encrypt HTTP connections over networks or the Internet, which makes data flow to be transmitted over a secure channel using symmetric/asymmetric cryptography keys and is provided in Arch Linux by certbot package.
sudo pacman -S certbot certbot-nginx

9. Next, use certbot to automatically obtain and install the SSL certificate. Replace your_domain.com with your actual domain or server IP.
sudo certbot --nginx -d tecmint.com
Certbot will automatically configure Nginx to use the obtained SSL certificate and it will also set up automatic HTTP to HTTPS redirection.
10. To verify the certificate installation and renewal setup, you can perform a dry run:
sudo certbot renew --dry-run
11. Again point your browser to Arch IP URL but this time using HTTPS protocol – https://192.168.122.87 – this time you can now see your Nginx Virtual Host serves the same content as the previous name-ip host but this time using an HTTP secure connection.
Step 3: Access PhpMyAdmin through a Virtual Host
If Virtual Host is enabled on Nginx, we no longer have access to http://localhost path contents (localhost usually serves content using the loopback IP address or system IP address it is not otherwise configured) because we have used domain “tecmint.com” as server_name so our content path has changed.
12. To access phpMyAdmin from the virtual host, you need to add allow access to the phpMyAdmin directory in your Nginx virtual host configuration file.
sudo nano /etc/nginx/sites-available/tecmint.com.conf
Add the following configuration to ensure proper access:
 location /phpMyAdmin {
        alias /usr/share/webapps/phpMyAdmin;
        index index.php;
        try_files $uri $uri/ =404;
    }

    location ~ \.php$ {
        include fastcgi_params;
        fastcgi_pass unix:/run/php-fpm/php-fpm.sock;
        fastcgi_index index.php;
        fastcgi_param SCRIPT_FILENAME $document_root$fastcgi_script_name;
    }

13. The simplest method to gain access to PhpMyAdmin through the web is to create a symbolic link between /usr/share/webapps/phpMyAdmin/ path and our newly defined Virtual Host path (/srv/www/tecmint.com).
sudo ln -s /usr/share/webapps/phpMyAdmin/ /srv/www/tecmint.com/
14. After you executed the above command, refresh your page and you will see a new folder phpMyAdmin appear if autoindex statement is enabled on Nginx Virtual Host or point your URL directly to the PhpMyAdmin folder https://arch_IP/phpMyAdmin.

Step 4: Enable Password Protected Directory on Nginx
Unlike Apache, Nginx uses the HttpAuthBasic module to enable Password Protected Directories but doesn’t provide any tools to create an encrypted .htpasswd file.
15. To achieve directory password protection with Nginx on Arch Linux, install the Apache web server and use its tools to generate an encrypted .htaccess file.
sudo pacman -S apache
16. After you have installed Apache, create a new directory under /etc/nginx/ named intuitively passwd where .htpasswd file will be stored and use the htpasswd command with -c switch on the first added user to generate the file, then if you want to add more users use htpasswd without -c switch.
sudo mkdir /etc/nginx/passwd
sudo htpasswd -c /etc/nginx/passwd/.htpasswd first_user
sudo htpasswd /etc/nginx/passwd/.htpasswd second_user
sudo htpasswd /etc/nginx/passwd/.htpasswd third_user
17. To protect your Virtual Host’s directory, add the following directives under the server block in your Nginx configuration.
sudo nano /etc/nginx/sites-available/tecmint.com.conf
Add the following configuration.
auth_basic "Restricted Website";
auth_basic_user_file /etc/nginx/passwd/.htpasswd;

18. Next restart the Nginx service, refresh the page and an Authentication Required popup should appear demanding your credentials.
sudo systemctl restart nginx

Now you have successfully enabled Nginx Password Protected Directories but be aware that at the same time Apache web server is installed in your system so make sure that it stays disabled and by any means do not start it because can lead to ports conflicting with Nginx.
All of the settings presented in this article were made under an Arch Linux system that acts as a server, but most of them, especially those regarding Nginx configuration files, are available on most Linux systems with slight differences.
The above is the detailed content of Setup Nginx Virtual Hosts, phpMyAdmin, and SSL on Arch Linux. For more information, please follow other related articles on the PHP Chinese website!

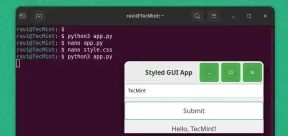 How to Create GUI Applications In Linux Using PyGObjectMay 13, 2025 am 11:09 AM
Creating graphical user interface (GUI) applications is a fantastic way to bring your ideas to life and make your programs more user-friendly. PyGObject is a Python library that allows developers to create GUI applications on Linux desktops using the
 How to Install LAMP Stack with PhpMyAdmin in Arch LinuxMay 13, 2025 am 11:01 AM
Arch Linux provides a flexible cutting-edge system environment and is a powerfully suited solution for developing web applications on small non-critical systems because is a completely open source and provides the latest up-to-date releases on kernel
 How to Install LEMP (Nginx, PHP, MariaDB) on Arch LinuxMay 13, 2025 am 10:43 AM
Due to its Rolling Release model which embraces cutting-edge software Arch Linux was not designed and developed to run as a server to provide reliable network services because it requires extra time for maintenance, constant upgrades, and sensible fi
![12 Must-Have Linux Console [Terminal] File Managers](https://img.php.cn/upload/article/001/242/473/174710245395762.png?x-oss-process=image/resize,p_40) 12 Must-Have Linux Console [Terminal] File ManagersMay 13, 2025 am 10:14 AM
12 Must-Have Linux Console [Terminal] File ManagersMay 13, 2025 am 10:14 AMLinux console file managers can be very helpful in day-to-day tasks, when managing files on a local machine, or when connected to a remote one. The visual console representation of the directory helps us quickly perform file/folder operations and sav
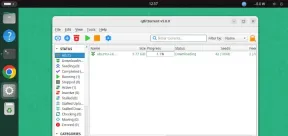 qBittorrent: A Powerful Open-Source BitTorrent ClientMay 13, 2025 am 10:12 AM
qBittorrent is a popular open-source BitTorrent client that allows users to download and share files over the internet. The latest version, qBittorrent 5.0, was released recently and comes packed with new features and improvements. This article will
 Setup Nginx Virtual Hosts, phpMyAdmin, and SSL on Arch LinuxMay 13, 2025 am 10:03 AM
The previous Arch Linux LEMP article just covered basic stuff, from installing network services (Nginx, PHP, MySQL, and PhpMyAdmin) and configuring minimal security required for MySQL server and PhpMyadmin. This topic is strictly related to the forme
 Zenity: Building GTK Dialogs in Shell ScriptsMay 13, 2025 am 09:38 AM
Zenity is a tool that allows you to create graphical dialog boxes in Linux using the command line. It uses GTK , a toolkit for creating graphical user interfaces (GUIs), making it easy to add visual elements to your scripts. Zenity can be extremely u
 Top 22 Best Music Players for LinuxMay 13, 2025 am 09:25 AM
Some may describe it as their passion, while others may consider it a stress reliever or a part of their daily life. In every form, listening to music has become an inseparable part of our lives. Music plays different roles in our lives. Sometimes it


Hot AI Tools

Undresser.AI Undress
AI-powered app for creating realistic nude photos

AI Clothes Remover
Online AI tool for removing clothes from photos.

Undress AI Tool
Undress images for free

Clothoff.io
AI clothes remover

Video Face Swap
Swap faces in any video effortlessly with our completely free AI face swap tool!

Hot Article
Hot Tools

MinGW - Minimalist GNU for Windows
This project is in the process of being migrated to osdn.net/projects/mingw, you can continue to follow us there. MinGW: A native Windows port of the GNU Compiler Collection (GCC), freely distributable import libraries and header files for building native Windows applications; includes extensions to the MSVC runtime to support C99 functionality. All MinGW software can run on 64-bit Windows platforms.

Dreamweaver Mac version
Visual web development tools

MantisBT
Mantis is an easy-to-deploy web-based defect tracking tool designed to aid in product defect tracking. It requires PHP, MySQL and a web server. Check out our demo and hosting services.

WebStorm Mac version
Useful JavaScript development tools

Zend Studio 13.0.1
Powerful PHP integrated development environment

