Home >Computer Tutorials >Computer Knowledge >How to create a new disk in win11? Tutorial on adding new disk settings in win11
How to create a new disk in win11? Tutorial on adding new disk settings in win11
- PHPzforward
- 2024-03-07 10:04:221431browse
php editor Xinyi introduces you to the setting tutorial for creating a new disk in win11. In win11 system, adding a new disk is a common requirement, which can help you expand storage space and better manage files. With a few simple steps, you can easily create a new disk in win11 system, making your computer more intelligent and efficient. Next, we will explain in detail the steps of how to create a new disk in win11, so that you can easily master the operation skills.
Win11 Add New Disk Settings Method
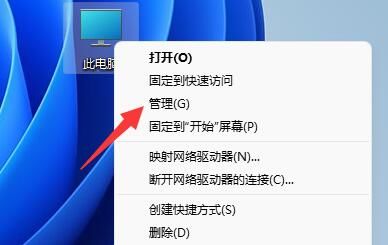
1. First, you need to right-click the computer icon on the desktop and click the Manage button in the pop-up option box.
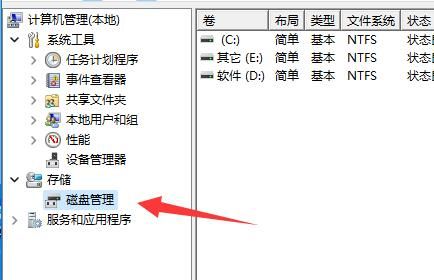
#2. In the computer management interface, find and click the disk management option in the lower left corner.
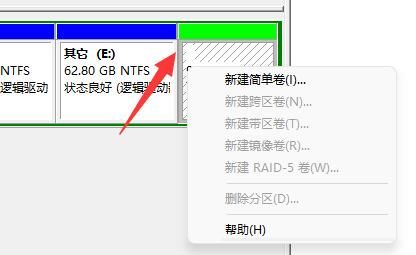
#3. Here we can see disk related information. The green one is the available space. Right-click the green area and select New Simple Volume.
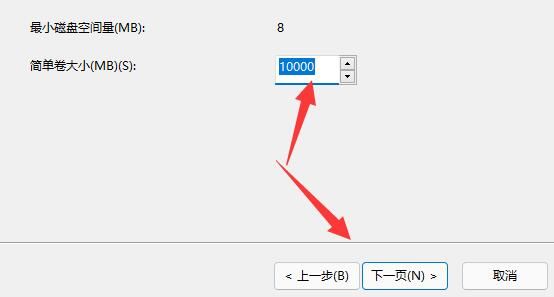
#4. In the pop-up window, the user can set the size of the simple volume, and then click the next page.
#5. Next, click the Next page button after selecting the drive.
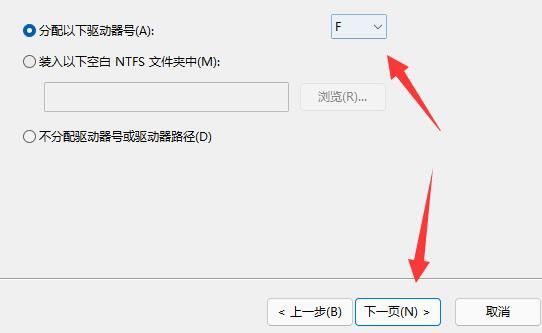
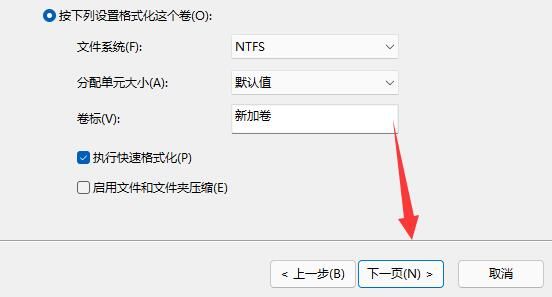
#6. The settings on the last page do not need to be changed. Finally, click the next page to complete the new disk.
The above is the detailed content of How to create a new disk in win11? Tutorial on adding new disk settings in win11. For more information, please follow other related articles on the PHP Chinese website!

