
Home >Computer Tutorials >Computer Knowledge >How to Overclock a Raspberry Pi
How to Overclock a Raspberry Pi

- WBOYWBOYWBOYWBOYWBOYWBOYWBOYWBOYWBOYWBOYWBOYWBOYWBforward
- 2024-02-25 09:37:50988browse
There is no doubt that Raspberry Pi 4 has a powerful processor. It's powered by Broadcom's BCM2711 processor with four Cortex-A72 cores and a clock speed of up to 1.5 GHz, making it significantly more powerful than other processors out of the box. In this article, we’ll explore how to safely overclock the Raspberry Pi 4 to improve its performance.
How to Overclock Raspberry Pi 4
The Raspberry Pi 4 has a native clock frequency of 1.5 GHz, and this article will attempt to overclock it to 2 GHz. Before overclocking, it's crucial to ensure your device remains well cooled. First, a radiator and fan need to be installed on the device to effectively reduce the heating temperature. Because overclocking changes the physical properties of the board, it can sometimes cause temperatures to rise as high as 158 degrees Fahrenheit. Therefore, taking appropriate cooling measures is crucial to ensure stable operation of the device.
When overclocking the Raspberry Pi 4, pay special attention to the installation of the heat sink and fan. They are crucial to keeping the CPU temperature within the proper range. Without a good cooling system, the performance of the CPU may be affected or even cause performance degradation and system crashes. Therefore, it is recommended to install a heat sink and fan when overclocking the processor to ensure that the system always runs in a stable and efficient state. These simple measures can help avoid problems caused by overheating while ensuring you get the best performance and experience.
Please note that when overclocking your Raspberry Pi, make sure to use proper cooling and heatsinks. While this method is considered safe and effective, we are not responsible for any damage that may occur.
Use the below mentioned instructions to overclock your Raspberry Pi 4
To overclock Raspberry PI 4 using Raspberry OS, follow the steps mentioned below.
- First, on your Raspberry PI OS, open the Terminal application and run the following commands to update all packages.
Sudo apt更新&;&sudo apt升级-y
- Now, run sudo apt dist-Upgrade to install the latest version of the distribution.
- We need to update its firmware to the latest version. Open a terminal and execute the following commands. If you get the message "RPI-UPDATE is already the latest version" then you are set. Otherwise, update the firmware and restart the PI.
SUDO APT安装RPI-更新
- After restarting the device, launch the terminal again and run the following commands to access the configuration file.
Sudo geany/boot/config.txt
- In the Geany window that will pop up after running the previously mentioned command, search for #arm_freq=800. Remove the label (#) and change the 800 to 2000 as we need to clock the speed to 2 GHz.
- To increase the voltage, add the following lines before the arm_freq string.
过电压=6
- If you want to increase the clock speed of the graphics processor unit, add the following lines.
GPU_freq=750
- Now you can check whether your Raspberry PI's CPU and GPU are successfully overclocked by following these instructions:
- Restart Raspberry Pi.
- Open two instances of the terminal.
- In each terminal window, run the following command:
Watch-n 1 vcgencmd MEASURE_CLOCK ARM//实时监控CPU时钟速度
查看-n 1 vcgencmd measure_temp//以显示当前温度
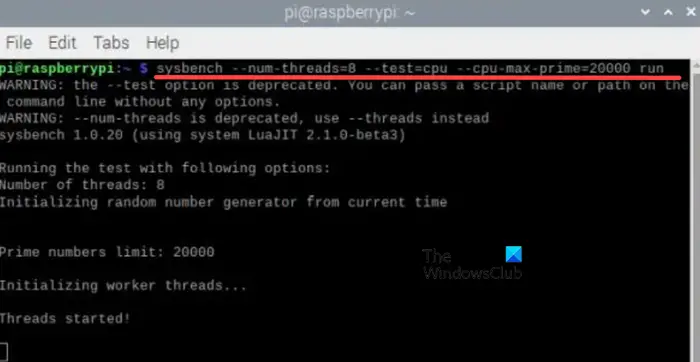
- In order to check if the Raspberry PI 4 reaches the required clock speed, which is 2 GHz, we will use the system bench. Run the below mentioned command to install the utility.
Sudo apt安装系统工作台
- Now, execute the below mentioned command to check whether the clock speed of Raspberry PI reaches 2000 or not. This will take about 10 seconds.
系统工作台--线程数=8--测试=cpu--cpu-max-Prime=20000次运行
This is how you can overclock your Raspberry Pi. If you want to disable overclocking, open the configuration file and add # in front of the command you write. This way, these lines will be commented out and will not be rendered when the configuration file is executed.
Undo changes in configuration file if Raspberry PI does not boot after overclocking
If the Raspberry PI does not boot after overclocking, you will need a computer to revert the changes you made.
In order to reconfigure the settings of the Raspberry Pi 4, we need to modify the configuration file through the computer. First, you need to remove the SD card from the motherboard and insert it into your PC. In your PC, find the SD card (labeled "BOOT" in File Explorer) and open it. Find the config.txt file in the SD card and modify it accordingly.
Next, when editing the configuration file, make sure to add a label for all instances that were previously changed. Once done, insert the SD card into the Raspberry Pi and boot it up at the default clock speed.
Read: How to Create a Raspberry PI Virtual Machine
Can the Raspberry Pi be overclocked?
Yes, the Raspberry Pi can be overclocked using the steps mentioned earlier. However, overclocking your Raspberry Pi may void its warranty, shorten its lifespan, or cause instability. That's why we urge you to be very cautious when changing your device's clock speed, and to add adequate cooling before putting your device under extreme stress.
Read: How to stress test a Raspberry Pi 4 on a Windows PC?
Can the Raspberry Pi run on Windows 11?
Yes, you can use Windows 11 on your Raspberry Pi device. We recommend you read our guide to installing Windows 11 on your Raspberry Pi. If you don't like the Raspberry Pi operating system, Windows 11 can be a good choice.
Also Read: How to set up a Raspberry Pi module with default settings.
The above is the detailed content of How to Overclock a Raspberry Pi. For more information, please follow other related articles on the PHP Chinese website!
Related articles
See more- What does jsapi payment mean?
- Can the overclocking function that comes with the Z370 motherboard be used for the 8700k CPU?
- How to set up the overclocking function of ASUS motherboard?
- MSI officially announces Z790MPOWER motherboard, dual-slot memory overclocking optimized design
- How to overclock Colorful 3060ti