Home >Computer Tutorials >Computer Knowledge >How to Test Your Computer's Power Supply (PSU)
How to Test Your Computer's Power Supply (PSU)
- WBOYWBOYWBOYWBOYWBOYWBOYWBOYWBOYWBOYWBOYWBOYWBOYWBforward
- 2024-02-19 19:00:04596browse
PSU failure is one of the common reasons why your computer experiences BSOD and sudden crashes. Therefore, it is crucial to ensure the good functioning of the PSU. In this article, we'll learn how to test your computer's power supply unit (PSU) to ensure the proper functioning of your system.
Testing a Windows computer’s power supply unit (PSU)
Here's how to test your computer's power supply unit (PSU).
Let’s talk about it in detail.
1]Check Symptoms
Before proceeding with the next tests, we need to check for some symptoms to determine whether these tests are necessary. By observing these symptoms, we can understand whether there is a problem with the health of the PSU.
- First, pick up an electrical tester and carefully touch it to your CPU's case. If there is a leakage, your PSU may be faulty.
- Another symptom is a burning smell coming from your computer, if the PSU is severely burned you will notice smoke, which is a leak.
- Random shutdowns or blue screens can be caused by PSU issues that cause voltage drops.
- Intermittent boot errors or crashes are issues that may be caused by a faulty PSU.
- Noise coming from the power supply unit (PSU) may be a sign of failure, such as a grinding fan or a high-pitched whine or buzz. If the noise exceeds the slight hum of a fan, that's usually a bad sign.
If you cannot draw any conclusions from the symptoms, check the tests mentioned below.
2] Test PSU using jumpers
The Jumpire Wire test doesn't provide all the information you need about your PSU, but it can inform you whether your device is in an operable condition.
In order to test, you will need a 6AWG or 18AWG gauge jumper wire and a paper clip. Follow the steps below.
After connecting the green wire to the ground wire and reconnecting the PSU to power, the PSU fan should start spinning and the power indicator light should appear, which means the PSU is operating normally. If the fan is not spinning, the PSU may be damaged and it is recommended to consult an expert or call customer service.
3] Test your PSU using a multimeter
A simple way to test your power supply is to use a multimeter. It is important to remember that a multimeter is a critical instrument that can be used to accurately measure various ranges of current, voltage, and resistance.
You can test the connectivity and voltage between different pins by using a multimeter. Simply short the powered pin to the adjacent ground pin, then connect a multimeter to ground and test the connector pins one by one to make sure the voltage is OK.
4] Test your PSU using a PSU tester

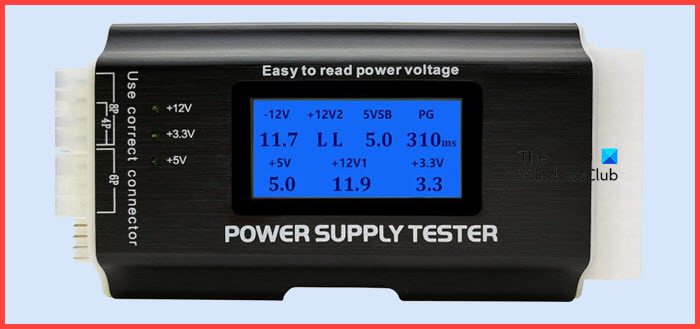
Last but not least, let’s buy a PSU tester. They are cheap and allow you to test your PSU. All you need to do is plug in the cable, power up the PSU, and reach the LCD screen. For many users, a PSU tester is a bit overwhelming, but if you don't want to deal with a fidgety multimeter, get a PSU tester.
Hopefully you will know if your PSU is failing, using one of the tests mentioned here.
The above is the detailed content of How to Test Your Computer's Power Supply (PSU). For more information, please follow other related articles on the PHP Chinese website!

