


php editor Xinyi brings you the bios setting problem of Jingyue h97m-vh motherboard. During computer installation or configuration, correct bios settings are crucial. As a common motherboard, Jingyue h97m-vh motherboard has rich setting options. This article will introduce how to correctly set the bios of Jingyue h97m-vh motherboard to help you better use this motherboard. Whether it is the first installation or further optimizing system performance, correct bios settings are an essential step. Let’s take a look!

Jingyue h97m-vh motherboard bios settings?
The BIOS settings of the H97M-VH motherboard mainly include the motherboard startup sequence, CPU and memory settings, power management, and the configuration of the hard disk and other peripherals.
You can press the specified key to enter the BIOS interface when the motherboard is turned on, and then adjust the corresponding settings as needed, such as setting the boot sequence to boot from a specific device, adjusting the frequency and voltage of the CPU and memory, etc. You can also perform Power management, setting power saving mode and wake-up events, and finally configuring the working mode and connection mode of hard drives and other peripherals.
After the adjustment is completed, press Save and Exit to apply the BIOS settings to the system.
Jingyue b760i motherboard bios settings?
Regarding the BIOS settings of the Jingyue b760i motherboard, you need to pay attention to the following points: 1. First enter the BIOS interface, which can be entered by pressing the DEL key or the F2 key; 2. In the motherboard settings, you can set the CPU Parameters such as operating frequency, memory, hard disk, etc. need to be adjusted accordingly according to your own hardware configuration; 3. In the advanced settings, you can set some advanced options, such as boot sequence, safe boot, etc.; 4. In the power management, You can adjust power-related parameters, such as energy-saving mode, etc. It should be noted that BIOS settings need to be operated with caution to avoid misoperation causing motherboard failure. If you need specific operation steps, you can refer to the motherboard user manual or seek help from relevant technical personnel.
How to enter bios on Jingyue b760m?
Hello, the method of entering the BIOS may vary depending on the computer brand and model, but you can usually enter through the following steps:
1. Press the key specified by the computer manufacturer when booting, usually It's the F2, F10, Delete or Esc key.
2. If you miss the key press timing, try restarting your computer and repeat step 1.
3. If you are unable to enter the BIOS, please refer to your computer's user manual or contact the manufacturer for support.
Please note that entering the BIOS may make changes to your computer's settings and configuration, so please proceed with caution.
How to enter the bios of Jingyue x99?
The method to enter the BIOS can be achieved through the following steps: 1. After booting, press the "Delete" key on the keyboard, or other keys such as "F2", "F12", "Esc", etc. The motherboard may have different keys, so you need to read the instructions in the specific motherboard manual.
2. After entering the BIOS interface, you can use the arrow keys and Enter key to operate. For details, you can read the on-screen prompts and select different menus for settings and operations.
3. After completing the settings, press the "F10" key to save the modifications and exit, or select other related operations.
In short, the method of entering the BIOS depends on the specific motherboard. You need to read the manual or search to obtain relevant information.
Jingyue b85 motherboard bios settings?
1. Turn on the computer and continuously click on the keyboard to enter the BIOS system settings. Each motherboard has different setting methods, but the methods are similar.
2. After entering, you will see the System option above, click it.
3. Then choose to find the System Language option through the down key on the keyboard, which is the "System Language Options".
4. You will find that English is displayed. After selecting, hit the Enter key to change it.
5. Then select the language you use, usually "Simplified Chinese".
6. Finally, we need to save our changes. Saving can be performed through the fast forward key F10, and the shortcut keys vary from computer to computer.
7. For most computers, when you press the ESC key to exit the BIOS setting interface, the system will prompt whether to save. At this time, select "Yes" to save the setting operation. In this way, when you enter the BIOS setting interface in the future, it will be in Chinese.
What is the startup key for the Jingyue motherboard?
The power-on button of Jingyue motherboard is usually located at the front panel connection position of the motherboard. It is usually a small square socket that can be plugged into the power-on button wire on the main chassis. When you press the power-on button of the main chassis, current will be transmitted to the power-on button on the motherboard through the button wire, thereby starting the computer.
When assembling the computer, you only need to correctly insert the power-on button wire on the main chassis into the power-on key socket on the motherboard to achieve the power-on function. In this way, users can easily use the power-on button on the motherboard to start the computer.
Why can’t the Jingyue x99 motherboard bios be changed to Chinese?
The reason why the Jingyue x99 motherboard bios cannot be changed to Chinese may be because the designer did not initially provide support for Chinese text. Additionally, changing the bios may require recompiling the system, which may cause other problems such as system instability or hardware damage. Therefore, in order to ensure the stability of the system and the normal operation of the hardware, we should not change the text language in bios.
How to enter the bios interface of Jingyue B85 motherboard?
First, press the Del key or F2 key when booting to enter the BIOS setup interface. If the keys don't work, you can try restarting the computer and holding down the Ctrl Alt Del key, and then press the Del key or F2 key.
If it still doesn't work, you can try to clear the CMOS, that is, take out the CMOS battery and reinsert it, and then try to enter the BIOS setup interface.
In addition, some computers may need to enter the BIOS setting interface in UEFI mode. You can try pressing the F10 key or Fn F2 key to enter the UEFI BIOS setting interface when booting.
What are the USB boot options for Jingyue motherboard?
1. The U disk boot option for Jingyue motherboard exists. 2. This is because the Jingyue motherboard is a motherboard that supports U disk booting. It has corresponding BIOS setting options that can set the U disk as the boot device. By setting the U disk startup item, users can choose to start the system or program from the U disk when booting. 3. By setting the U disk boot option of Jingyue motherboard, users can easily perform system installation, repair or other related operations, while also providing more flexibility and convenience. In addition, USB boot can also be used for system backup, data recovery and other purposes, providing users with more choices and possibilities.
Can't the hard disk mode be changed in the Jingyue motherboard bios?
The BIOS of some motherboards may limit the options for changing the hard disk mode. This is usually for compatibility and stability reasons. If you cannot find the option to change the hard drive mode in the Jingyue motherboard's BIOS, it may be because the motherboard does not support or restricts such changes. In this case, you may want to consider running the drive in its current mode or find another solution to meet your needs.
The above is the detailed content of Jingyue h97m-vh motherboard bios settings?. For more information, please follow other related articles on the PHP Chinese website!

 Neighbors: Suburban Warfare Black Screen? 4 Fixes HereApr 22, 2025 pm 10:01 PM
Neighbors: Suburban Warfare Black Screen Problem Solving Guide Neighbor: The suburban war game unexpectedly had a black screen problem, resulting in the inability to enter the game? don’t worry! This blog post by MiniTool will provide four effective ways to solve the problem of black screen in Neighbors: Suburban Warfare. Quick navigation: Neighbors: Suburban war black screen Method 1: Run the game as an administrator Method 2: Reinstall Easy Anti-Cheat Method 3: Update the graphics card driver Method 4: Reinstall the game Conclusion Neighbors: Suburban war black screen Newly released games often encounter various problems, Neighbors: Subu
 Works 100%: Recover FL Studio Files (Unsaved & Deleted) EasilyApr 22, 2025 pm 08:01 PM
Recover Lost FL Studio Projects: A Step-by-Step Guide Losing your FL Studio project can be devastating. This guide provides solutions for recovering both unsaved and deleted FL Studio (.flp) files on Windows. Recovering Unsaved FL Studio Files Metho
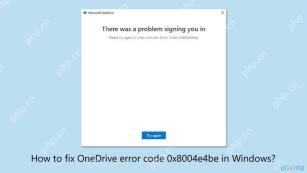 How to fix OneDrive error code 0x8004e4be in Windows?Apr 22, 2025 pm 08:00 PM
OneDrive is the native cloud product of Microsoft which allows users to store files, sync them on devices, and access them from anywhere. It is the basic file m
 What if KB5055683 Fails to Install? Here Are Some FixesApr 21, 2025 pm 08:03 PM
The KB5055683 cumulative update is designed to improve the quality and reliability of .NET Framework 3.5, 4.8 and 4.8.1 in Windows 10 systems. If you encounter the failure of KB5055683 installation, how to solve it? This article will provide effective solutions. Windows 10 KB5055683 Update KB5055683 is a cumulative update for .NET Framework 3.5, 4.8 and 4.8.1 for Windows 10 22H2 versions, released on April 8, 2025. This update contains all security improvements from previous versions, but no new security improvements were added. It is recommended that you download and install KB50 as soon as possible
 Fresh Guide! Fix REMATCH A D3D12-compatible GPU ErrorApr 21, 2025 pm 08:01 PM
Encountering the REMATCH D3D12-compatible GPU error on Windows? This guide provides solutions to get you back in the game. REMATCH, a multiplayer online football game, requires a graphics card supporting DirectX 12 (Feature Level 12.0, Shader Model
 Clone a Hard Drive Without OS, Watch Pro Guide with Easy StepsApr 21, 2025 am 10:24 AM
This guide shows you how to clone a hard drive even if your Windows system won't boot. MiniTool ShadowMaker simplifies this process. Windows boot failures are common, caused by issues like corrupted system files or MBR errors. Cloning your hard dri
 League of Legends Play Button Not Working on PC: ResolvedApr 21, 2025 am 10:09 AM
The League of Legends game buttons do not work properly, resulting in the inability to enter the game? don’t worry! This guide will guide you to solve this problem quickly and effectively, allowing you to easily resume the game. Just follow the steps below to quickly resolve the game button issue! Quick navigation: League of Legends game buttons don't work How to fix League of Legends game buttons not working on PC Summarize League of Legends game buttons don't work As a MOBA game, League of Legends continues to attract global players and has a huge and stable player group. To enhance the gaming experience, Riot Games regularly releases updates to introduce new content, but this doesn't always go smoothly. Sometimes, some accidental technical failures may occur after a new update, such as League of Legends games
 How to use Plex to create your own private Netflix or SpotifyApr 20, 2025 am 10:13 AM
Build Your Own Streaming Service with Plex: A Step-by-Step Guide We're accustomed to on-demand content at our fingertips, thanks to services like Netflix and Spotify. However, building a personal media library offers unique advantages: ownership and


Hot AI Tools

Undresser.AI Undress
AI-powered app for creating realistic nude photos

AI Clothes Remover
Online AI tool for removing clothes from photos.

Undress AI Tool
Undress images for free

Clothoff.io
AI clothes remover

Video Face Swap
Swap faces in any video effortlessly with our completely free AI face swap tool!

Hot Article
Hot Tools

SublimeText3 Linux new version
SublimeText3 Linux latest version

VSCode Windows 64-bit Download
A free and powerful IDE editor launched by Microsoft

MinGW - Minimalist GNU for Windows
This project is in the process of being migrated to osdn.net/projects/mingw, you can continue to follow us there. MinGW: A native Windows port of the GNU Compiler Collection (GCC), freely distributable import libraries and header files for building native Windows applications; includes extensions to the MSVC runtime to support C99 functionality. All MinGW software can run on 64-bit Windows platforms.

Dreamweaver Mac version
Visual web development tools

DVWA
Damn Vulnerable Web App (DVWA) is a PHP/MySQL web application that is very vulnerable. Its main goals are to be an aid for security professionals to test their skills and tools in a legal environment, to help web developers better understand the process of securing web applications, and to help teachers/students teach/learn in a classroom environment Web application security. The goal of DVWA is to practice some of the most common web vulnerabilities through a simple and straightforward interface, with varying degrees of difficulty. Please note that this software

