


php editor Strawberry will introduce to you how to copy the folder path on Mac. In the Mac system, copying the folder path can help us quickly locate the location of the specified folder and improve work efficiency. To copy a folder path, you can use two simple methods: one is to use the right-click menu, and the other is to use shortcut keys. Using these methods, you can easily copy folder paths to easily locate and manage your files. Next, let’s learn about the specific steps.
How to look at the mac file path
On Mac, document files are usually saved in the "Documents" folder in the user's home directory. You can access the folder through the Finder's left sidebar, or use Spotlight Search to find documents.
On a Mac computer, you can find various commonly used folders through the following paths: Macintosh HD (or other hard drive name) Users (user) user name. There are many common folders under this folder, such as desktop, documents, downloads, music, pictures, videos, etc. You can also create your own folders to store specific types of files if needed.
The browser saves downloaded files in a folder named "Downloads" by default. You can find this folder in the Finder on your Mac, usually in the sidebar. If you want to change the location of your downloads folder, you can set this in your browser's Preferences. Please note that this only works on Mac computers, the default download folder location.
You can view the full path of a file or folder by using the Get Info panel. Find the file or folder whose path you want to view in Finder, right-click the item and select the "Get Information" option. In the pop-up panel, you will see the full path information of the project. This method can help you quickly find the location of a file or folder.
In the mac system, you can get the path by right-clicking on the file or folder, selecting Show Introduction, and then finding the location in the pop-up window. On systems prior to Mac 10, paths are displayed in the normal way, using slashes (/) to separate folders. Starting from mac 10, the path will be displayed with a small arrow instead of a slash. It should be noted that the path does not include the file name, so when quoting the path, remember to add the file name and extension.
How to copy files to different locations on Mac
The steps to copy files to other locations on Mac are very simple. First, select the file you want to copy, and then open the Mac right-click menu (if you haven’t installed the Mac right-click menu tool, you can install it first). Next, select the "Copy to" option in the right-click menu. In the pop-up window, select a path where you want to save the file and click OK. In this way, you have successfully copied files from Mac to other locations.
The steps are as follows: First, open the file manager "Finder" application in the Apple system. Then, browse in the left panel and find the disk containing the files you want to move. Click the disk name to expand its contents.
First, open the target folder as indicated by the arrow in the picture below. Then, press the [Command A] shortcut key to select all files. Then, press the [Command C] shortcut key according to the arrow in the picture below.
Mac computers and hard disk file systems are incompatible. The main manifestation is that Mac cannot copy, copy or write files to NTFS-formatted mobile hard disks or U disks. This is because Mac only has "read" permissions for the NTFS file system, not "write" permissions. Therefore, in order to use the mobile hard drive or USB flash drive normally on Mac, you can consider formatting it with a file system supported by Mac, such as Mac OS Extended (HFS) or APFS. This allows you to copy, copy and write files on your Mac.
The details are as follows: First, start our MAC and click on the launch pad in the list on the left, as shown in the figure. Then click [mounty] to apply. If it is not available on the computer, we can download it from the software website, as shown in the picture. Afterwards, a mountain icon will be displayed in the upper menu bar, as shown in the picture.
(1) "Command C" and "Command V": copy and paste, the file can be copied to other locations; (2) "Command D": copy a copy of the file in the same location; (3) " Command C" and "Command Option V": The effect is equivalent to cut and paste.
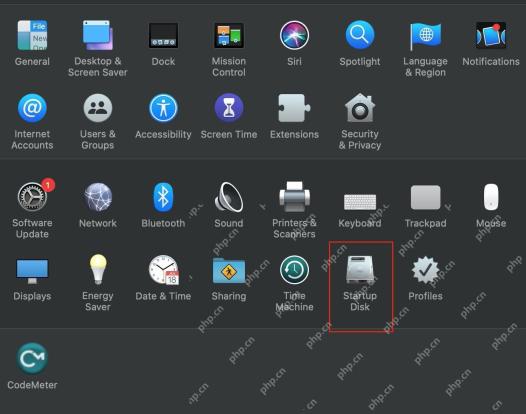
How to set the path of the trash folder in Apple computer system
1. Method 1 First we need to open the display path of Finder.
2. Modify the default storage path: We can modify the computer's default folder storage path to the path we want. For example, if we want to modify the storage path of downloaded files, we can open the Chrome browser, select "Settings", then click "Advanced Settings" to modify it in the download settings.
3. If there is something in the trash can, a full trash can will be displayed in the Dock. Clicking on the trash can will pop up a window with the deleted files in it. Right-click on the file you want to recover and click [Put Back]. The specific menu name is based on what you see.
4. From there, you can drag items from the Trash window onto the desktop (or other folders), or you can right-click them and select "Put Back" in the menu. You can also select items in the Recycle Bin and choose File Put Back in the menu bar, and they will be returned to their original location before you moved them to the Recycle Bin.
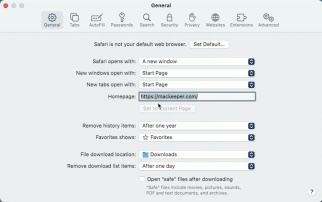
5. For example, if you want to specify the file downloaded by the browser to a certain folder, click the browser first. Then we click on browser. We click [Preferences] as follows. Then we click Settings General and we click [Download file location] as follows.
6. Put the two apps together and a folder will be created. Finally, you can name the new folder. Data expansion: The folder is specially used to hold full-page files. The main purpose is to better preserve the files and make them neat and standardized.

How to move a file to another disk in Apple system?
1. Usually, after connecting the hard disk to Mac, the desktop will appear Hard disk icon, then we can select the file and drag it directly to the external hard disk.
2. Check the partition format of the mobile hard disk, which is displayed as an NTFS format mobile hard disk. Right-click on the mobile hard disk and find that there is no "New Folder" option. Mounty11 software can help us copy files to NTFS format storage devices.
3. First start our MAC and click Launchpad in the list on the left, as shown in the figure. Then click [mounty] to apply. If it is not available on the computer, we can download it from the software website, as shown in the picture. Afterwards, a mountain icon will be displayed in the upper menu bar, as shown in the picture.
Conclusion: The above is a summary of the answers related to Mac copying folders compiled by this site for you. I hope it will be helpful to you! If your problem is solved, please share it with more friends who care about this problem~
The above is the detailed content of How to copy folder on mac?. For more information, please follow other related articles on the PHP Chinese website!

 MacBook Stuck on Apple LogoApr 26, 2025 am 09:40 AM
Macs are reliable and trustworthy, but like any computer, they’re prone to errors. It is a nightmare booting up your computer to get your Mac stuck on Apple logo. For iMacs, you may see the spinning wheel cursor or a frozen loading ba
 Mac Sleep Modes Explained: Hibernate vs Sleep vs StandbyApr 25, 2025 am 10:36 AM
Learn about the energy-saving modes of Mac: Sleep, Sleep, Safe Sleep and Standby You may have noticed that your Mac will go to sleep after a period of inactivity. However, Apple has developed more than one energy-saving model for its computers. This article will take you through all these modes and show you how to switch between them. This article will discuss how to make your Mac hibernate and how to change your Mac's sleep settings with: 4 Mac energy-saving modes The status of a Mac while sleeping How to change the sleep mode of your Mac Mac energy saving mode 1. Mac sleep mode Putting the Mac in Sleep Mode keeps its RAM powered, which allows the Mac to wake up quickly and resume work. Normally, Macs will take a while

![How to create an app in 2025: My step-by-step guide [no code]](https://img.php.cn/upload/article/001/242/473/174554515174947.jpg?x-oss-process=image/resize,p_40) How to create an app in 2025: My step-by-step guide [no code]Apr 25, 2025 am 09:39 AM
How to create an app in 2025: My step-by-step guide [no code]Apr 25, 2025 am 09:39 AMCreate your own app from scratch: a complete guide for 2025 summary: Concept: Verify with Google Trends. Build: Use code-free tools such as SwiftyLaunch, or use Swift for encoding. Tips: Use TypingMind to assist in writing application descriptions. Want to know how to create your own application? Then continue reading! This guide will walk you through every step from conception to listing the app store. Ready? Accelerate iOS application development Enter the details, select the required functions, and SwiftyLaunch will generate the code for you. Available on Setapp. Free trial Security test How to do it in 2025
 Mac Prohibitory Symbol Fix: MacBook Shows Circle With Slash on StartupApr 25, 2025 am 09:35 AM
Encountering the dreaded prohibitory symbol (a circle with a line through it) on your Mac during startup? This indicates a problem with your macOS installation, likely due to incompatibility or corruption. Don't panic; this guide offers several sol
 How to Remove Unwanted Toolbars from Your BrowserApr 25, 2025 am 09:27 AM
Unwanted browser toolbars can be a nuisance, slowing down your browsing and potentially compromising your security. This guide shows you how to remove them from Safari, Google Chrome, and Mozilla Firefox on your Mac. Remember to back up your Mac wi

 Sonoma vs Sequoia: What Is Difference & Which Is Better?Apr 24, 2025 am 11:04 AM
macOS Sonoma vs. Sequoia: A Detailed Comparison and Upgrade Guide Choosing between macOS Sonoma and Sequoia? This comprehensive guide highlights key differences and helps you decide which operating system best suits your needs. While both offer rob


Hot AI Tools

Undresser.AI Undress
AI-powered app for creating realistic nude photos

AI Clothes Remover
Online AI tool for removing clothes from photos.

Undress AI Tool
Undress images for free

Clothoff.io
AI clothes remover

Video Face Swap
Swap faces in any video effortlessly with our completely free AI face swap tool!

Hot Article
Hot Tools

MinGW - Minimalist GNU for Windows
This project is in the process of being migrated to osdn.net/projects/mingw, you can continue to follow us there. MinGW: A native Windows port of the GNU Compiler Collection (GCC), freely distributable import libraries and header files for building native Windows applications; includes extensions to the MSVC runtime to support C99 functionality. All MinGW software can run on 64-bit Windows platforms.

Zend Studio 13.0.1
Powerful PHP integrated development environment

EditPlus Chinese cracked version
Small size, syntax highlighting, does not support code prompt function

mPDF
mPDF is a PHP library that can generate PDF files from UTF-8 encoded HTML. The original author, Ian Back, wrote mPDF to output PDF files "on the fly" from his website and handle different languages. It is slower than original scripts like HTML2FPDF and produces larger files when using Unicode fonts, but supports CSS styles etc. and has a lot of enhancements. Supports almost all languages, including RTL (Arabic and Hebrew) and CJK (Chinese, Japanese and Korean). Supports nested block-level elements (such as P, DIV),

WebStorm Mac version
Useful JavaScript development tools

