Home >Software Tutorial >Computer Software >How to add shadow effects in CorelDRAW 2019, easily done in a few simple steps
How to add shadow effects in CorelDRAW 2019, easily done in a few simple steps
- 王林forward
- 2024-02-11 11:09:071405browse
php editor Xiaoxin brings you a simple step-by-step tutorial on how to add shadow effects in CorelDRAW 2019. CorelDRAW is a powerful graphic design software that can make graphics more three-dimensional and vivid by adding shadow effects. In this tutorial, we will introduce in detail how to use the shadow tool of CorelDRAW 2019 to add a shadow effect to your design. In just a few simple steps, you can easily do it. Whether you are a beginner or someone with some design experience, you can easily get started and make your design works more outstanding.
The specific operations are as follows:
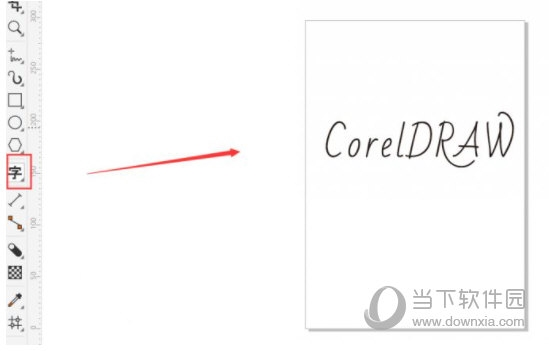
1. Open the software and create an object

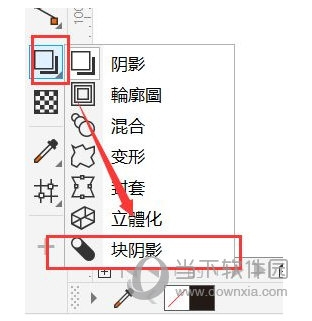
2. Find [Toolbar] on the left Shadow Module] Click [Small Triangle] and select [Block Shadow] in the drop-down menu

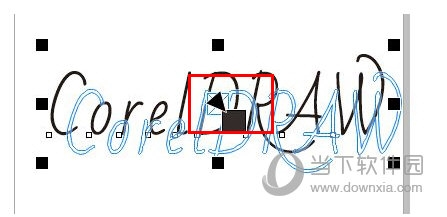
3. After selecting the tool, click on the object. A [triangle] will appear as an indicator icon. Drag and release the icon to obtain the shadow effect.

When dragging, pay attention to the rendering effect and consider the size of the object. , work style and other factors to avoid excessive shadow coverage of objects. The above is the CorelDRAW2019 related tutorials brought by the editor, I hope it can help everyone.
The above is the detailed content of How to add shadow effects in CorelDRAW 2019, easily done in a few simple steps. For more information, please follow other related articles on the PHP Chinese website!

