Home >Computer Tutorials >Computer Knowledge >After clicking on Use U Disk Cache
After clicking on Use U Disk Cache
- 王林forward
- 2024-02-10 13:20:08702browse
php editor Banana will introduce you to a convenient and quick technique - click on Use U Disk Cache. When we use computers every day, we often encounter problems such as slow file transfer speed and insufficient memory. Using a USB flash drive as a cache can effectively solve these problems. Through simple operations, setting the USB disk as a cache disk can speed up file transfer and improve the operating efficiency of the computer. In addition, using a USB flash drive as a cache can also increase memory space and make the computer smoother. Next, let’s learn about the specific method on how to use the USB flash drive cache.
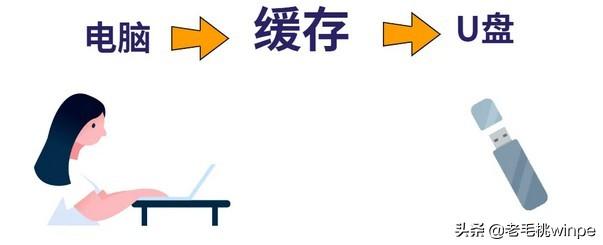
First of all, let’s understand that when copying files to a USB flash drive, they will go through a process called “caching” before they are finally transferred to the USB flash drive. middle. The following is a demonstration diagram.
#Due to the slow transfer process, even if the computer shows that the transfer is complete, the cache of the USB flash drive may not have completely transferred the file. Therefore, if you pull out the USB flash drive directly, the file data is likely to be lost. To avoid this, Microsoft added a "Safe Eject" button.
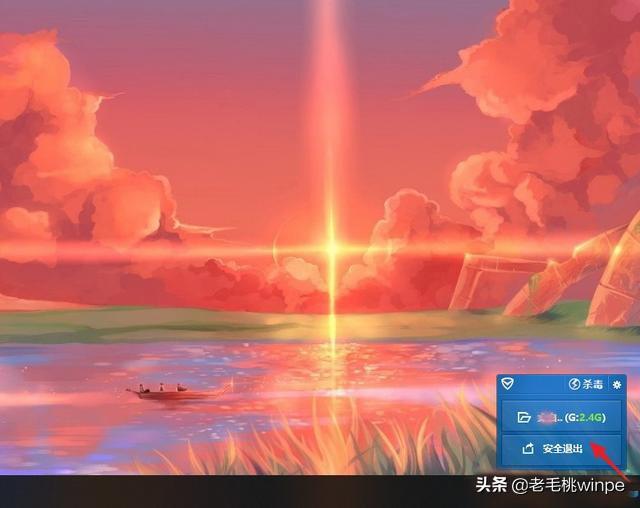
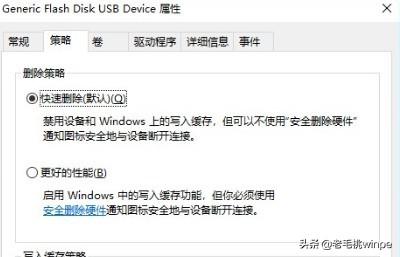
"Safe Eject" is to switch the operating mode of the U disk from "Better Performance" to "Quick Delete", so that we can pull out the U disk at will disk without worrying about damaging or losing files. If you are not sure whether the computer setting is "Quick Delete", you can confirm by following the following operations:
Step 1: Insert the U disk into the USB interface of the computer and right-click Click the U disk option and select [Properties].

Step 2: In the properties window, switch the tab to [Hardware] and click [Properties].
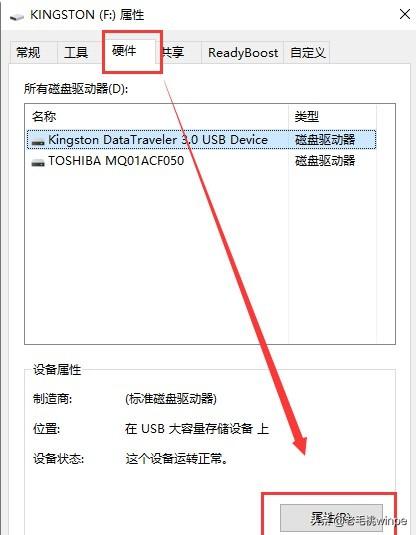
Step 3: Switch to the [Policy] tab and view it in the [Delete Policy] box. If there is no setting, check [Quick Delete] ] and then click [OK].
After clicking the [Safe Eject] button, you may encounter a situation where the USB flash drive fails to safely eject, so what should you do?
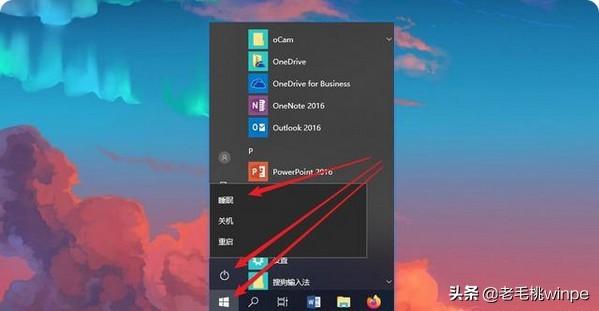
Method 1: Open the start menu, click [Power]-[Sleep], wait for the hard disk light to go out, and then pull out the USB flash drive.
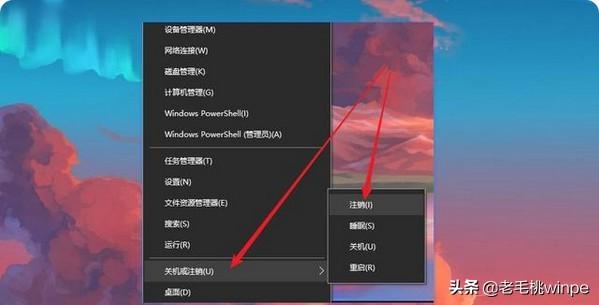
Method two: If method one cannot solve the problem, then right-click the start menu, click [Shut down or log off] - [Log off], and then try again Enter the system and click [Safe Eject].
Method 3: Sometimes the ejection fails because some programs occupy the U disk. Follow the prompts to enter the task manager and close these programs or software. Then safely eject the USB flash drive.
The above is the detailed content of After clicking on Use U Disk Cache. For more information, please follow other related articles on the PHP Chinese website!
Related articles
See more- Implementation of mini program using for loop to bind click event of item
- How to use js to jump to the specified div after clicking a certain part of the current page?
- What to do if there is no menu option when right-clicking on the excel table
- What should I do if the right mouse button does not respond when playing ppt?
- What to do if there is no response when clicking the mouse after turning on the computer

